Fine-tuning Google Analytics Site Search for Your WordPress Site
Loves Data

More than just a simple content management system, WordPress and its ecosystem of third-party developments provide a whole architecture for building a website, and the popular tool is the backbone of more than 16 million websites, many of which will include that familiar box that invites users to search within the site.
If you provide internal search on your WordPress site, you are not just giving a helping hand to your website users. By tracking what people are typing into that box, you get valuable data on what content they are seeking and where on your site they are (or are not) finding it. This will help you get such insights as whether your site is harder to navigate than you thought or whether there is demand for content that you are not providing.
Basic setup
Enabling site search reporting in Google Analytics is a really easy process:
- Log in to your Google Analytics account
- Click on the ‘Admin’ tab
- Select the view where you want to set up site search
- Set the ‘Site Search tracking’ option on and – for out-of-the-box WordPress sites – enter the single letter ‘s’ as the query parameter
That should do the trick, but for the full lowdown on setting up site search in Google Analytics, check out our handy setup guide in our recent blog post.
The problem with Site Search for WordPress sites
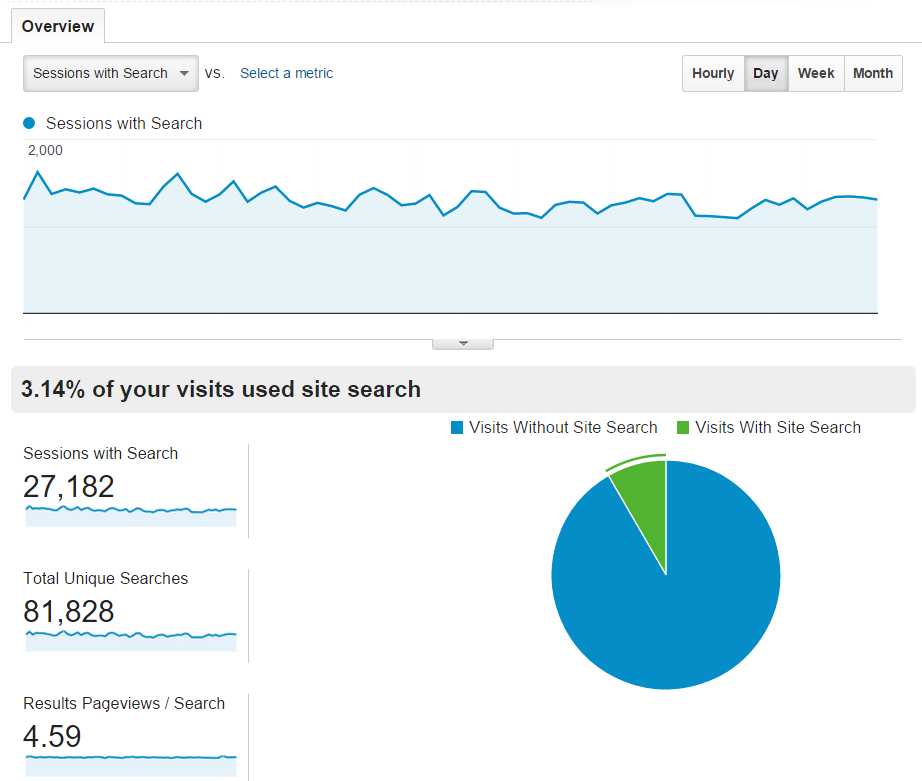
Once set up, site search usage data will start flowing into your view and you can enjoy all of the site search reports that Google Analytics provides. However, there is a slight deficiency that makes the reports less useful than they could be. Try selecting the ‘Pages’ report and choosing ‘Destination Page’ as the primary reporting dimension. Unfortunately, a consequence of the way the default WordPress setup works is that you will see one row of data for every distinct search term that your users entered, all under the homepage:
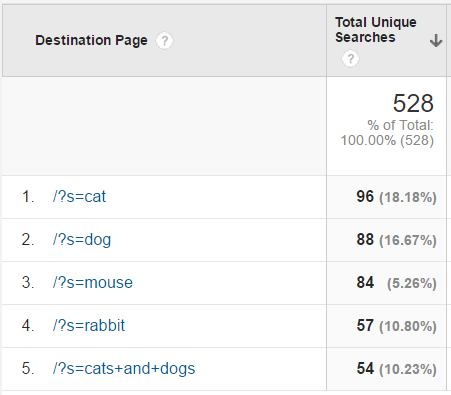
Where your users have clicked through to a second or subsequent page of search results, the destination page appears as something like /page2/?s=cats+and+dogs. This issue may not be especially serious, but it is a bit misleading and it makes it harder for you to do meaningful analysis. Luckily, it is quite easy to resolve.
The Solution
To make your reporting and analysis that bit more meaningful, we suggest that you add a couple of simple view filters which will rewrite the reported page path to combine the rows of internal site search data more meaningfully.
The first filter you need will rewrite the page path for the first page of results to collapse them into a single path, ensuring that the destination page for first-page internal site search will always appear in reports as www.yourwebsite.com/search. To configure this, create a new custom filter, choose the ‘Advanced’ type, and enter the following parameters:
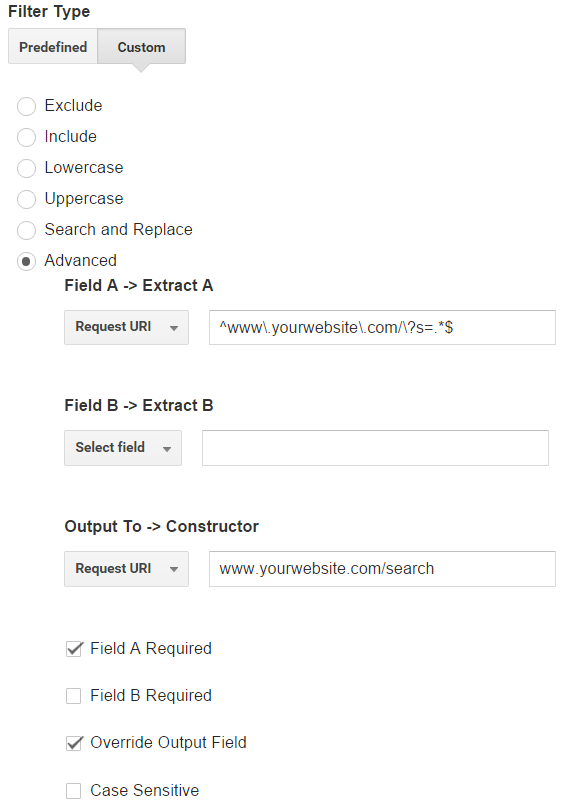
- Field A -> Extract A:^www\.yourwebsite\.com/\?s=.*$ (replacing www\.yourwebsite\.com with your own domain)
- Field B -> Extract B: [blank]
- Output To -> Constructor:www.yourwebsite.com/search
- Tick ‘Field A Required’ and ‘Override Output Field’
The second filter works in a similar way, but for second and subsequent pages of search results, neatly collapsing the reported destination pages into the form www.yourwebsite.com/search/2 and so on. Again, create a new custom filter, choose the ‘Advanced’ type, and enter the following parameters:
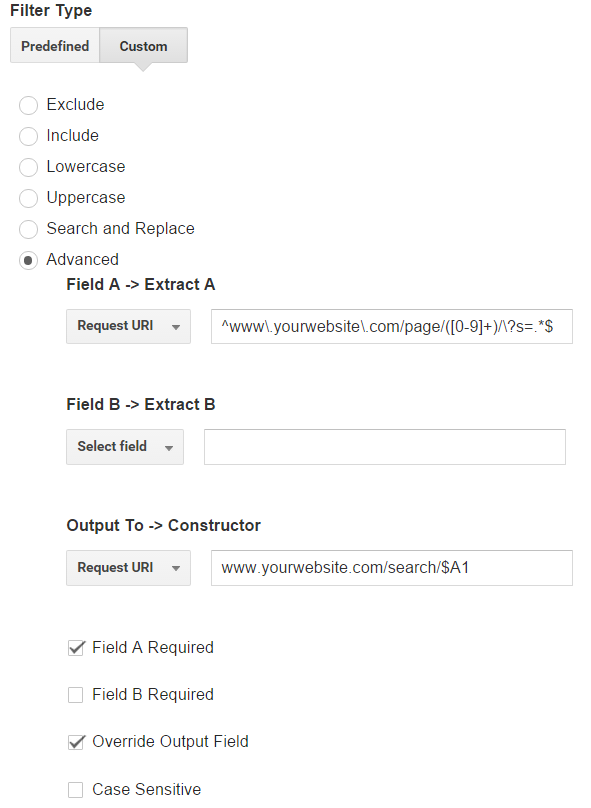
- Field A -> Extract A: ^www\.yourwebsite\.com/page/([0-9]+)/\?s=.*$ (replacing www\.yourwebsite\.com with your own domain)
- Field B -> Extract B: [blank]
- Output To -> Constructor: www.yourwebsite.com/search/$A1
- Tick ‘Field A Required’ and ‘Override Output Field’
And that’s it! Don’t forget that changes to your Google Analytics views permanently modify future data stored in it so it is always a good idea to try things out in a testing view before you modify your primary reporting view settings.
