Creating a New Google Analytics Account and Property
Benjamin Mangold
If you're new to Google Analytics 4 (GA4) and ready to start measuring what's happening on your website, you're in the right place. In this guide, you’ll learn how to create your own Google Analytics account and property, and how to install GA4 on your website using Google Tag Manager. I’ll walk you through each step so you can start collecting meaningful data. You can also watch this tutorial to walk through the steps:
Step 1: Create a Google Analytics Account and Property
To use Google Analytics, you'll need to create an account and property. Start by visiting the Google Marketing Platform. If you’re new to Google Analytics, click 'Get started today' to create an account. Otherwise, sign in to your existing account.

When you create a new account, think of it as your top-level folder for organizing data. Name your account after your business or organization – this helps keep things organized. You can also create multiple accounts if you manage different businesses or clients.
Next, review the data sharing settings. These control how your data is shared with Google and others. You can leave the defaults or adjust them based on your preferences – and you can update them later.
After naming your account, it’s time to create a property. This is where your website or app data will be collected and reported. Use a name that clearly reflects the website or app you're tracking. Carefully select your reporting time zone – changing this later can lead to data gaps or overlaps. Also, select your currency to ensure accurate revenue reporting.
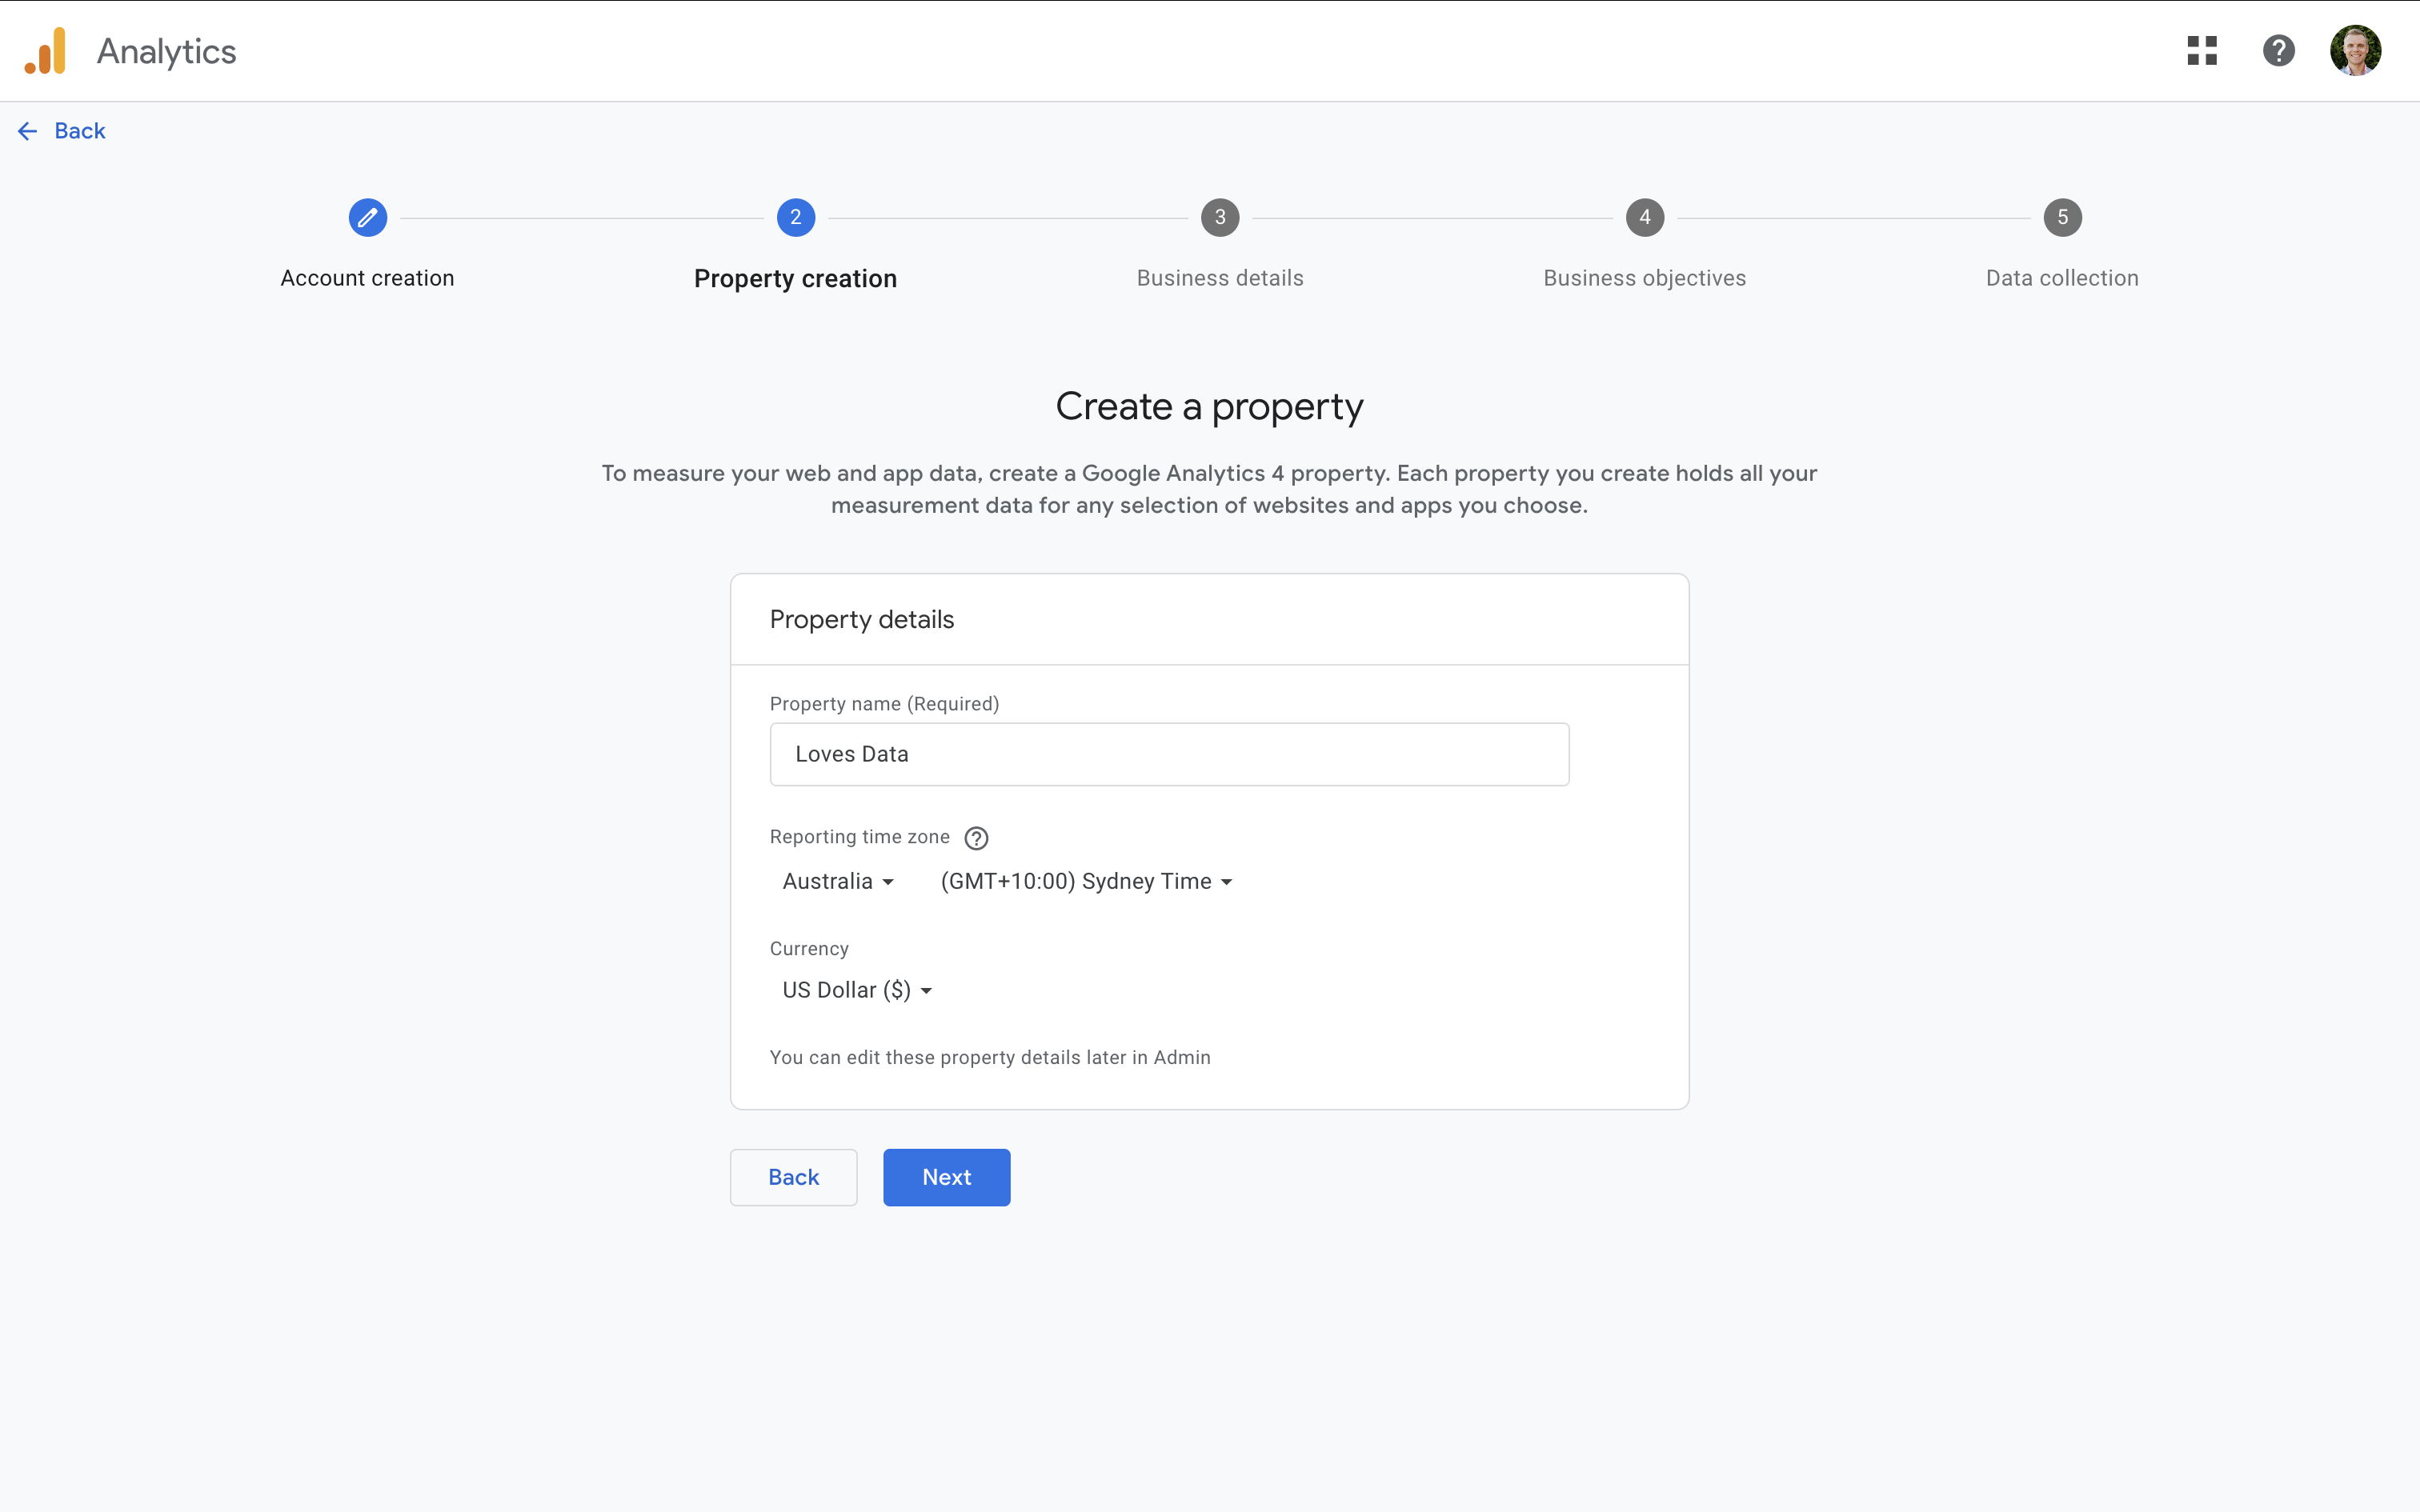
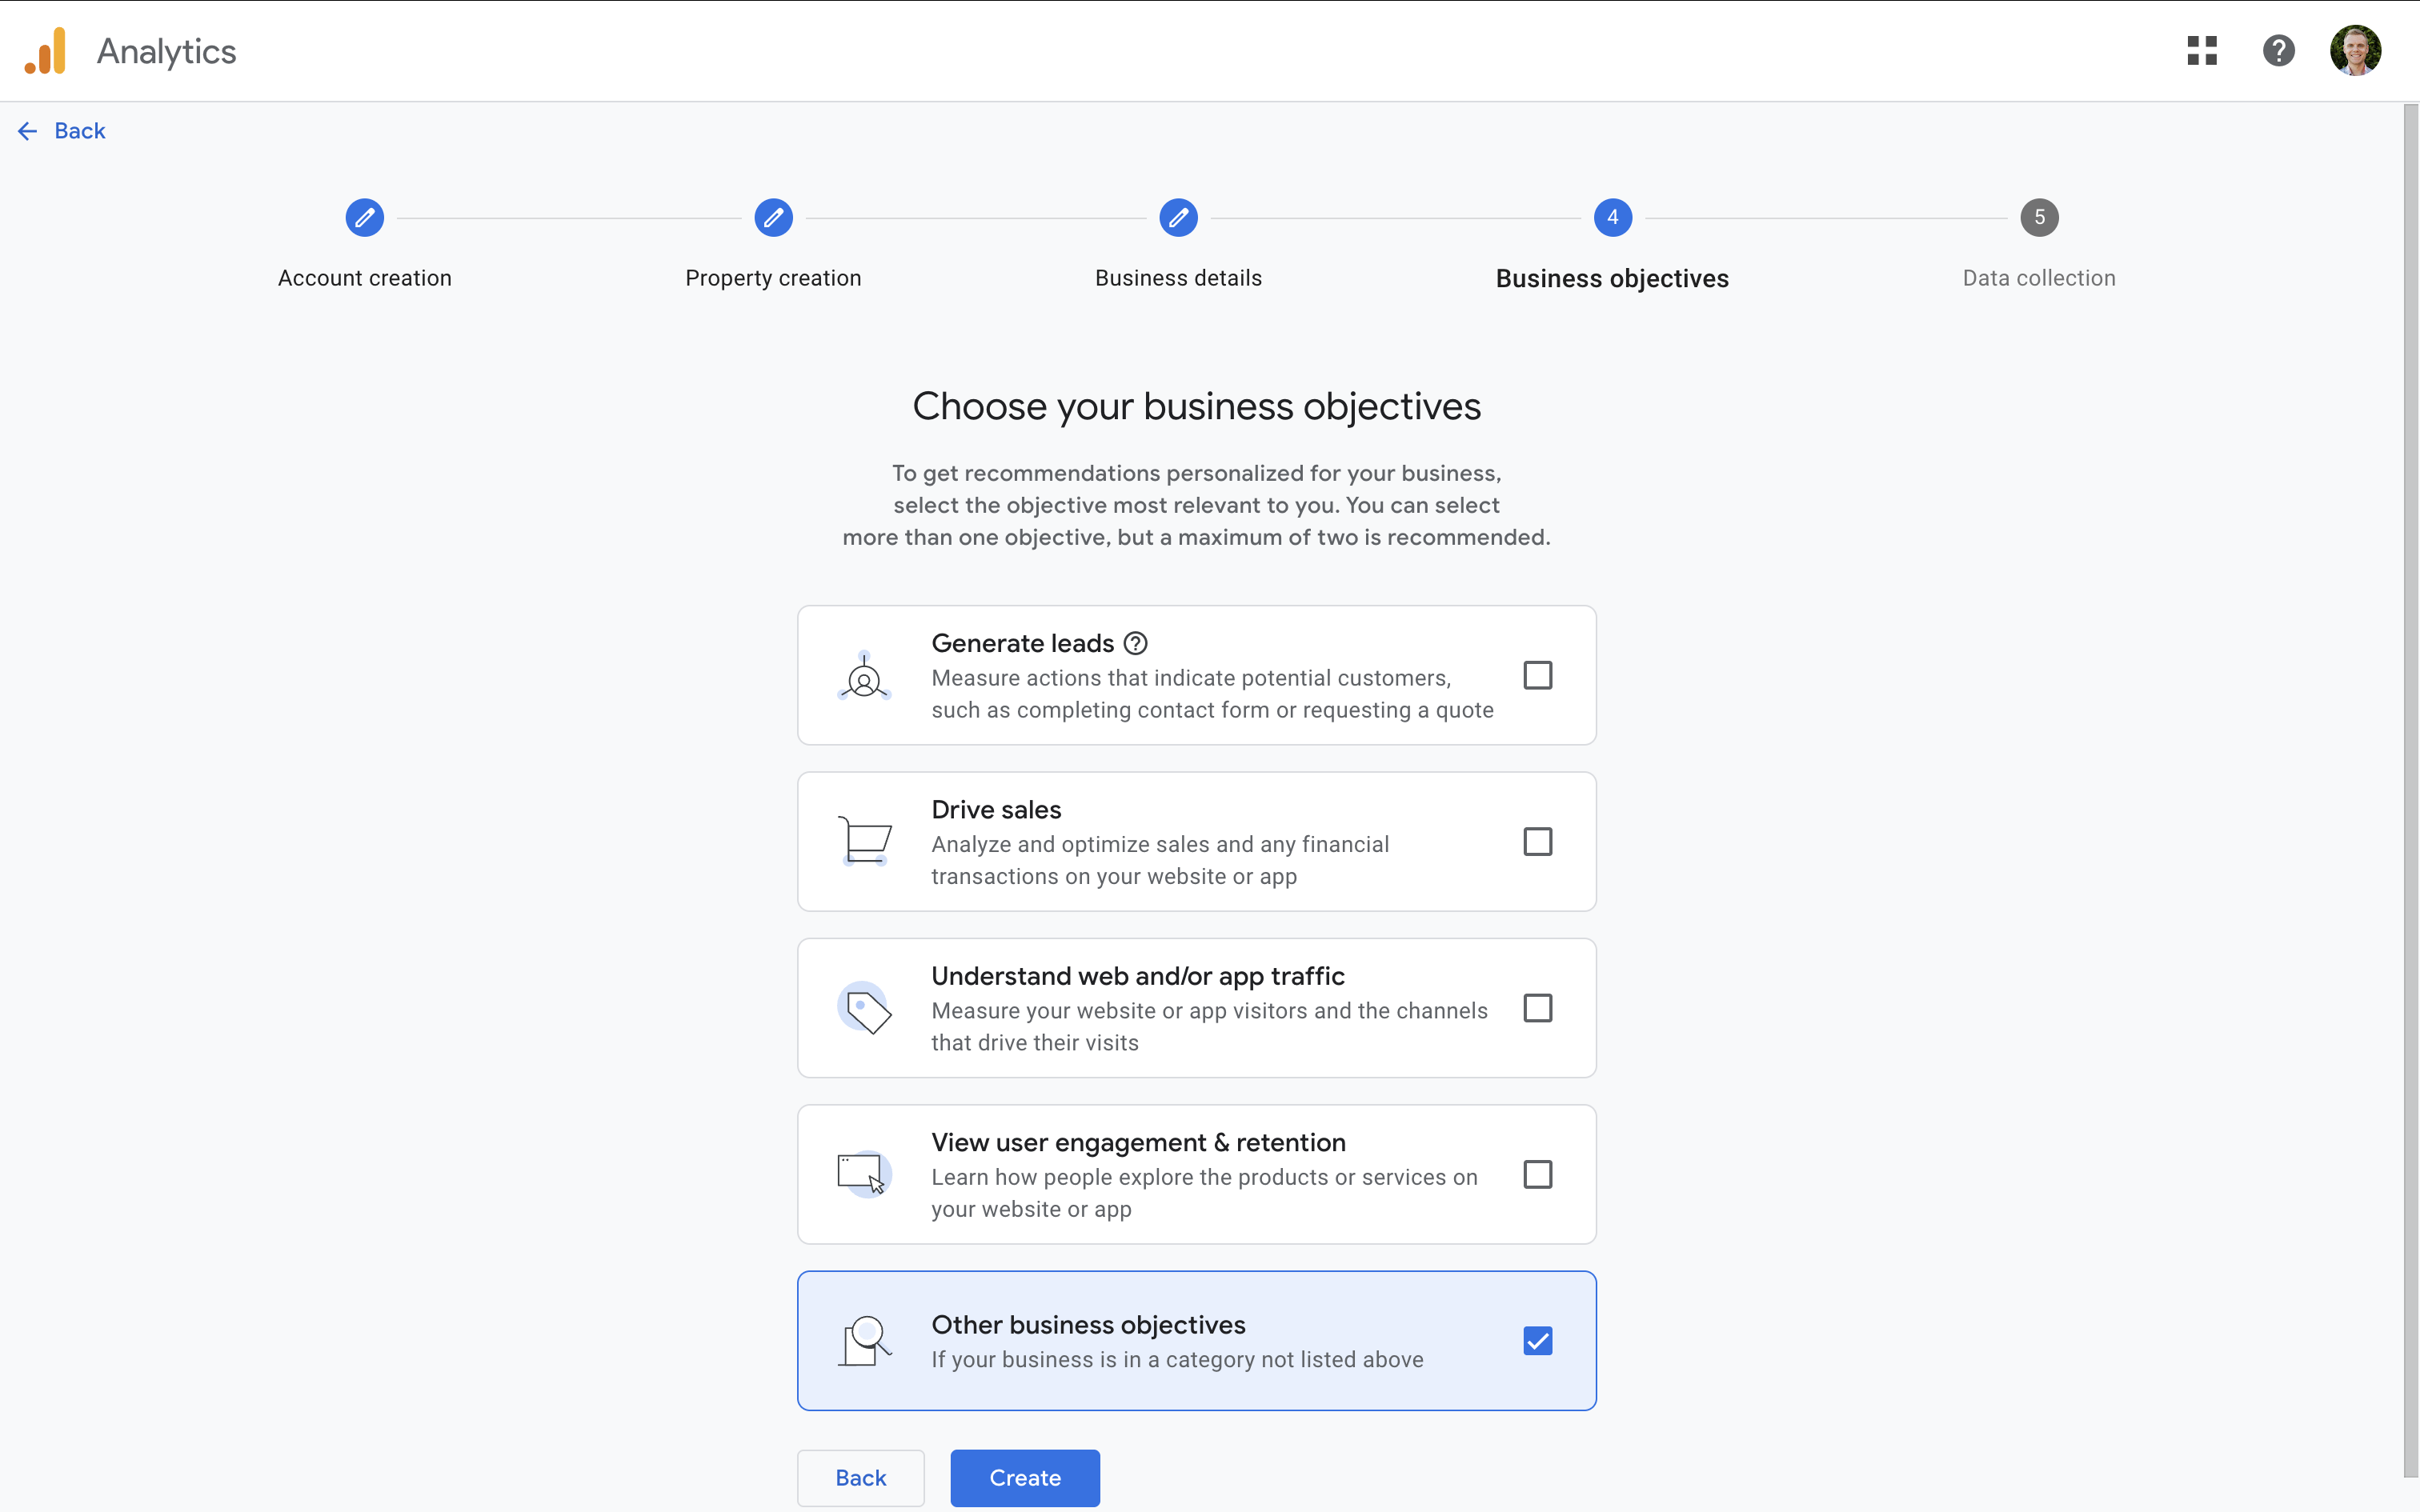
Then provide some basic details about your business, including your industry category, business size, and business objectives. Selecting objectives helps GA4 tailor your default reports. I recommend choosing 'Other business objectives' to make sure you have access to all of the standard reports.
Finally, review and accept the Google Analytics terms of service for your country. You’ve now created your GA4 account and property!
Step 2: Create a Data Stream for Your Website
The next step is to create a data stream – this is how GA4 collects data from your website or app.
Select 'Web' as your platform, then enter your website’s URL and give the stream a clear name, like 'Main Website'.
GA4 enables Enhanced Measurement by default. This automatically tracks key interactions like page views, scrolls, outbound link clicks, site search, form interactions, video engagement, and file downloads. You can leave this on for now – or customize it later.
After creating your stream, you’ll see your Measurement ID – it looks like G-123ABC456. This ID is how GA4 knows where to send your data.
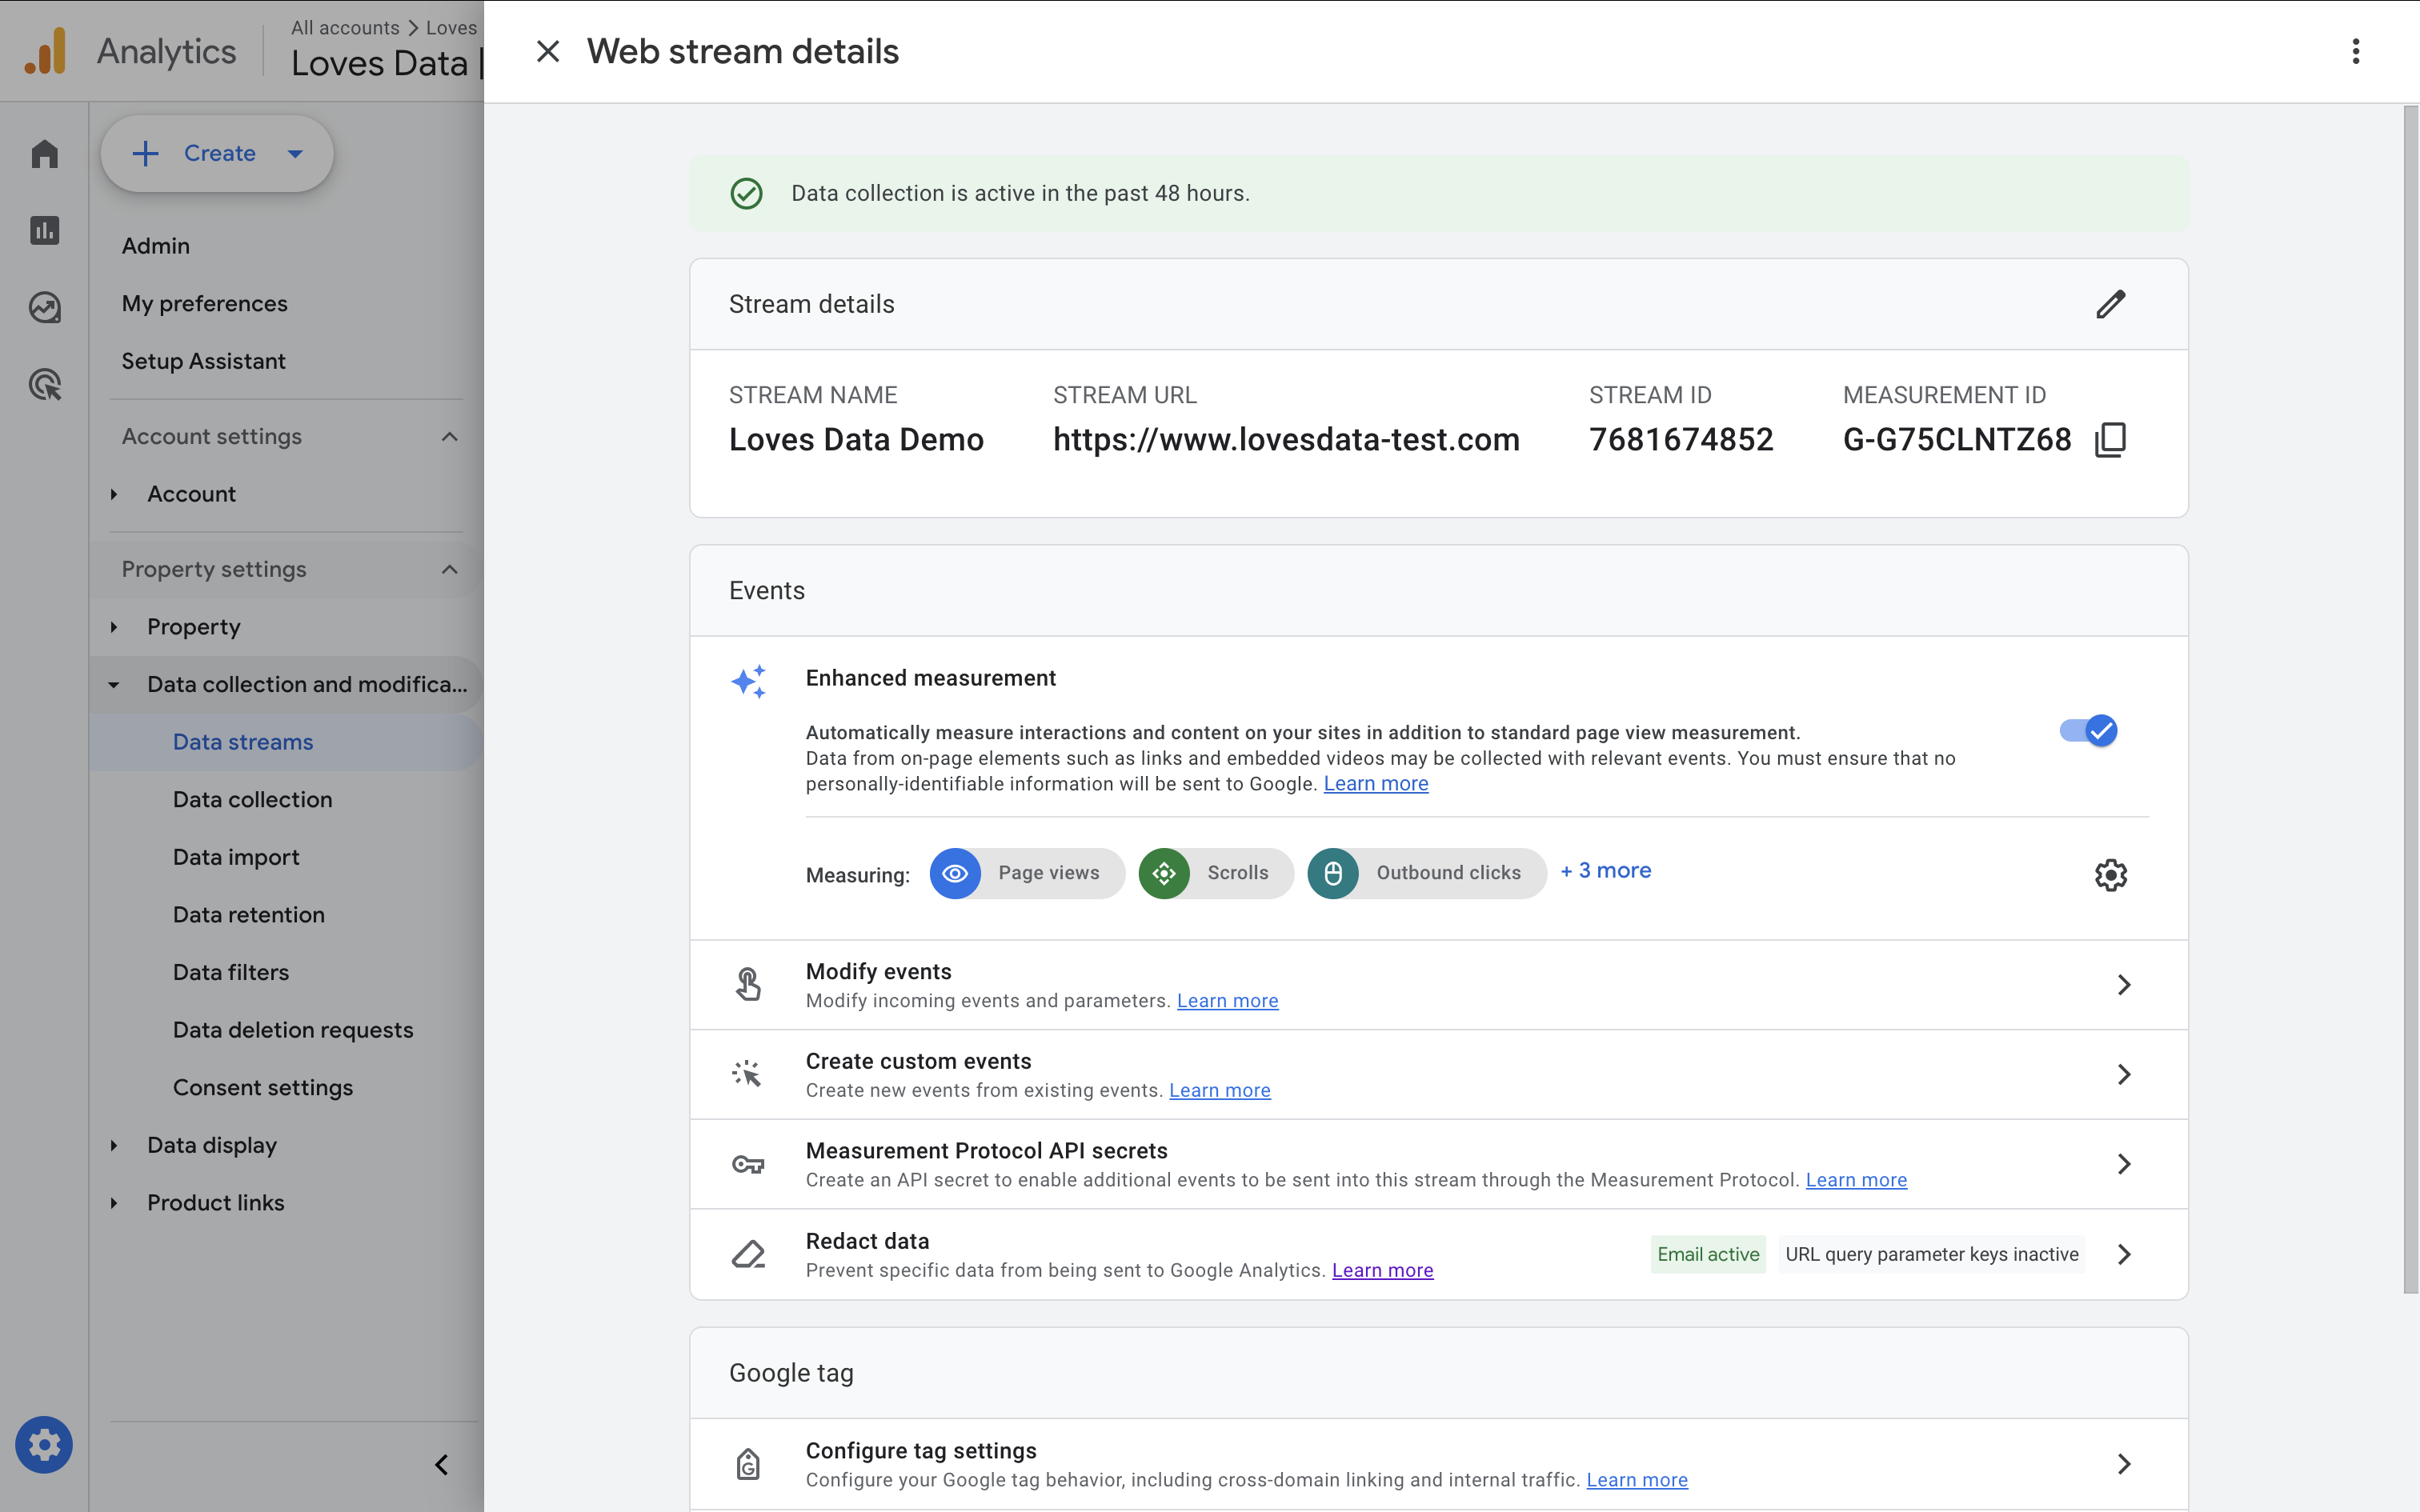
GA4 will also check if a Google Tag already exists on your website. If one is detected, you can choose to use it. Otherwise, you’ll see instructions to install the tag manually – or you can use Google Tag Manager, which I recommend for flexibility and scalability.
Step 3: Install Google Analytics Using Google Tag Manager
While you can install the Google Tag directly on your site, using Google Tag Manager (GTM) makes managing tags much easier – especially as your setup grows.
Go to Google Tag Manager. If you don’t have an account yet, click 'Create Account'. Enter your account name, country, and container name – usually your website’s domain – and select 'Web' as the platform.
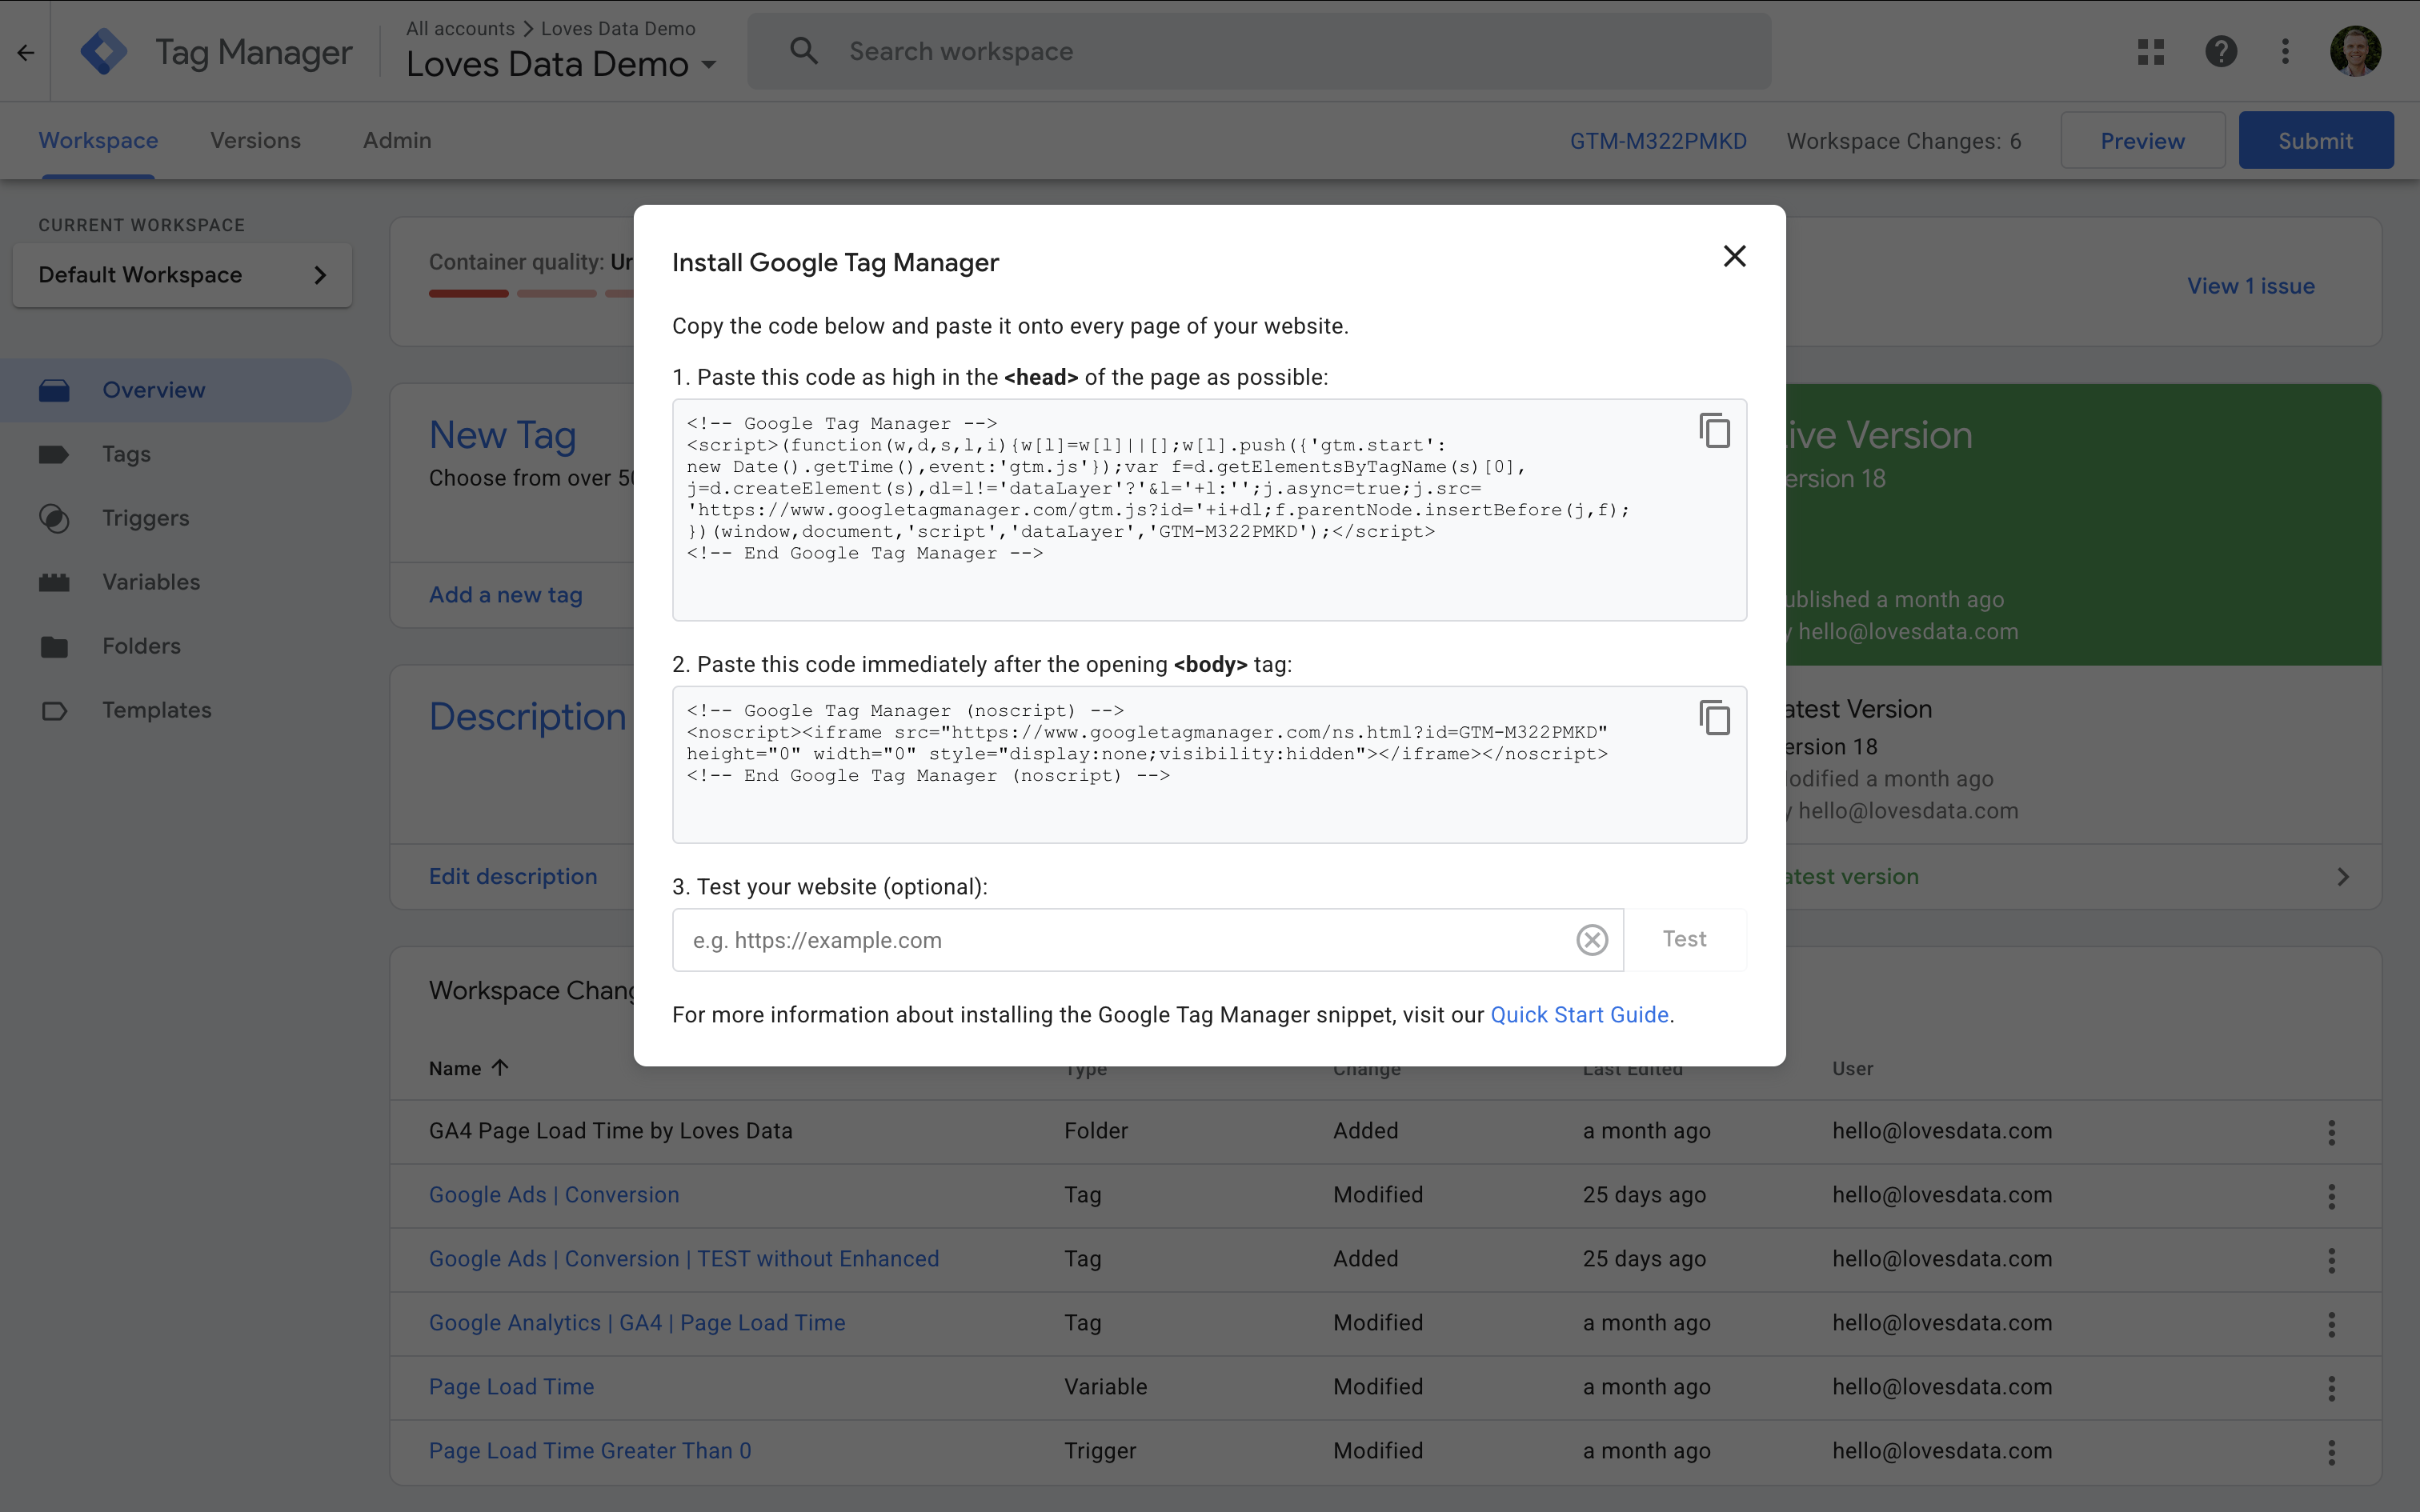
After creating your container, GTM will show two snippets of code:
- The first should be placed inside the
<head>tag on every page. - The second goes immediately after the opening
<body>tag (this is a noscript version to support visitors without JavaScript). I don't bother installing this tag as it doesn't improve data accuracy.
If you’re using WordPress, you can use a plugin like GTM4WP to add the container without editing code. For Shopify, Squarespace, or other platforms, check their documentation or see the tutorials I’ve linked below for step-by-step instructions.
Step 4: Configure the GA4 Tag in Google Tag Manager
Now let’s configure your first tag to send data to GA4.
In GTM, click 'Tags' and then 'New'. Name your tag something like 'Google Tag | GA4 | Page View'. For the tag type, select 'Google Tag'.
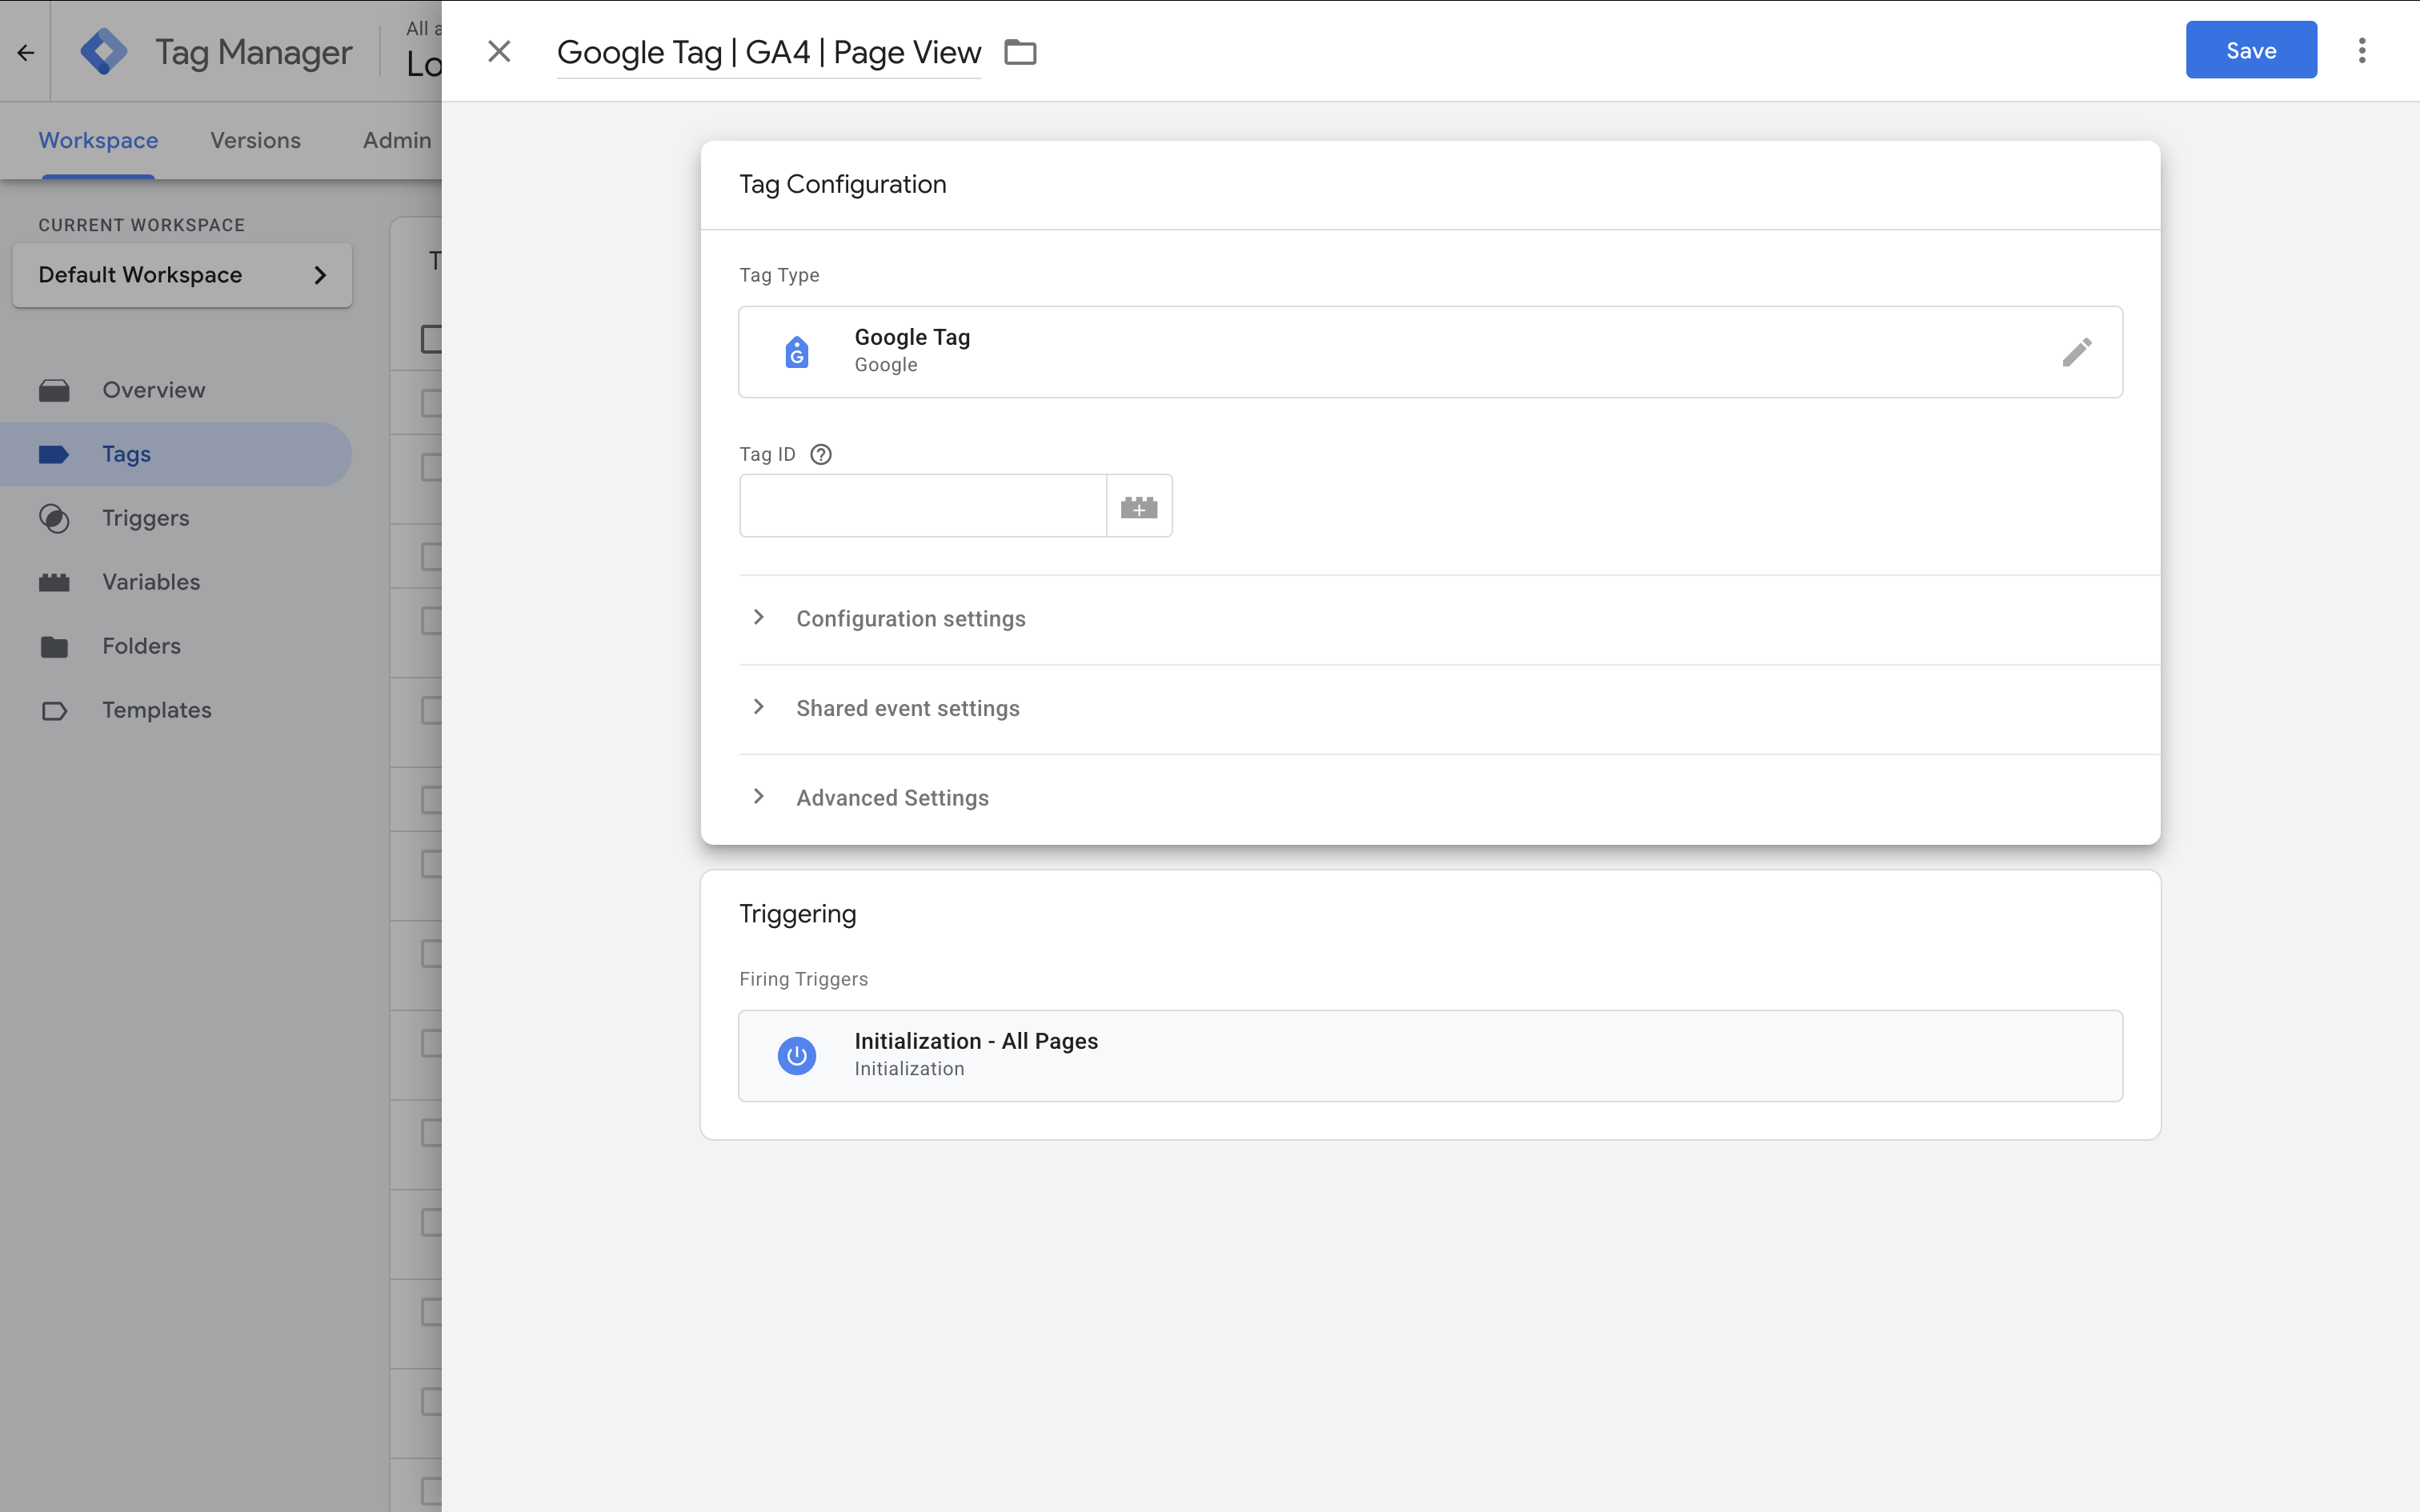
Instead of pasting your Measurement ID directly into each tag, create a constant variable for it. This makes it easy to manage if the ID changes.
- Go to 'Variables' and click 'New'.
- Name it 'GA4 Measurement ID'.
- Set the type to 'Constant' and paste your Measurement ID.
Then, in your GA4 tag, select your new variable for the Measurement ID.
Under 'Triggering', choose 'Initialization – All Pages'. This ensures the tag fires early on every page – before most other tags – which helps with data accuracy and compatibility with Consent Mode.
Click 'Save', and then publish your GTM container. GA4 should begin collecting data. If you were previously using another method to install GA4, consider migrating to GTM in stages – and check out my GTM tutorial series for help.
Next Steps
Well done – you've successfully set up Google Analytics 4!
You now have your account, property, data stream, and tags ready to go. You can begin exploring your GA4 reports to understand your audience, measure conversions, and improve your website’s performance.