How to Track AI Traffic in GA4 (Step‑by‑Step)
Benjamin Mangold
I get it – keeping up with AI-driven traffic can feel a bit overwhelming. In this guide, you’ll learn practical ways to see your AI traffic in Google Analytics 4 (GA4), understand which tools are sending people to your website, and report on that traffic using clear, repeatable steps.
AI platforms like ChatGPT, Gemini, Claude, Microsoft Copilot, and DeepSeek are changing how people discover content. But here’s the challenge – Google Analytics doesn’t automatically separate these visits. By default, they’re often grouped into broad buckets like 'referral' or 'organic', which makes it hard to understand what’s really going on.
Recent industry research shows traffic from AI platforms are still a small share overall, but they’ve grown rapidly and can be high-value. That's why it’s worth setting up clean, reliable reporting in Google Analytics 4.
Table of Contents
- Why Tracking AI Traffic in GA4 is Important
- Identifying AI Traffic Sources in GA4 Reports
- Use GA4 Explorations to Filter AI Traffic
- Create a Custom Report in the Library
- Build a Custom Channel Group for AI Traffic
- Analyze and Extend Your AI Reporting
- Conclusion and Next Steps
Why Tracking AI Traffic in GA4 is Important
As AI platforms become part of everyday search behavior, they’re starting to influence how people find your content. Some quick context to frame the opportunity:
- AI-driven visits are still a small share of referral traffic, but have accelerated quickly year-over-year – signalling a growing trend you don’t want to miss.
- Several studies suggest visitors who arrive via AI assistants can be highly valuable – for example, coming in with strong intent or ready to act.
If you don’t separate AI traffic from generic 'referral' or 'organic' traffic, it’s harder to answer simple questions like: Which AI tools actually send engaged visitors? Which pages do they land on? Are they converting?
What we’ll do in this guide: start with a quick way to spot AI sources in GA4's standard reports, then build customized Exploration reports, adjust standard reports, and finally we'll create a custom channel group so AI appears alongside your other channels. You’ll find practical tips, examples, and regex you can use as we travel through the steps.
You can also follow along with our tutorial:
Identifying AI Traffic Sources in GA4 Reports
Let’s begin with GA4's built-in reports. This gives you a baseline view of AI referral traffic before you build anything custom.
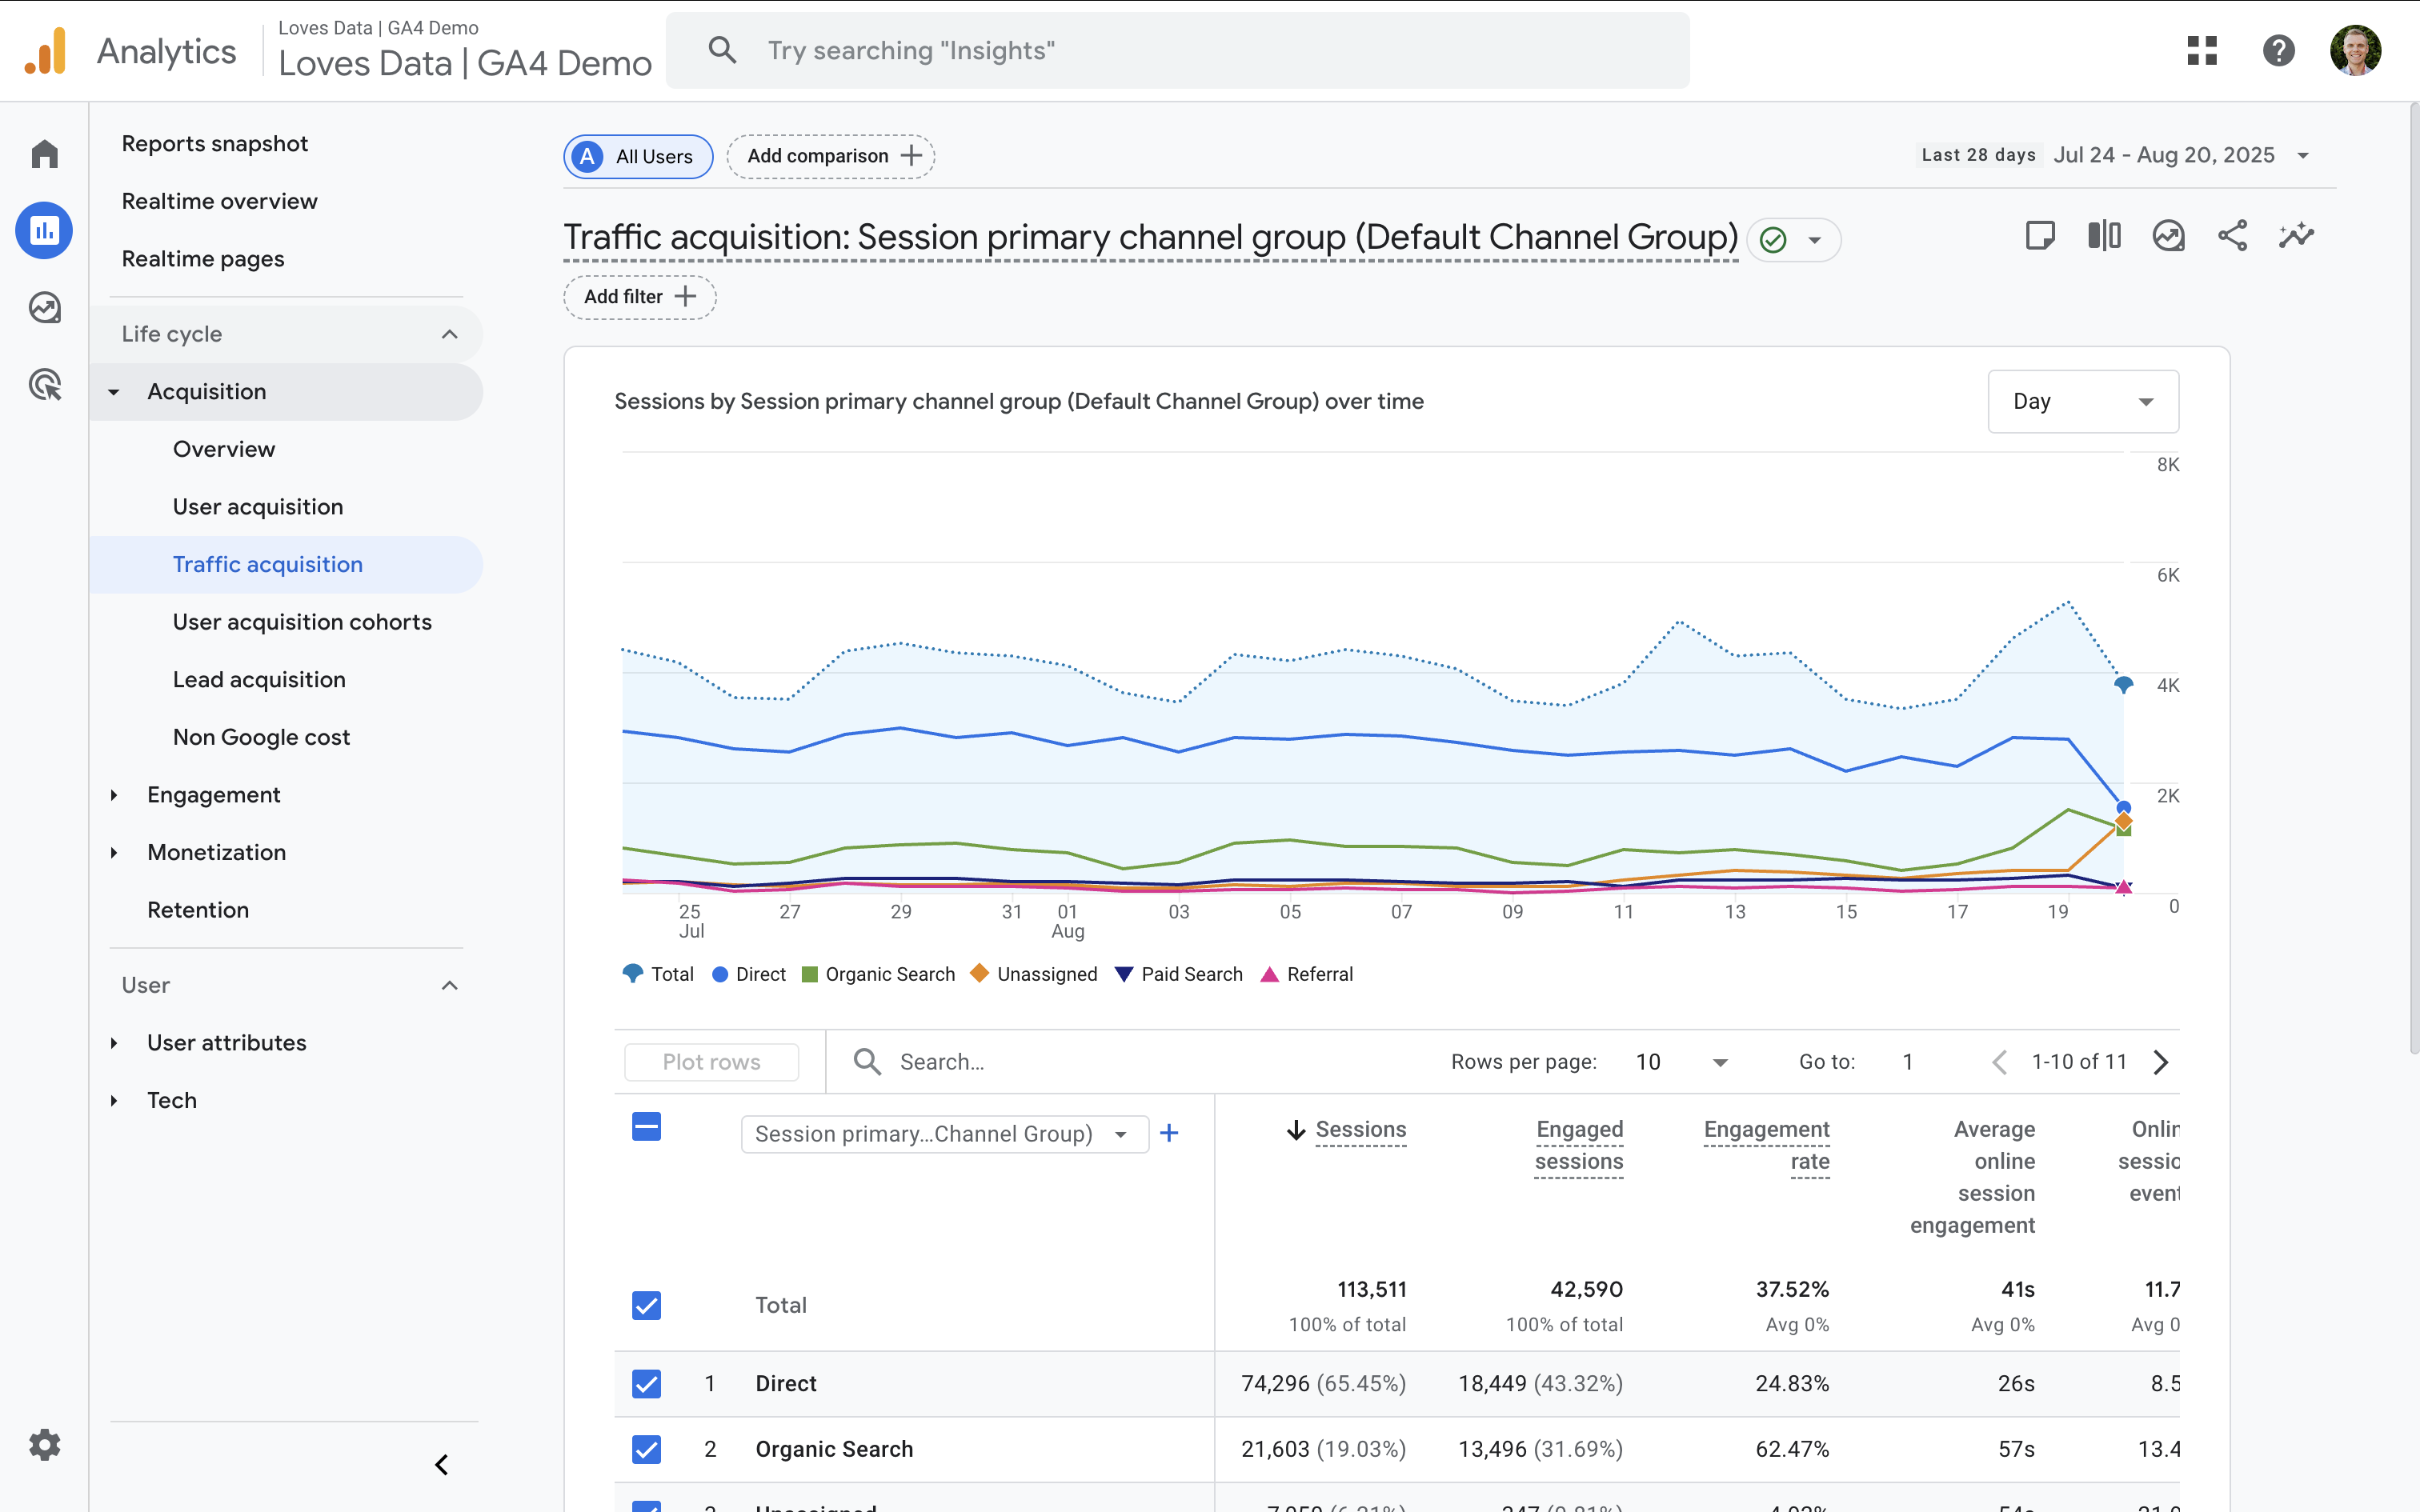
Step 1: Navigate to the Traffic Acquisition report
Open your GA4 property and navigate to 'Reports' and select 'Traffic Acquisition'. You’ll see your traffic broken down by channel and source.
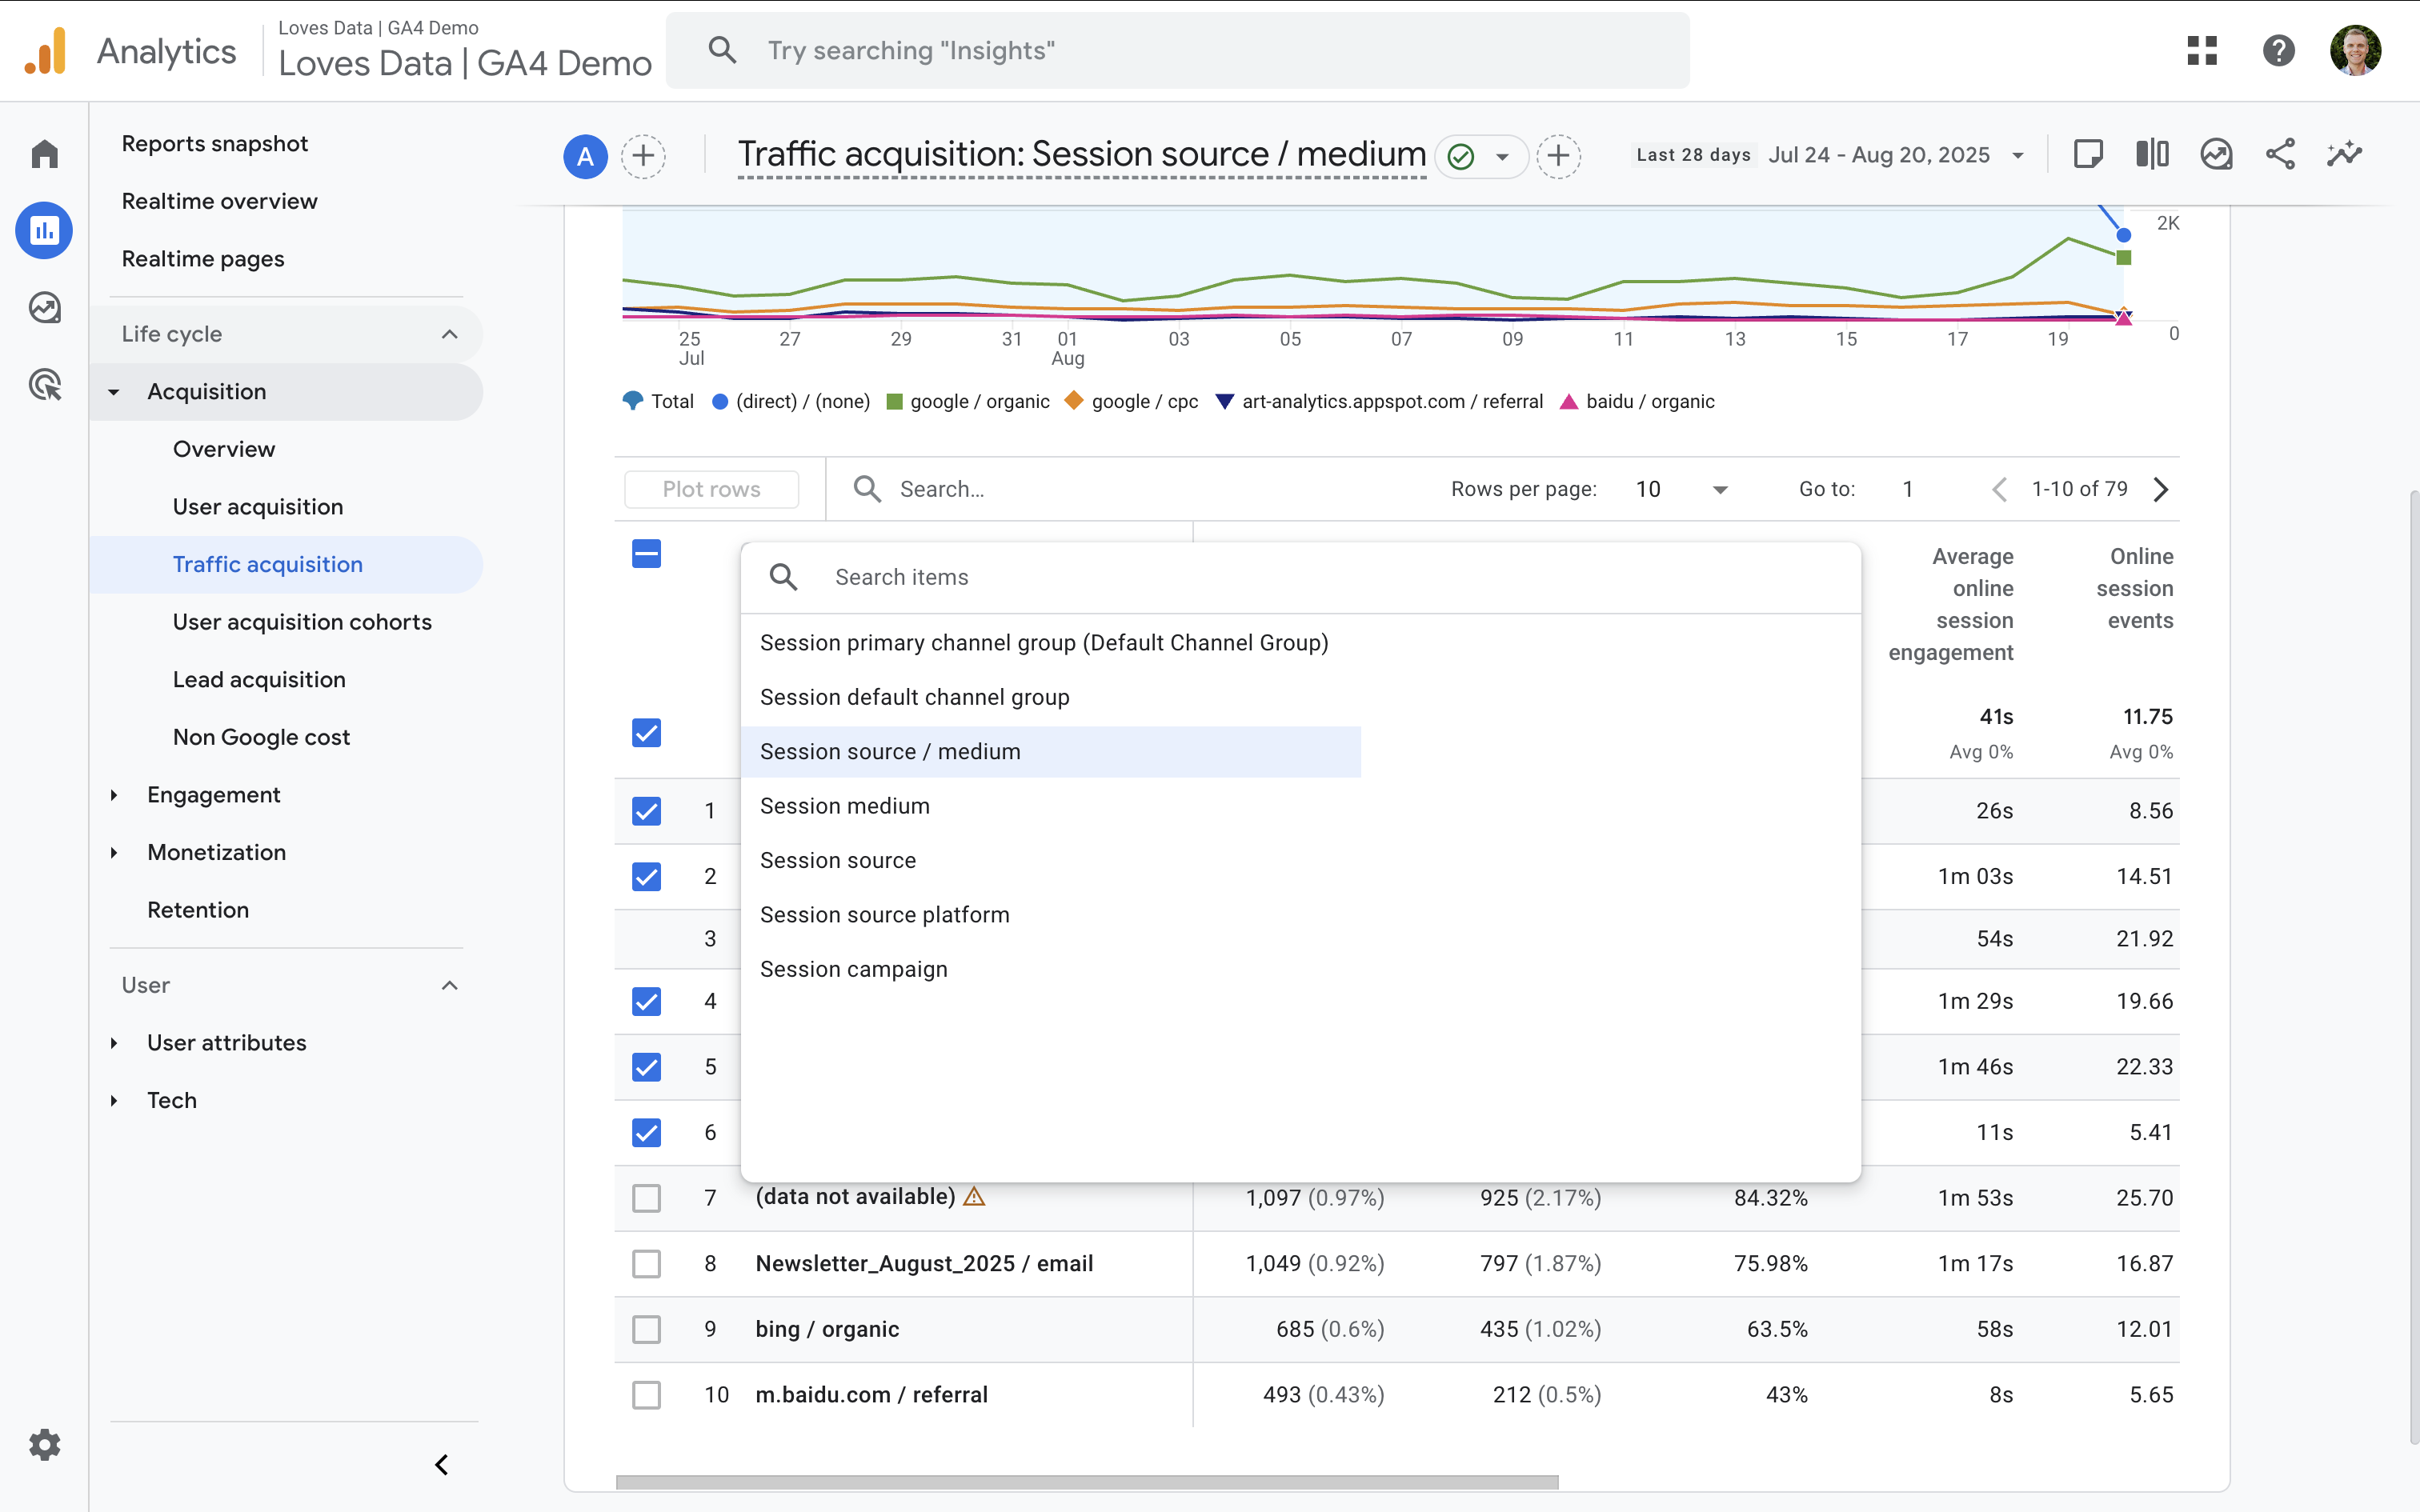
Step 2: Change the primary dimension to 'Session Source / Medium'
Above the table, change the dimension to 'Session Source / Medium' (or 'Session Source' for a simpler view). This lets you view the exact sources sending traffic.
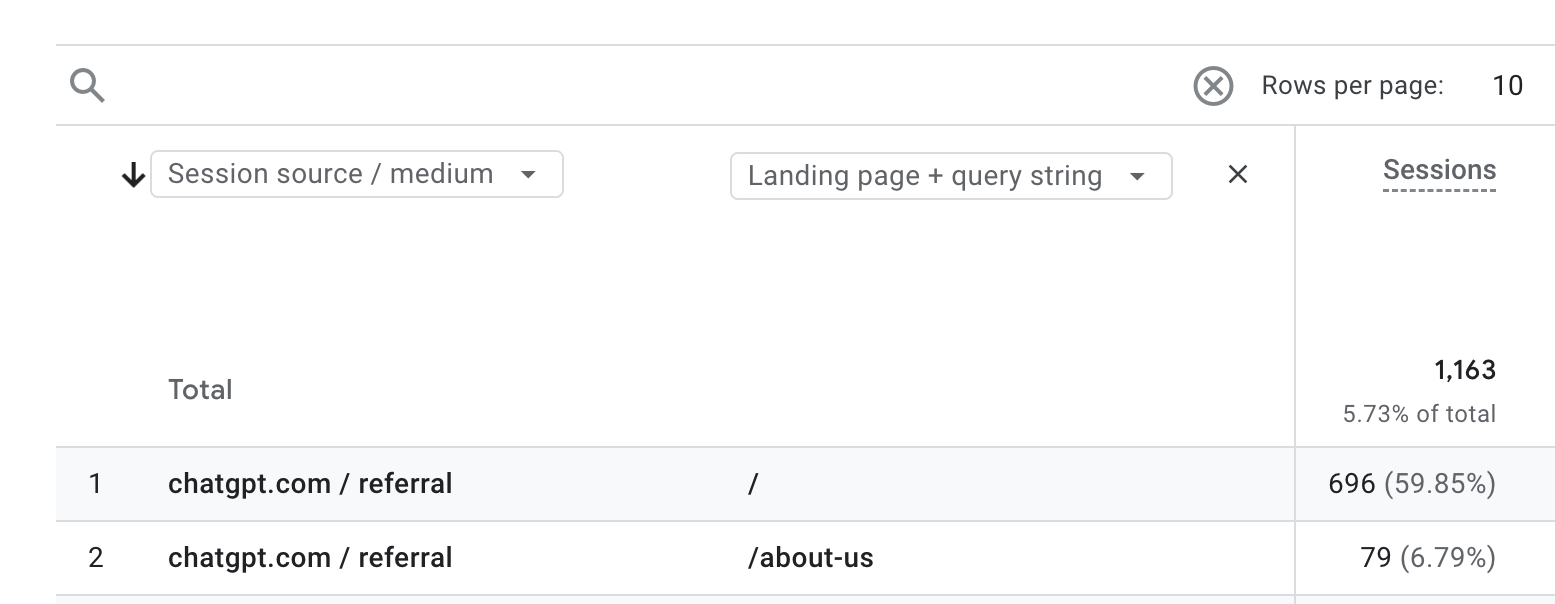
Step 3: Look for AI referrers
Look for rows like 'chatgpt.com / referral', 'perplexity.ai / referral', 'copilot.microsoft.com / referral', 'gemini.google.com / referral', or similar. These might be different for your website, so take time to review your data. If you spot them here, you’ve confirmed AI referral traffic is reaching your website.
Tip: You might also see AI traffic appear as 'organic' when it’s surfaced within AI-enhanced search overviews, or as 'not set' if GA4 can’t determine the medium.
Step 4: Add 'Landing page' for entry points
Add a secondary dimension or use the landing page report to see where people arrive from AI sources. This helps you understand which pages AI tools are most likely to recommend.
Use GA4 Explorations to Filter AI Traffic
Explorations are perfect for focused, flexible analysis. We’ll create a simple table that only shows sessions from AI tools. You can save it, reuse it, and adjust it anytime.
Step 1: Create a blank exploration report
Navigate to 'Explore' and create a new blank exploration report. Next, name your report, something like 'AI Traffic' that's short and descriptive.
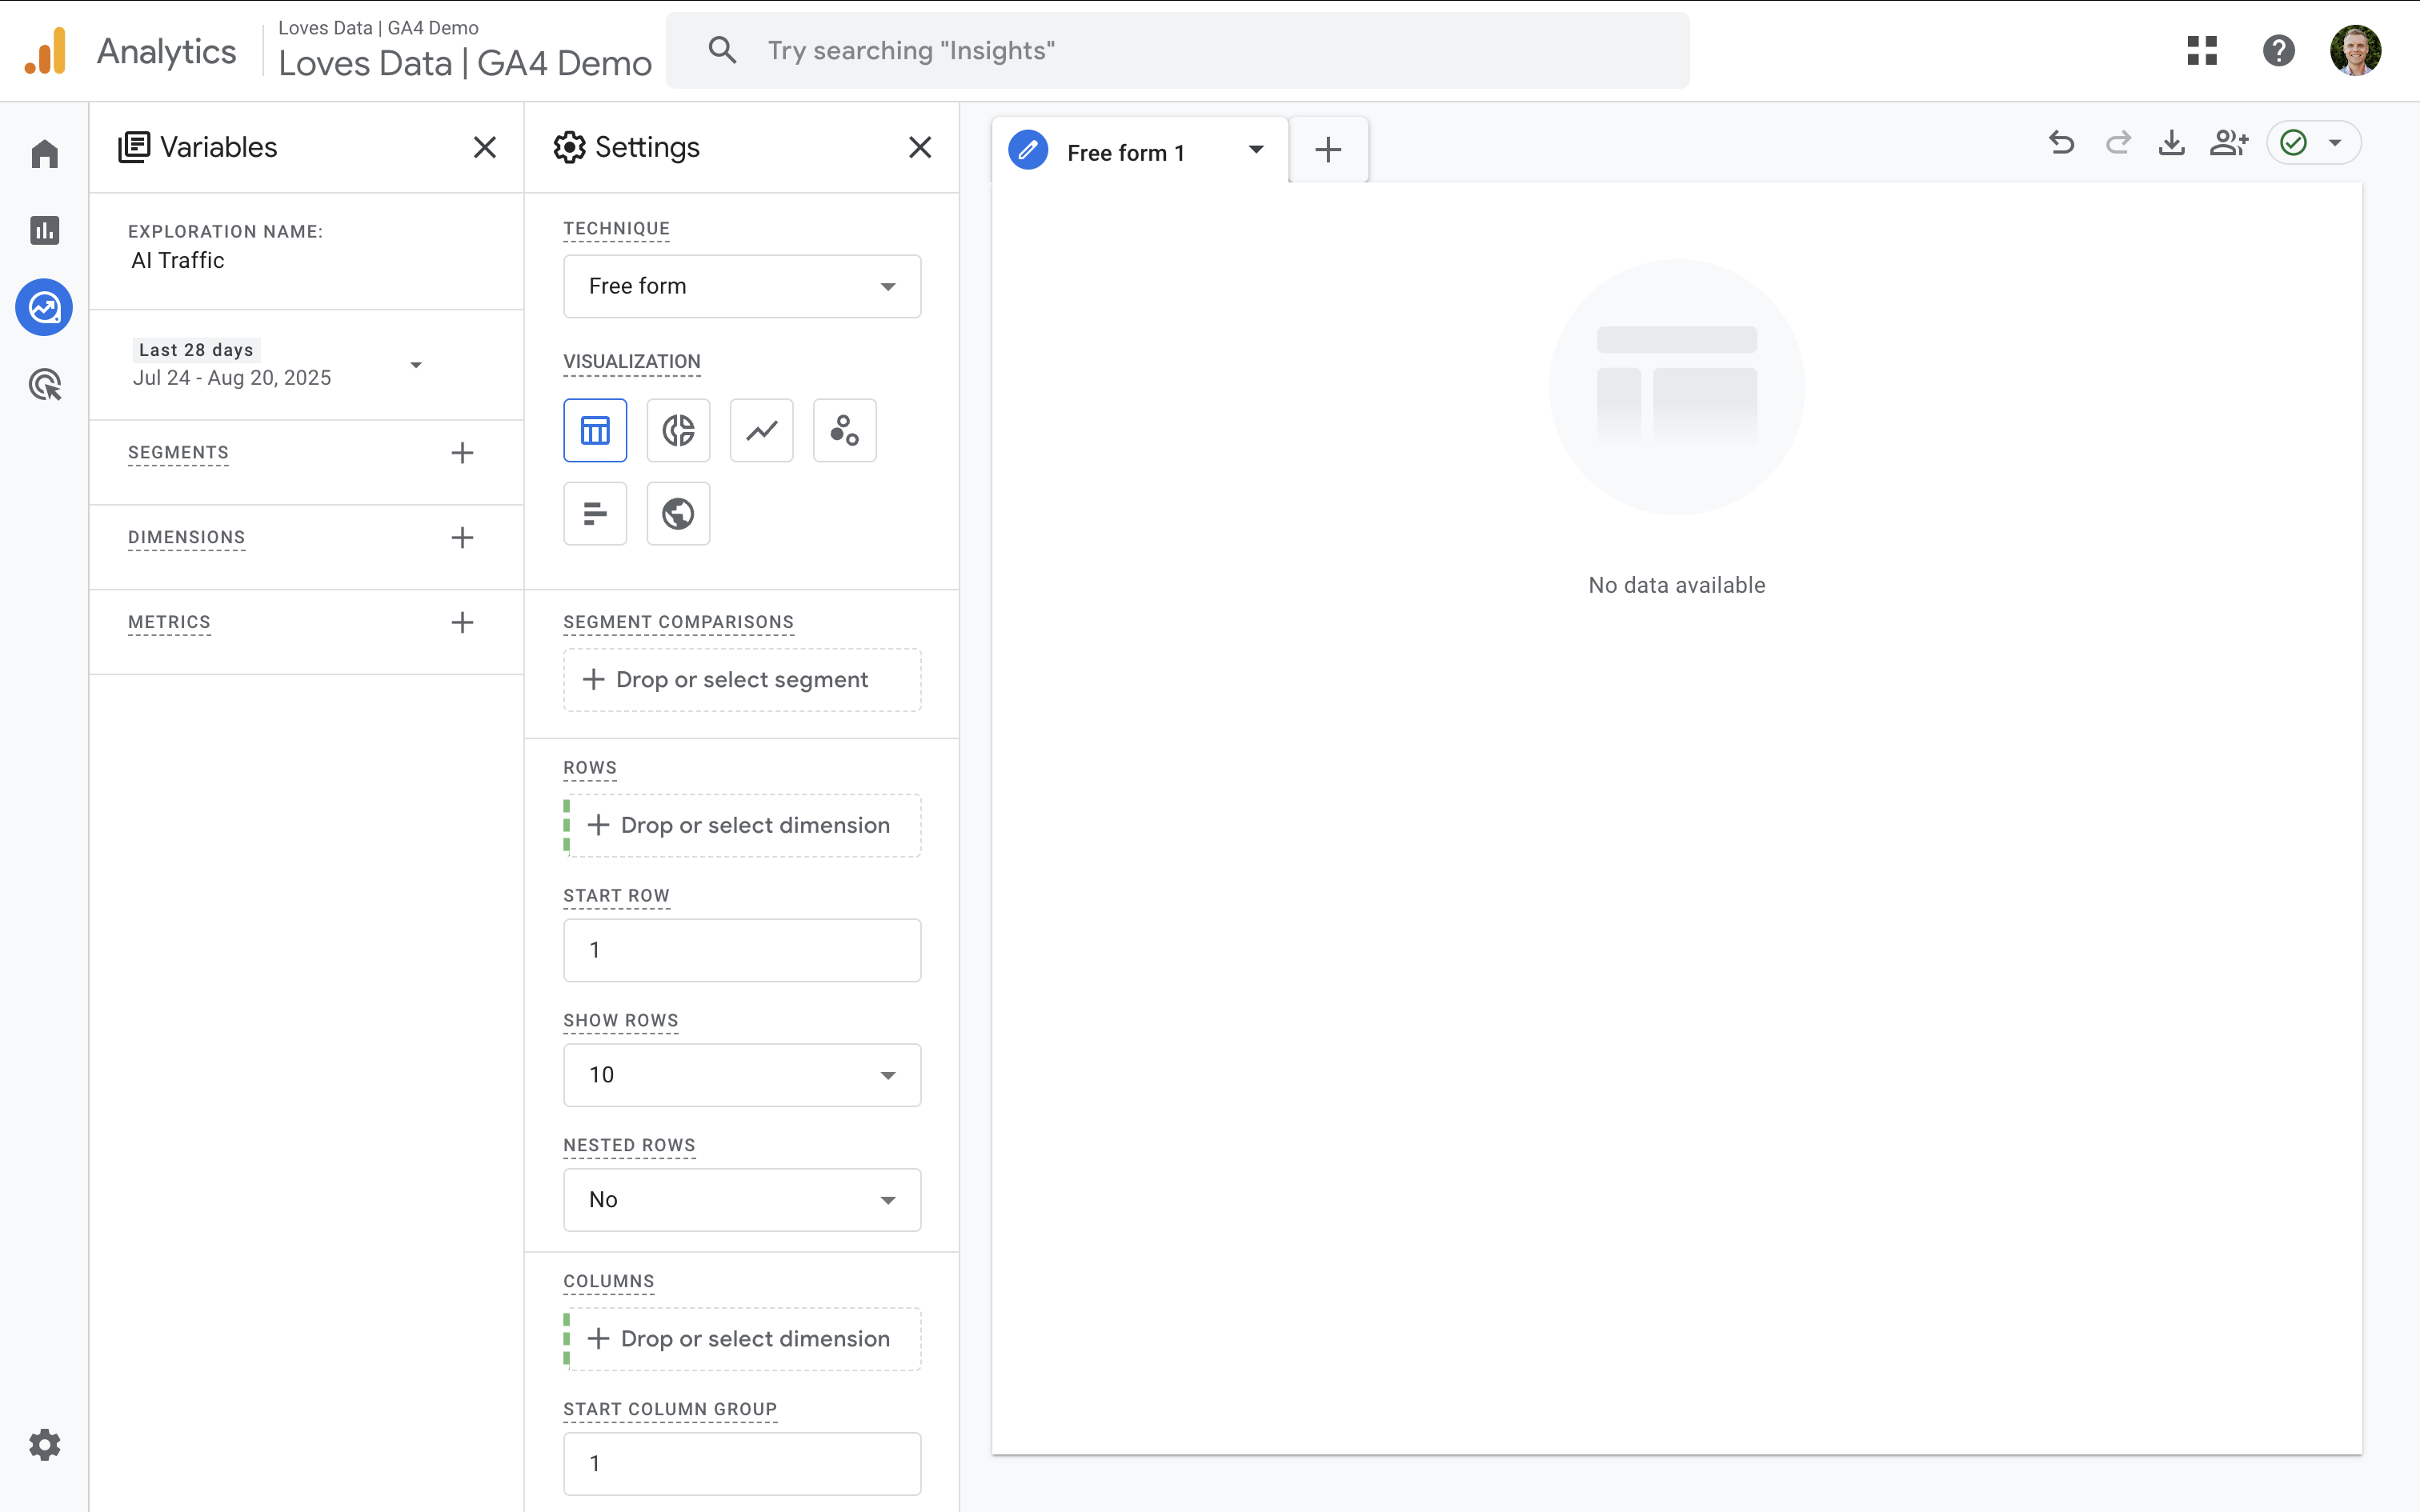
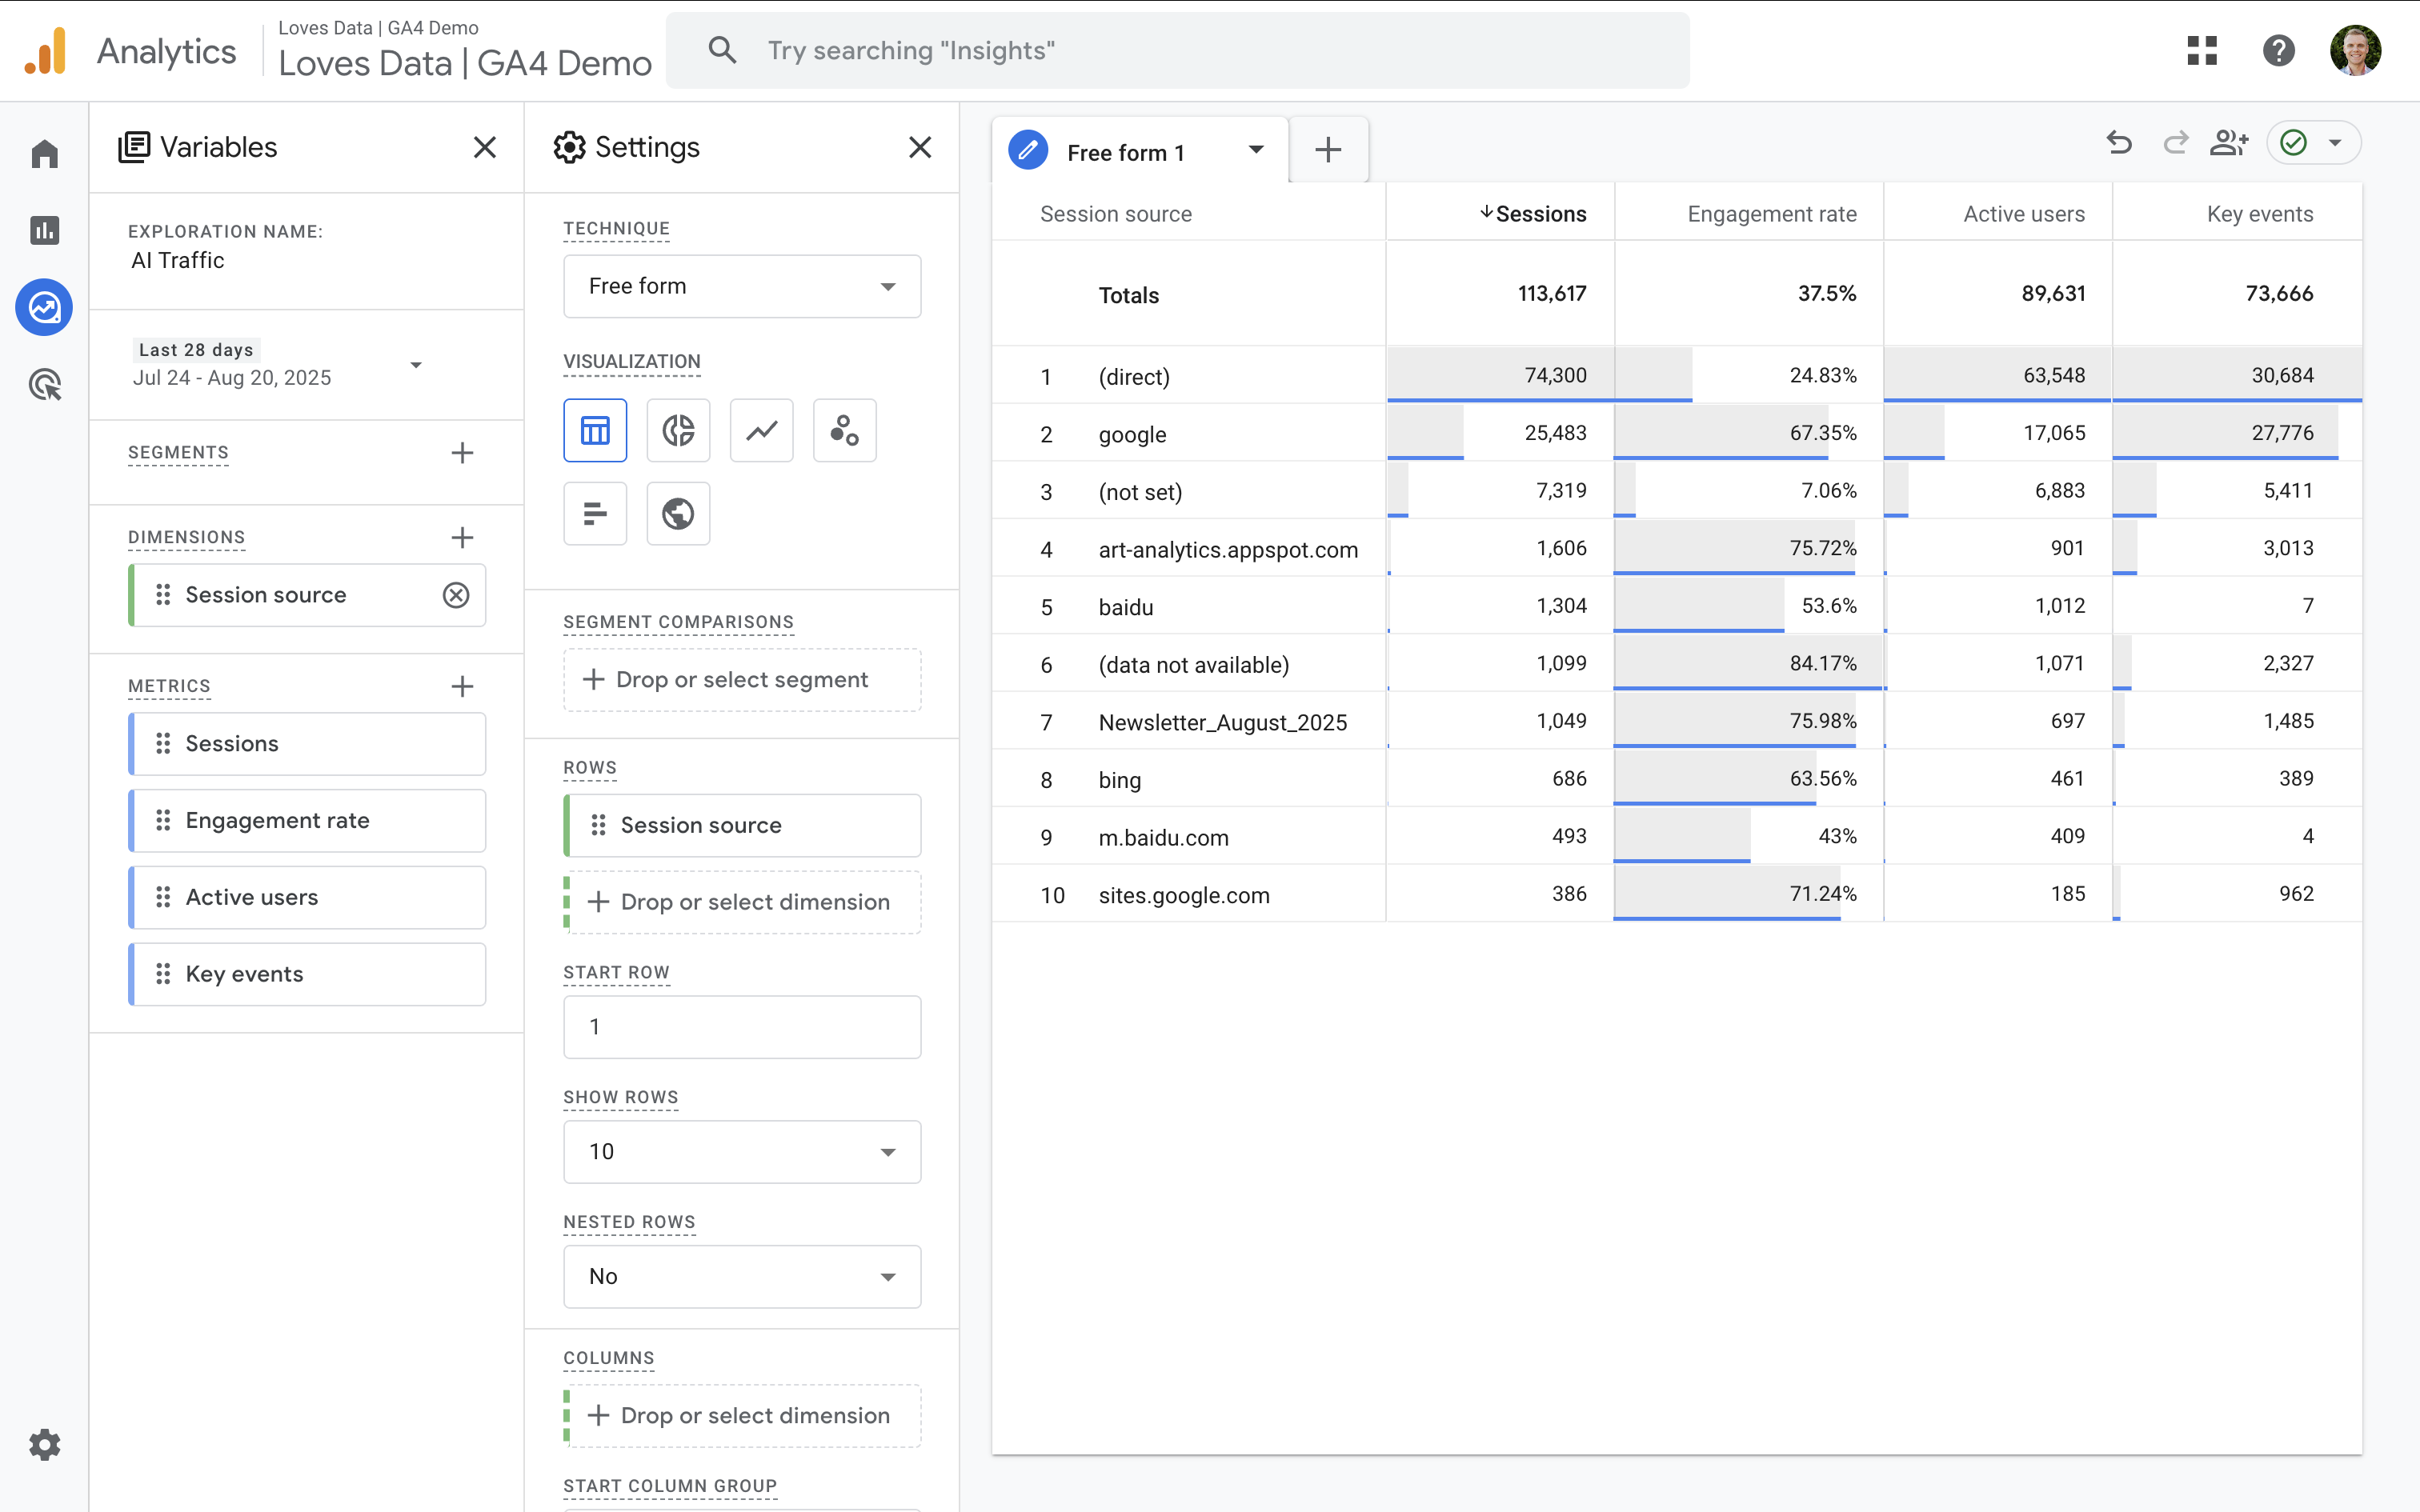
Step 2: Add dimensions and metrics
Click the plus icon next to 'Dimensions' and add 'Session Source' (or 'Session Source / Medium' if you want the medium too). Click the plus icon next to 'Metrics' and add the metrics you want included – for example, 'Sessions', 'Engagement Rate', 'Active Users', and 'Key Events' (for conversions). Double-click the dimension and metrics to add them to your report.
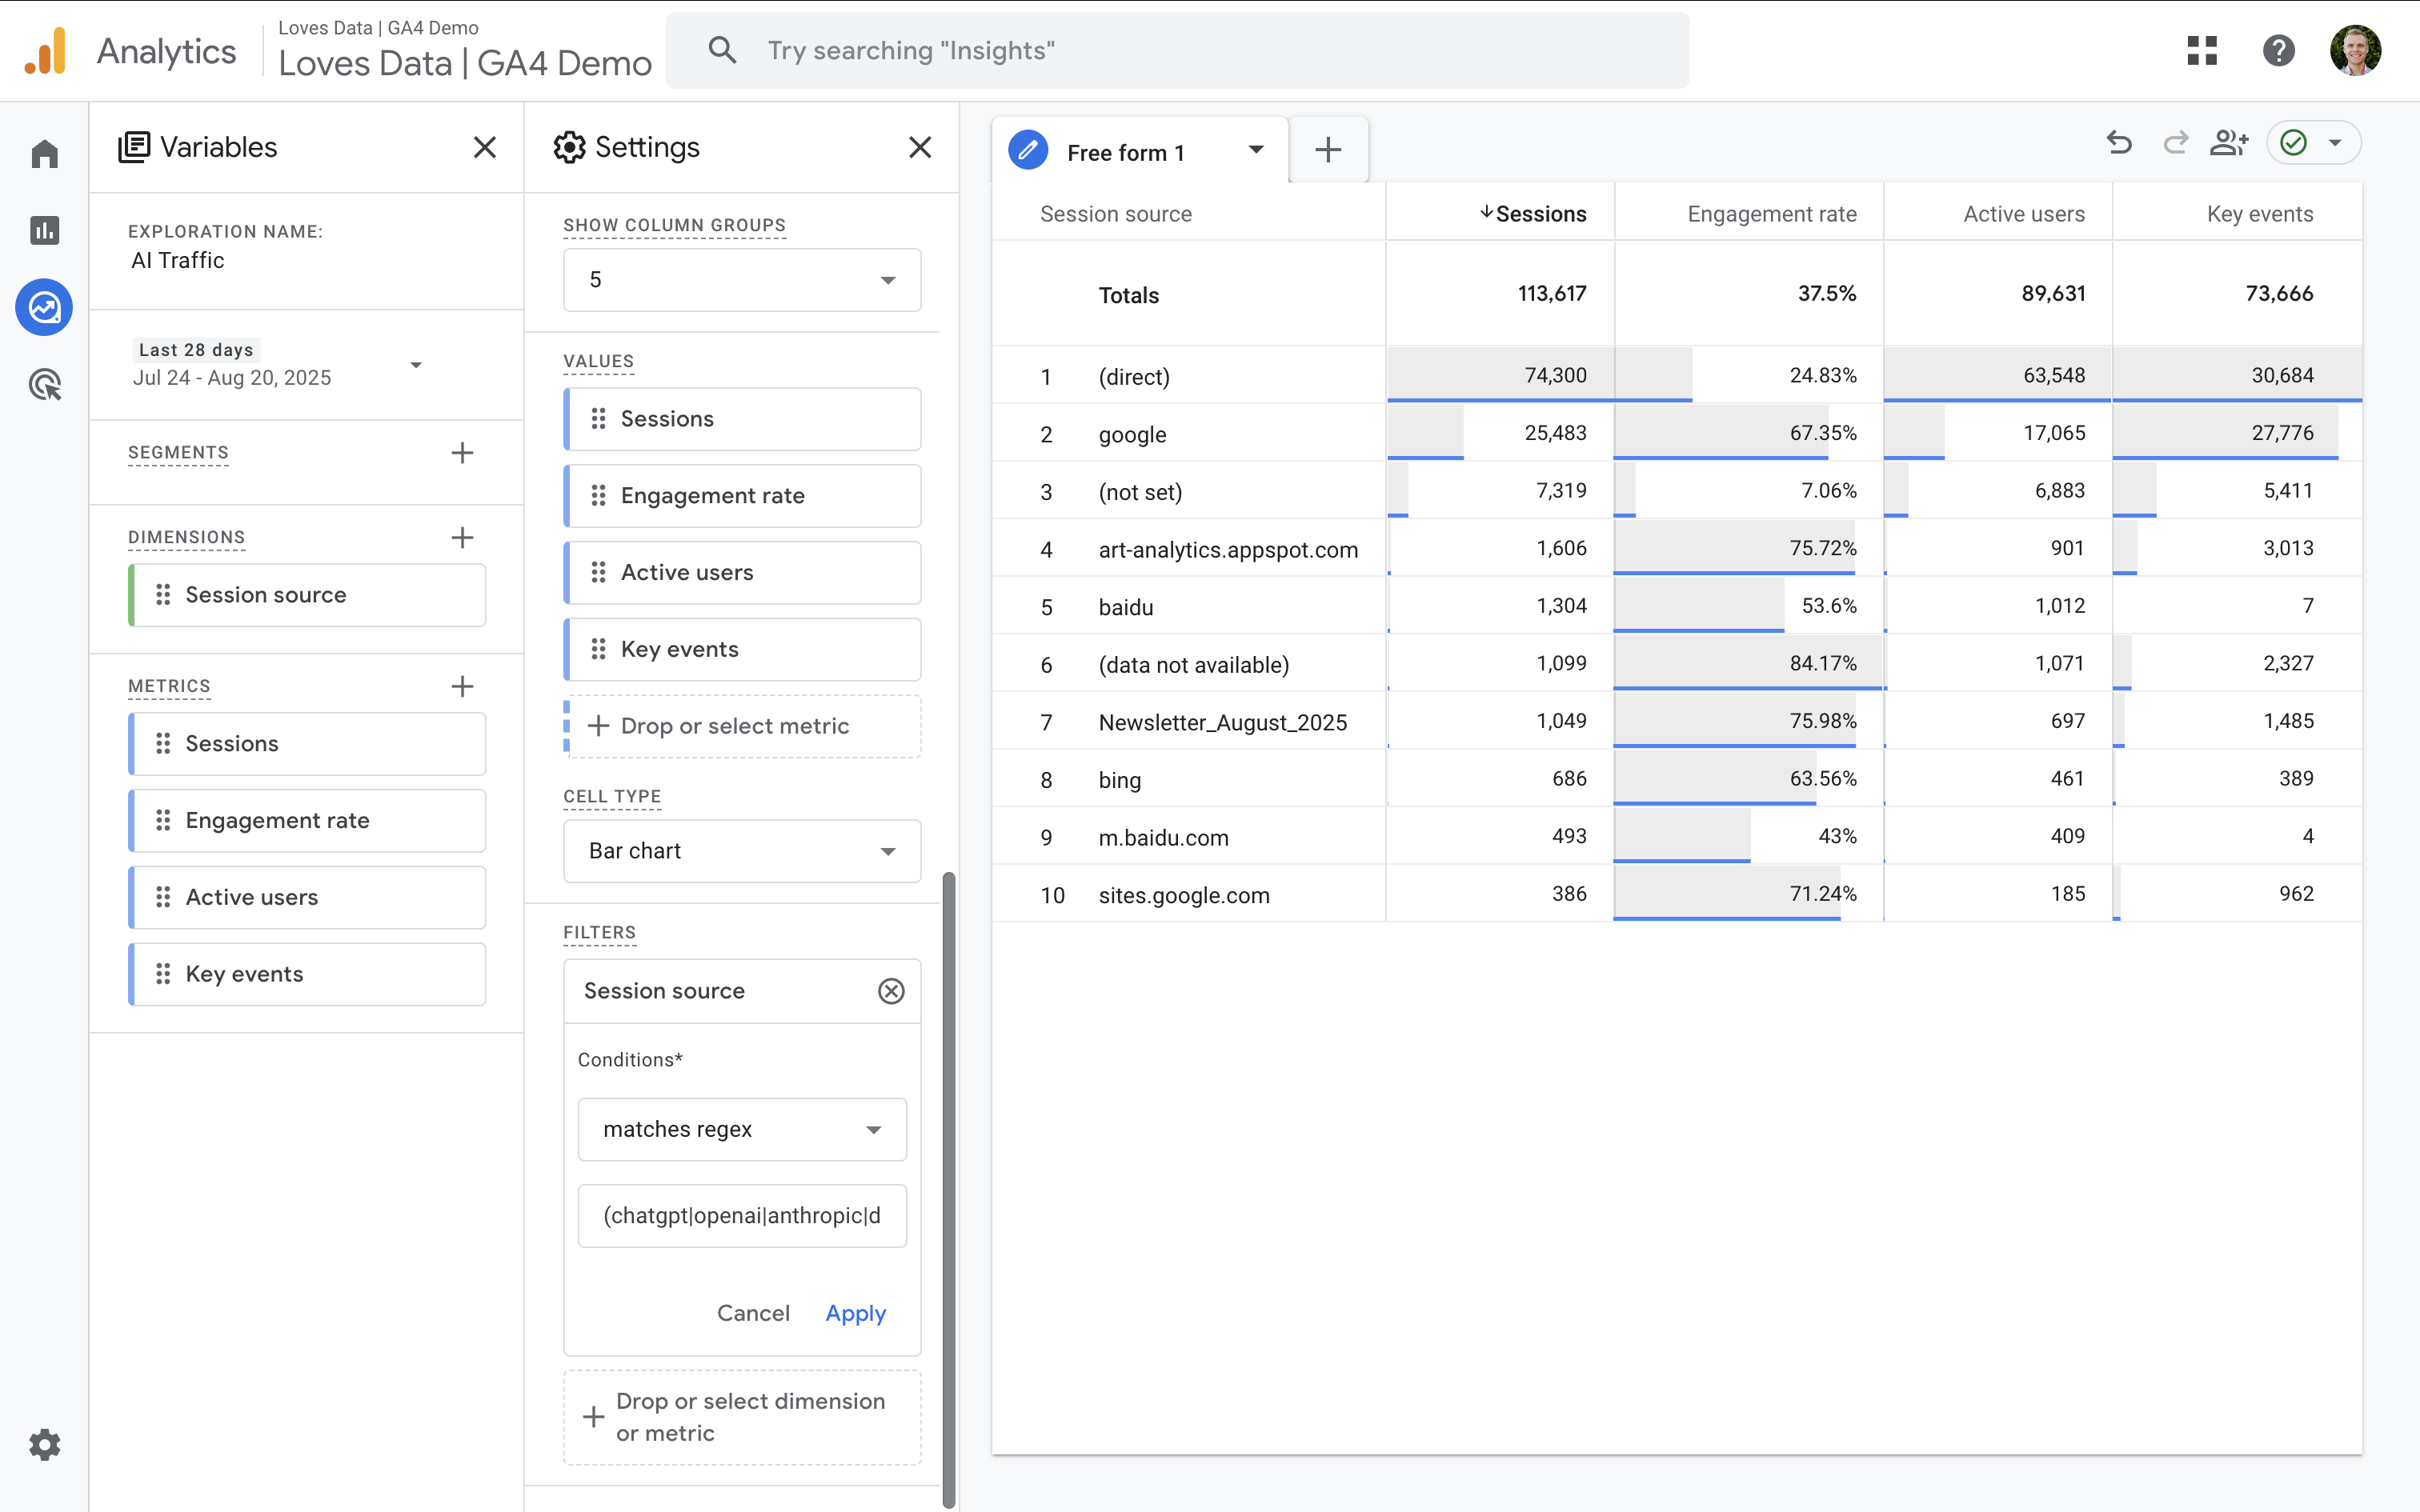
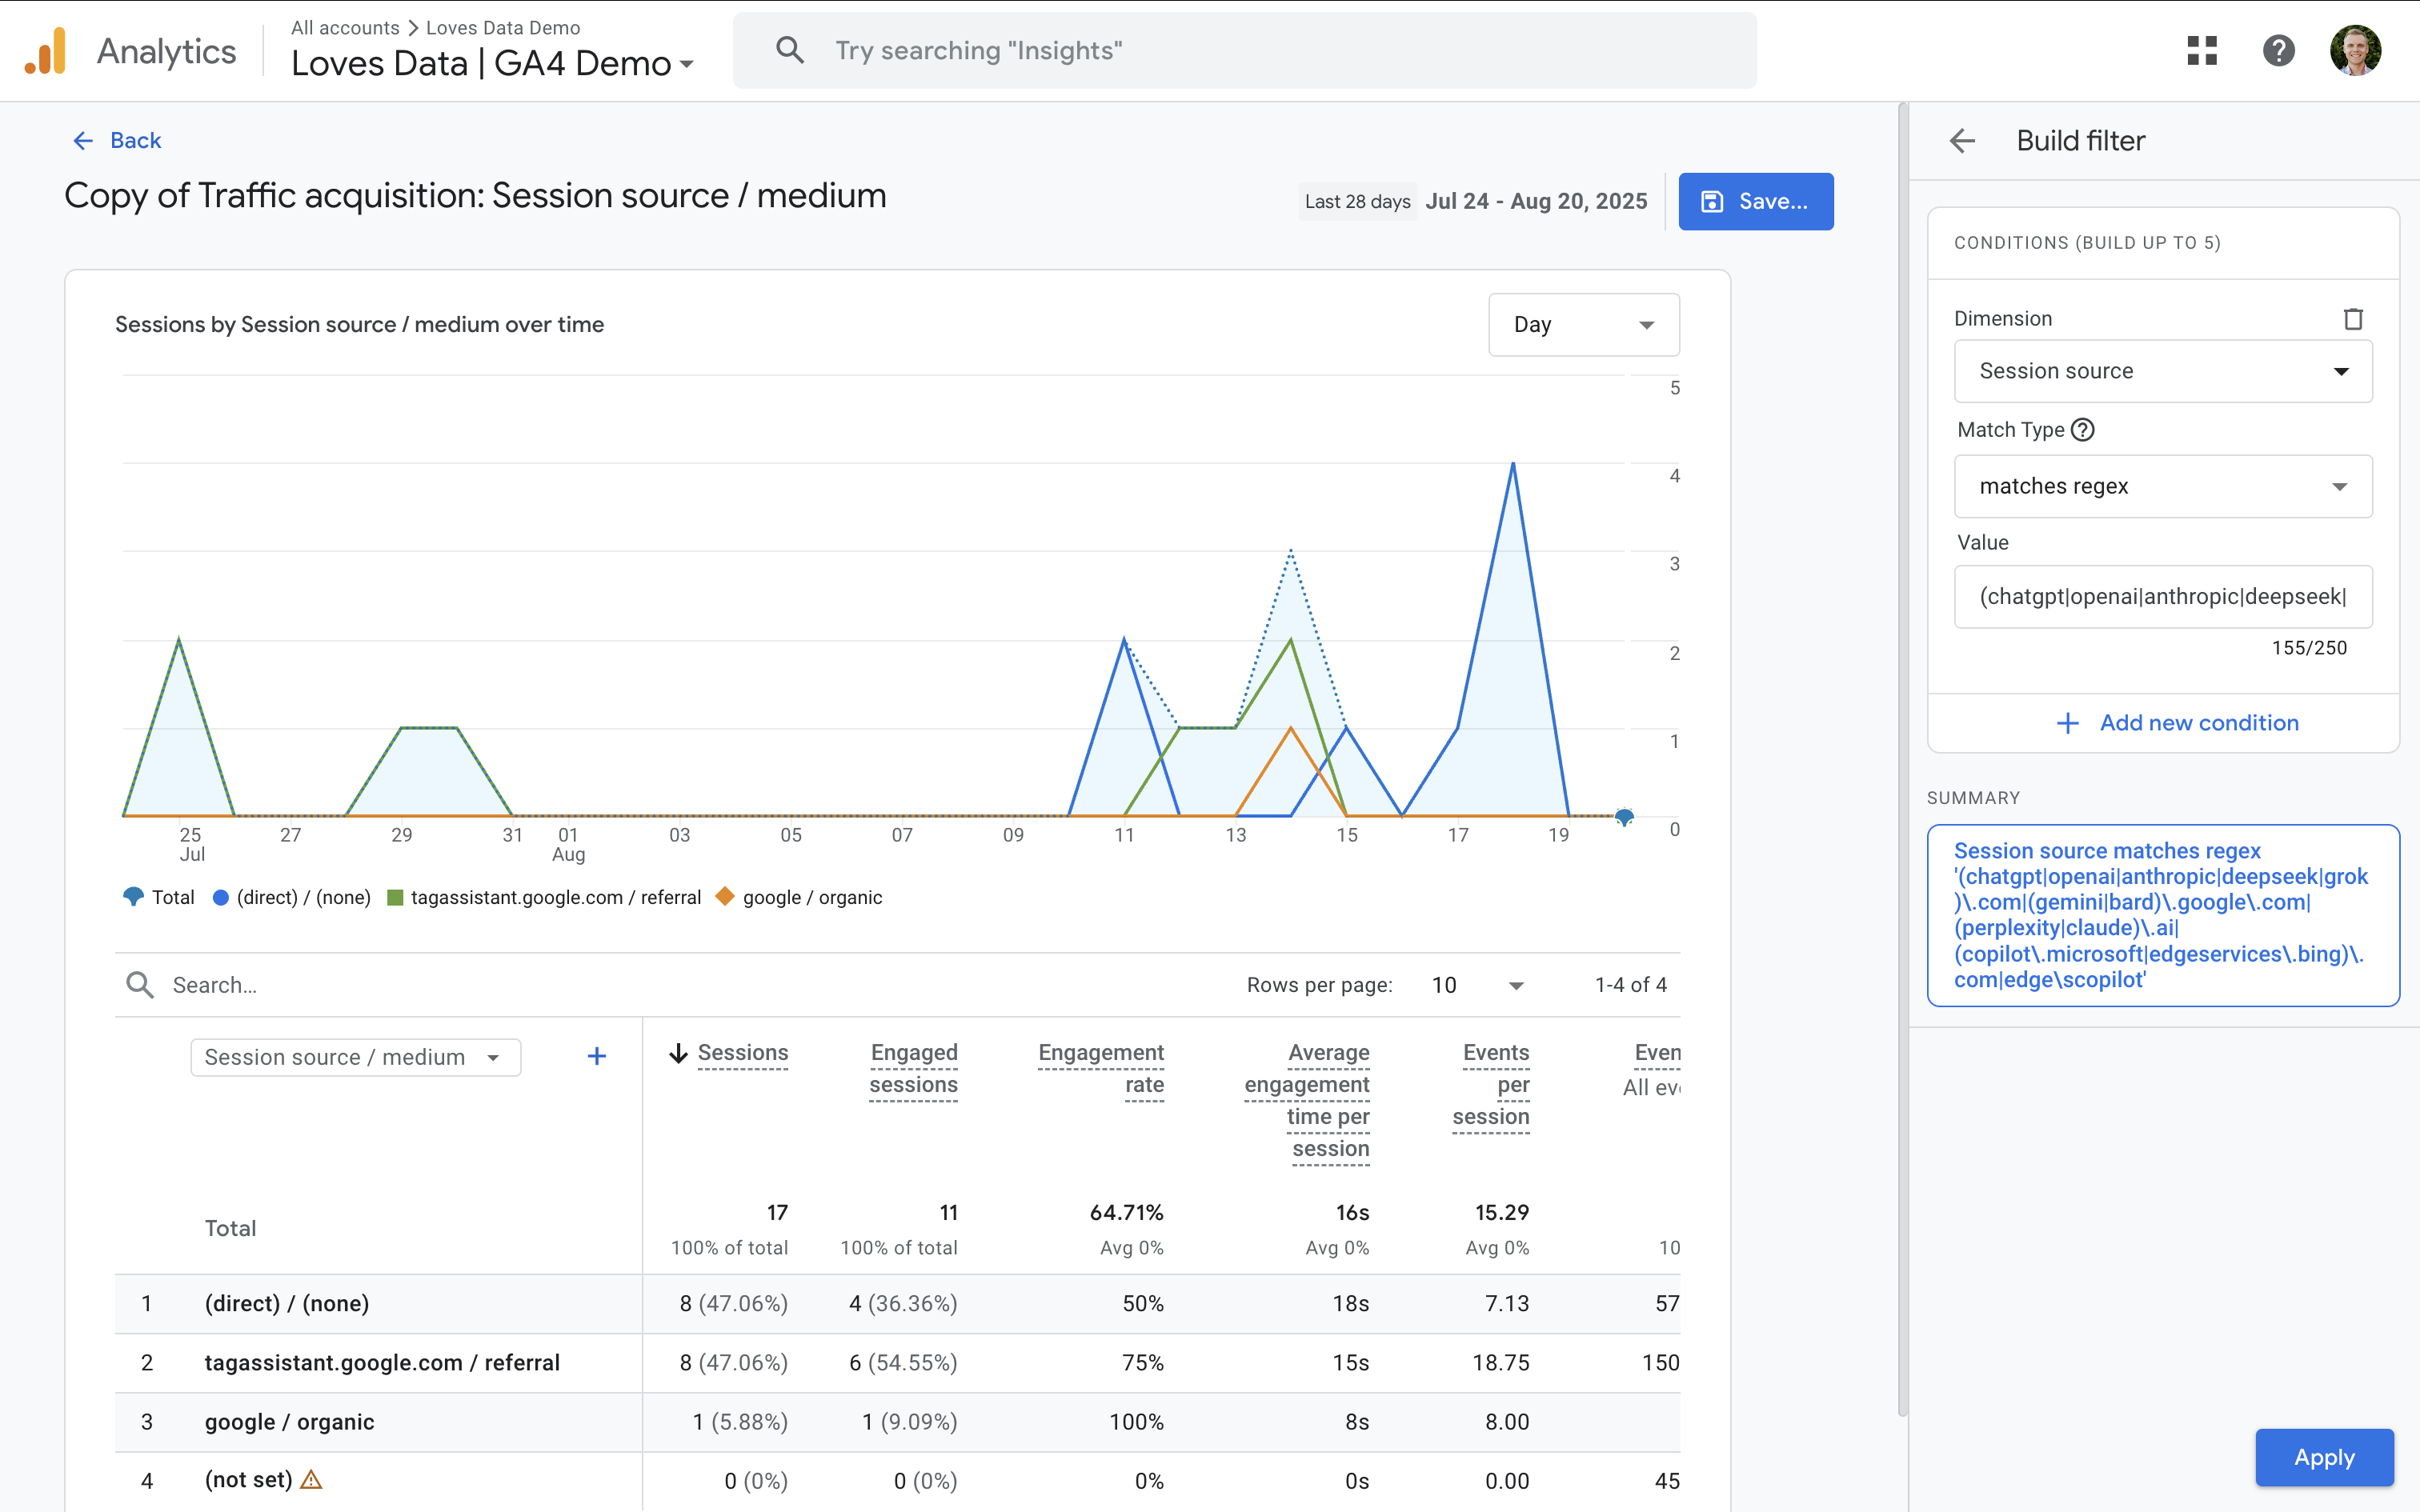
Step 3: Apply a regex filter
In the second column (under 'Settings'), scroll to the bottom to add a filter. Choose your dimension (for example, 'Session Source') and set the condition to 'Matches Regex'. Enter a regular expression that matches the AI tools you want to include.
Here's regex you can use (or adjust to match what you see in your report):
(chatgpt|openai|anthropic|deepseek|grok).com|(gemini|bard).google.com|(perplexity|claude).ai|(copilot.microsoft|edgeservices.bing).com|edge\scopilot
Important: GA4 regex matching is case-sensitive. If your sources appear in upper and lower case (for example, 'ChatGPT' vs 'chatgpt'), include the variants you need.
Step 4: Review and refine your AI view
Your report will now only include your AI traffic sources. If you’re missing a tool you expect to see, create an unfiltered table to confirm the exact value being recorded in your property and then update your regex.
Create a Custom Report in the Library
Next, let’s create a standard report that anyone can access in the GA4 property. This is perfect for quickly seeing your AI traffic. You’ll need Editor or Administrator permission to complete these steps.
Step 1: Open the Library
Navigate to 'Reports' and select 'Library' at the bottom of the menu.
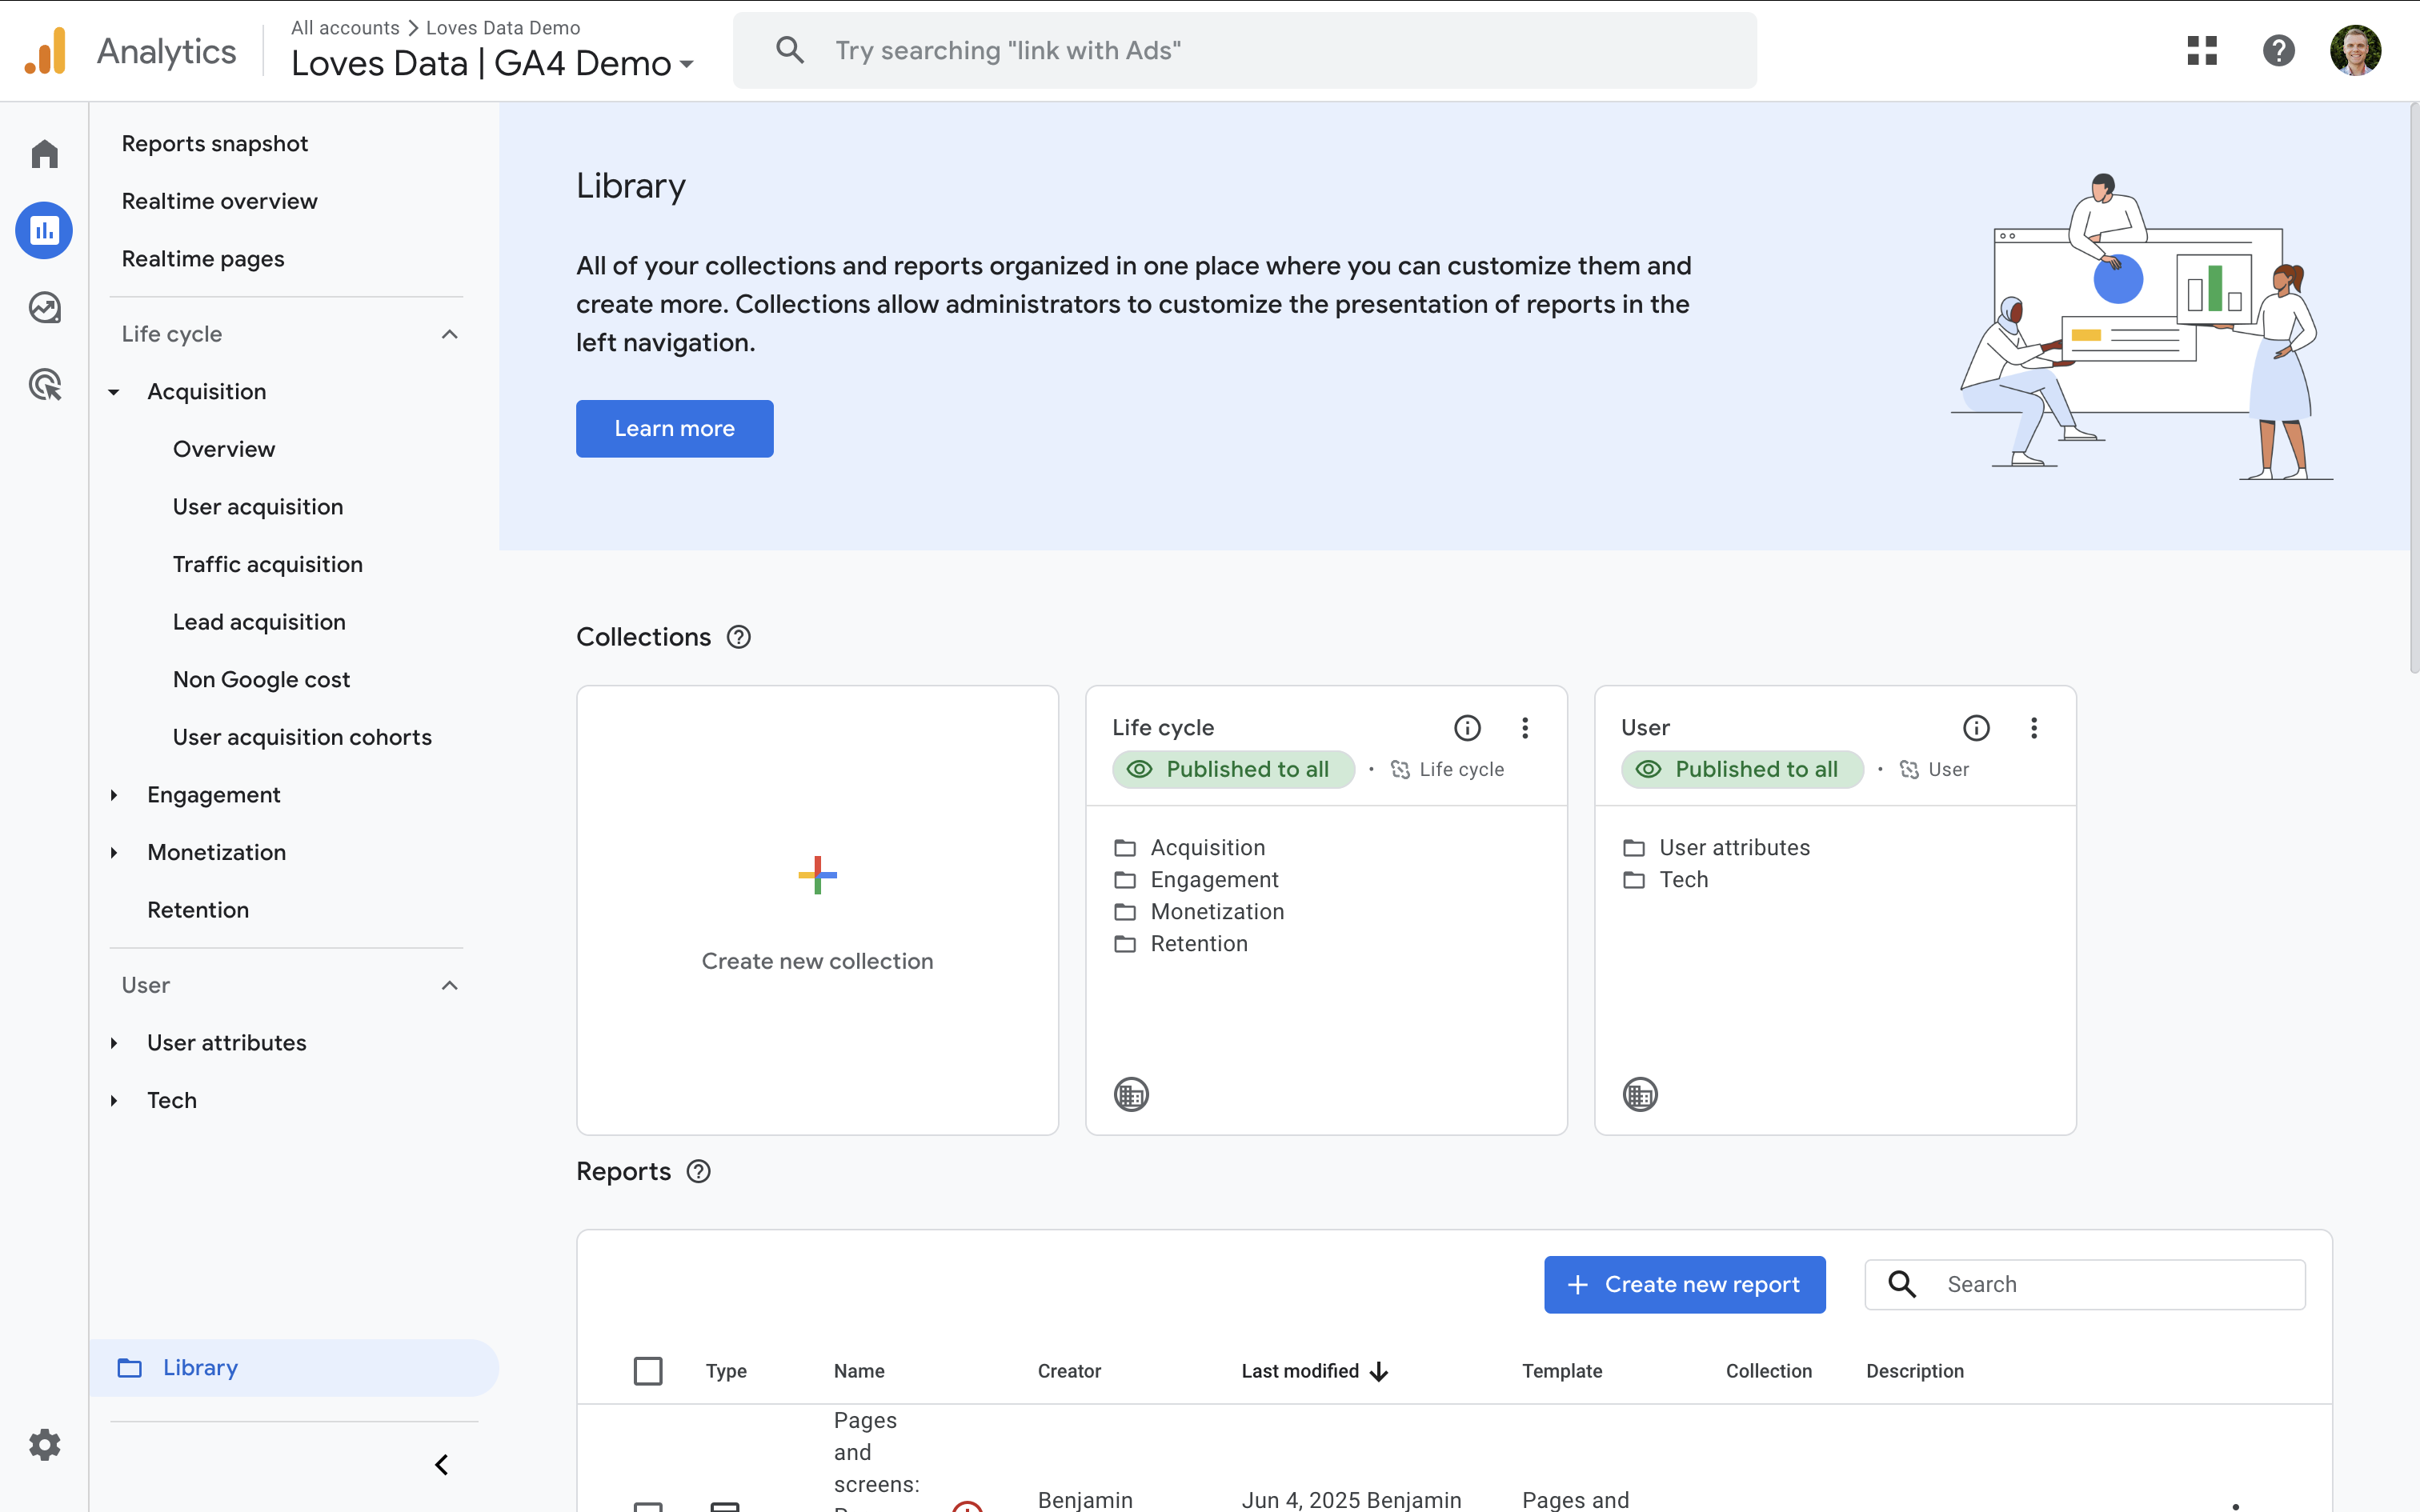
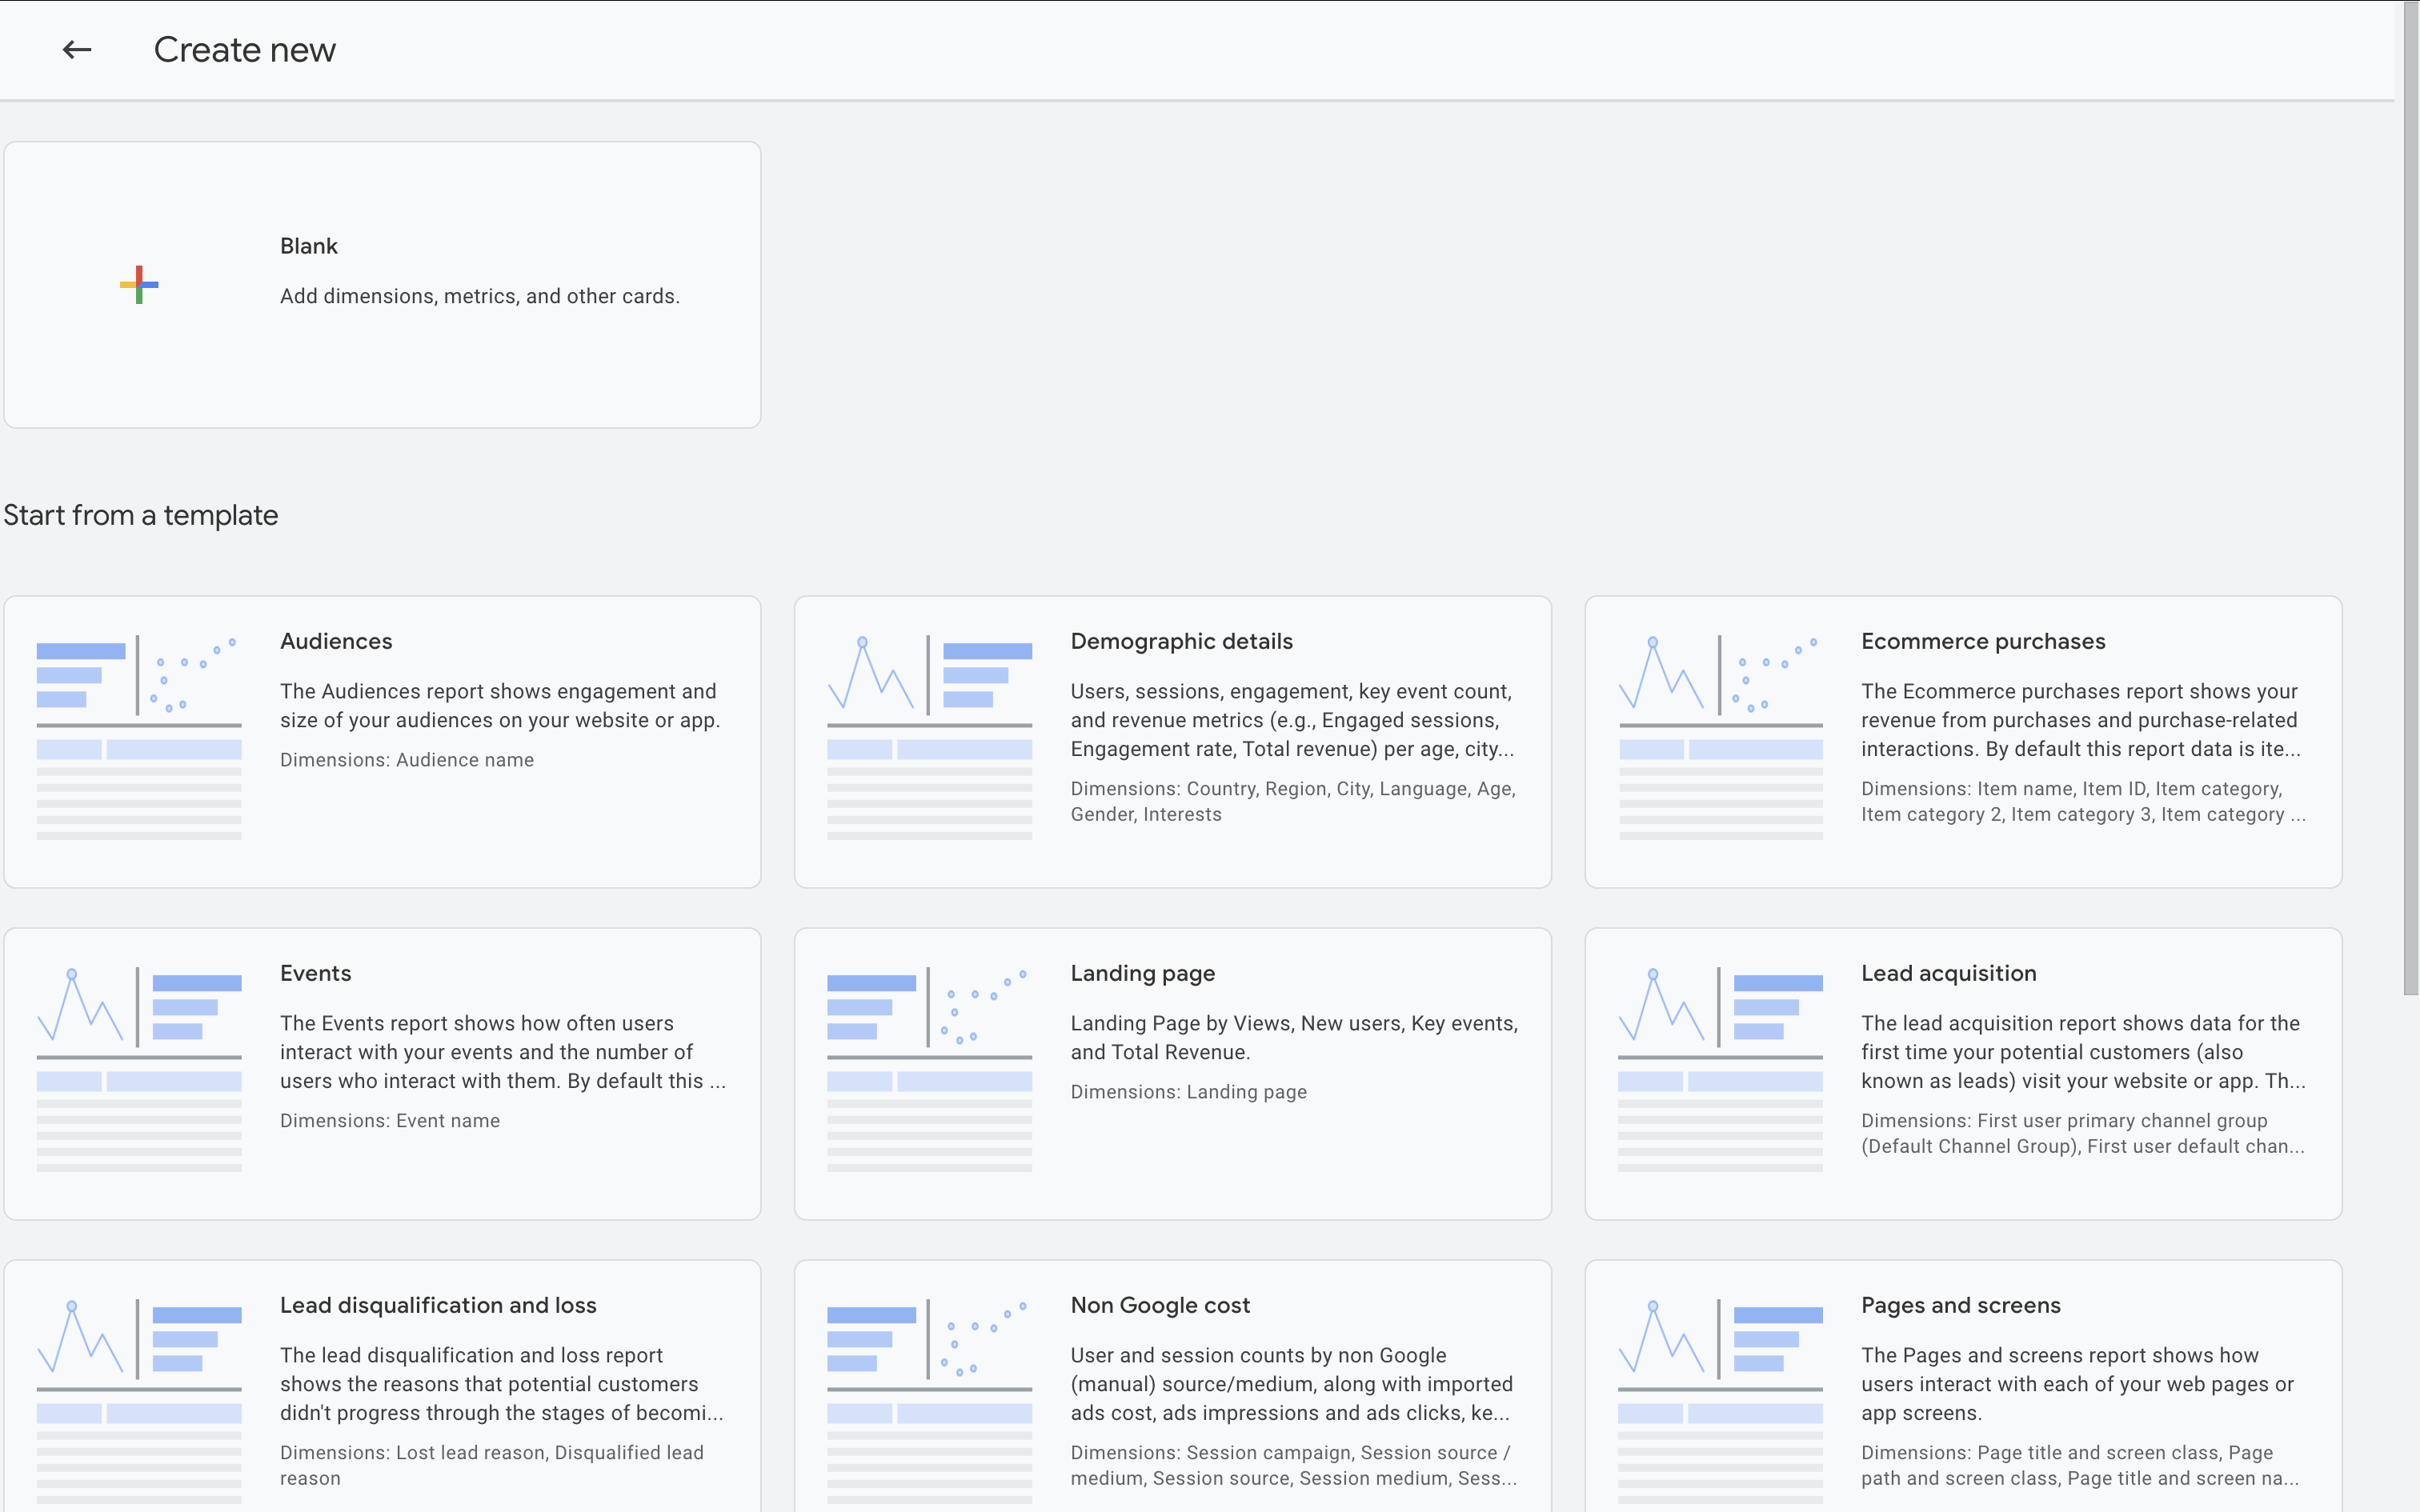
Step 2: Create a Traffic Acquisition report
Choose 'Create New Report' and select 'Create Detail Report'. Select the 'Traffic Acquisition' template as your starting point.
Step 3: Add dimensions, metrics, and a regex filter
On the right, set the default dimension to 'Session Source' (or 'Session Source / Medium'). Add a filter for 'Session Source' using 'Matches Regex' and paste the same pattern you used in your Exploration report. Check that the metrics you want are included in the report. For example, you might want to include 'Sessions', 'Engagement Rate', 'Active Users', and key event metrics.
Step 4: Save and add it to your menu
Save your report and add it to the collection in the Library so it appears in the left-hand 'Reports' menu for your team.

Build a Custom Channel Group for AI Traffic
Ready to compare your different marketing channels? Creating a custom channel group lets AI traffic appear alongside your default channels (like 'Organic Search' and 'Referral'). This is great for top-level analysis and reporting.
Step 1: Open Admin settings
Navigate to 'Admin', then under 'Data Display' select 'Channel Groups'.
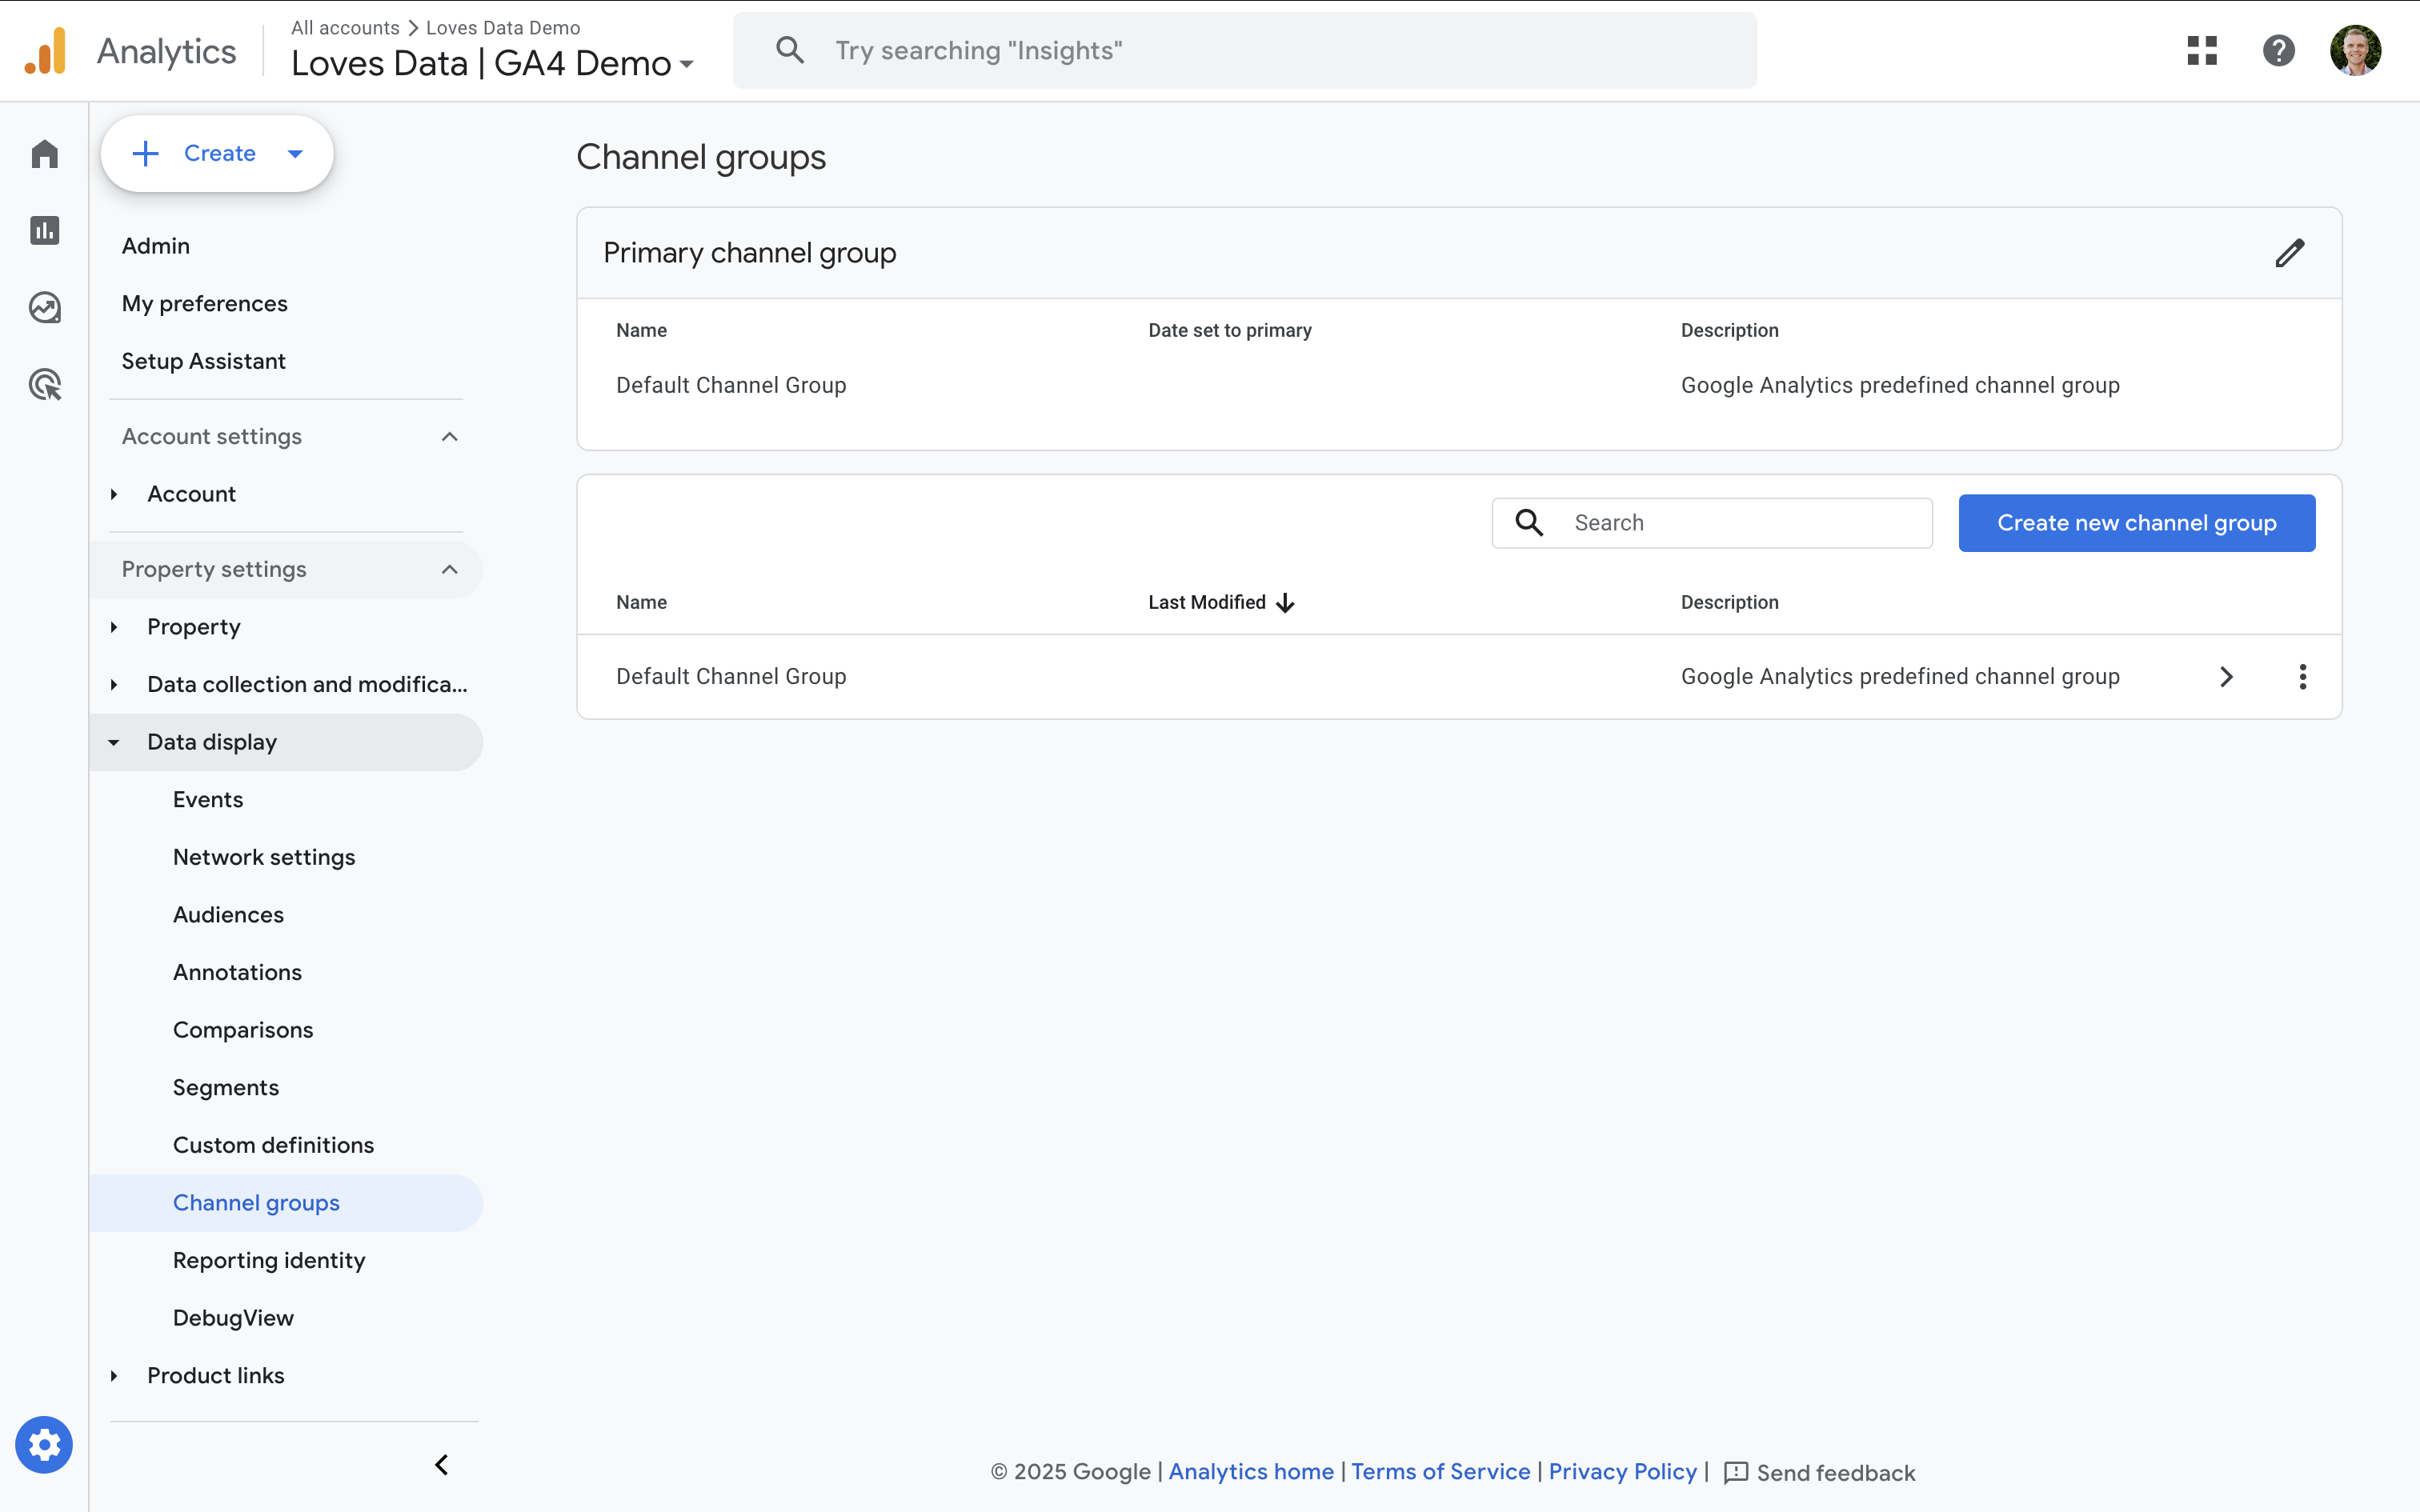
Step 2: Copy the default channel group
Copy the default channel group. Give your copy a clear name, for example, 'Default and AI Chatbots'.
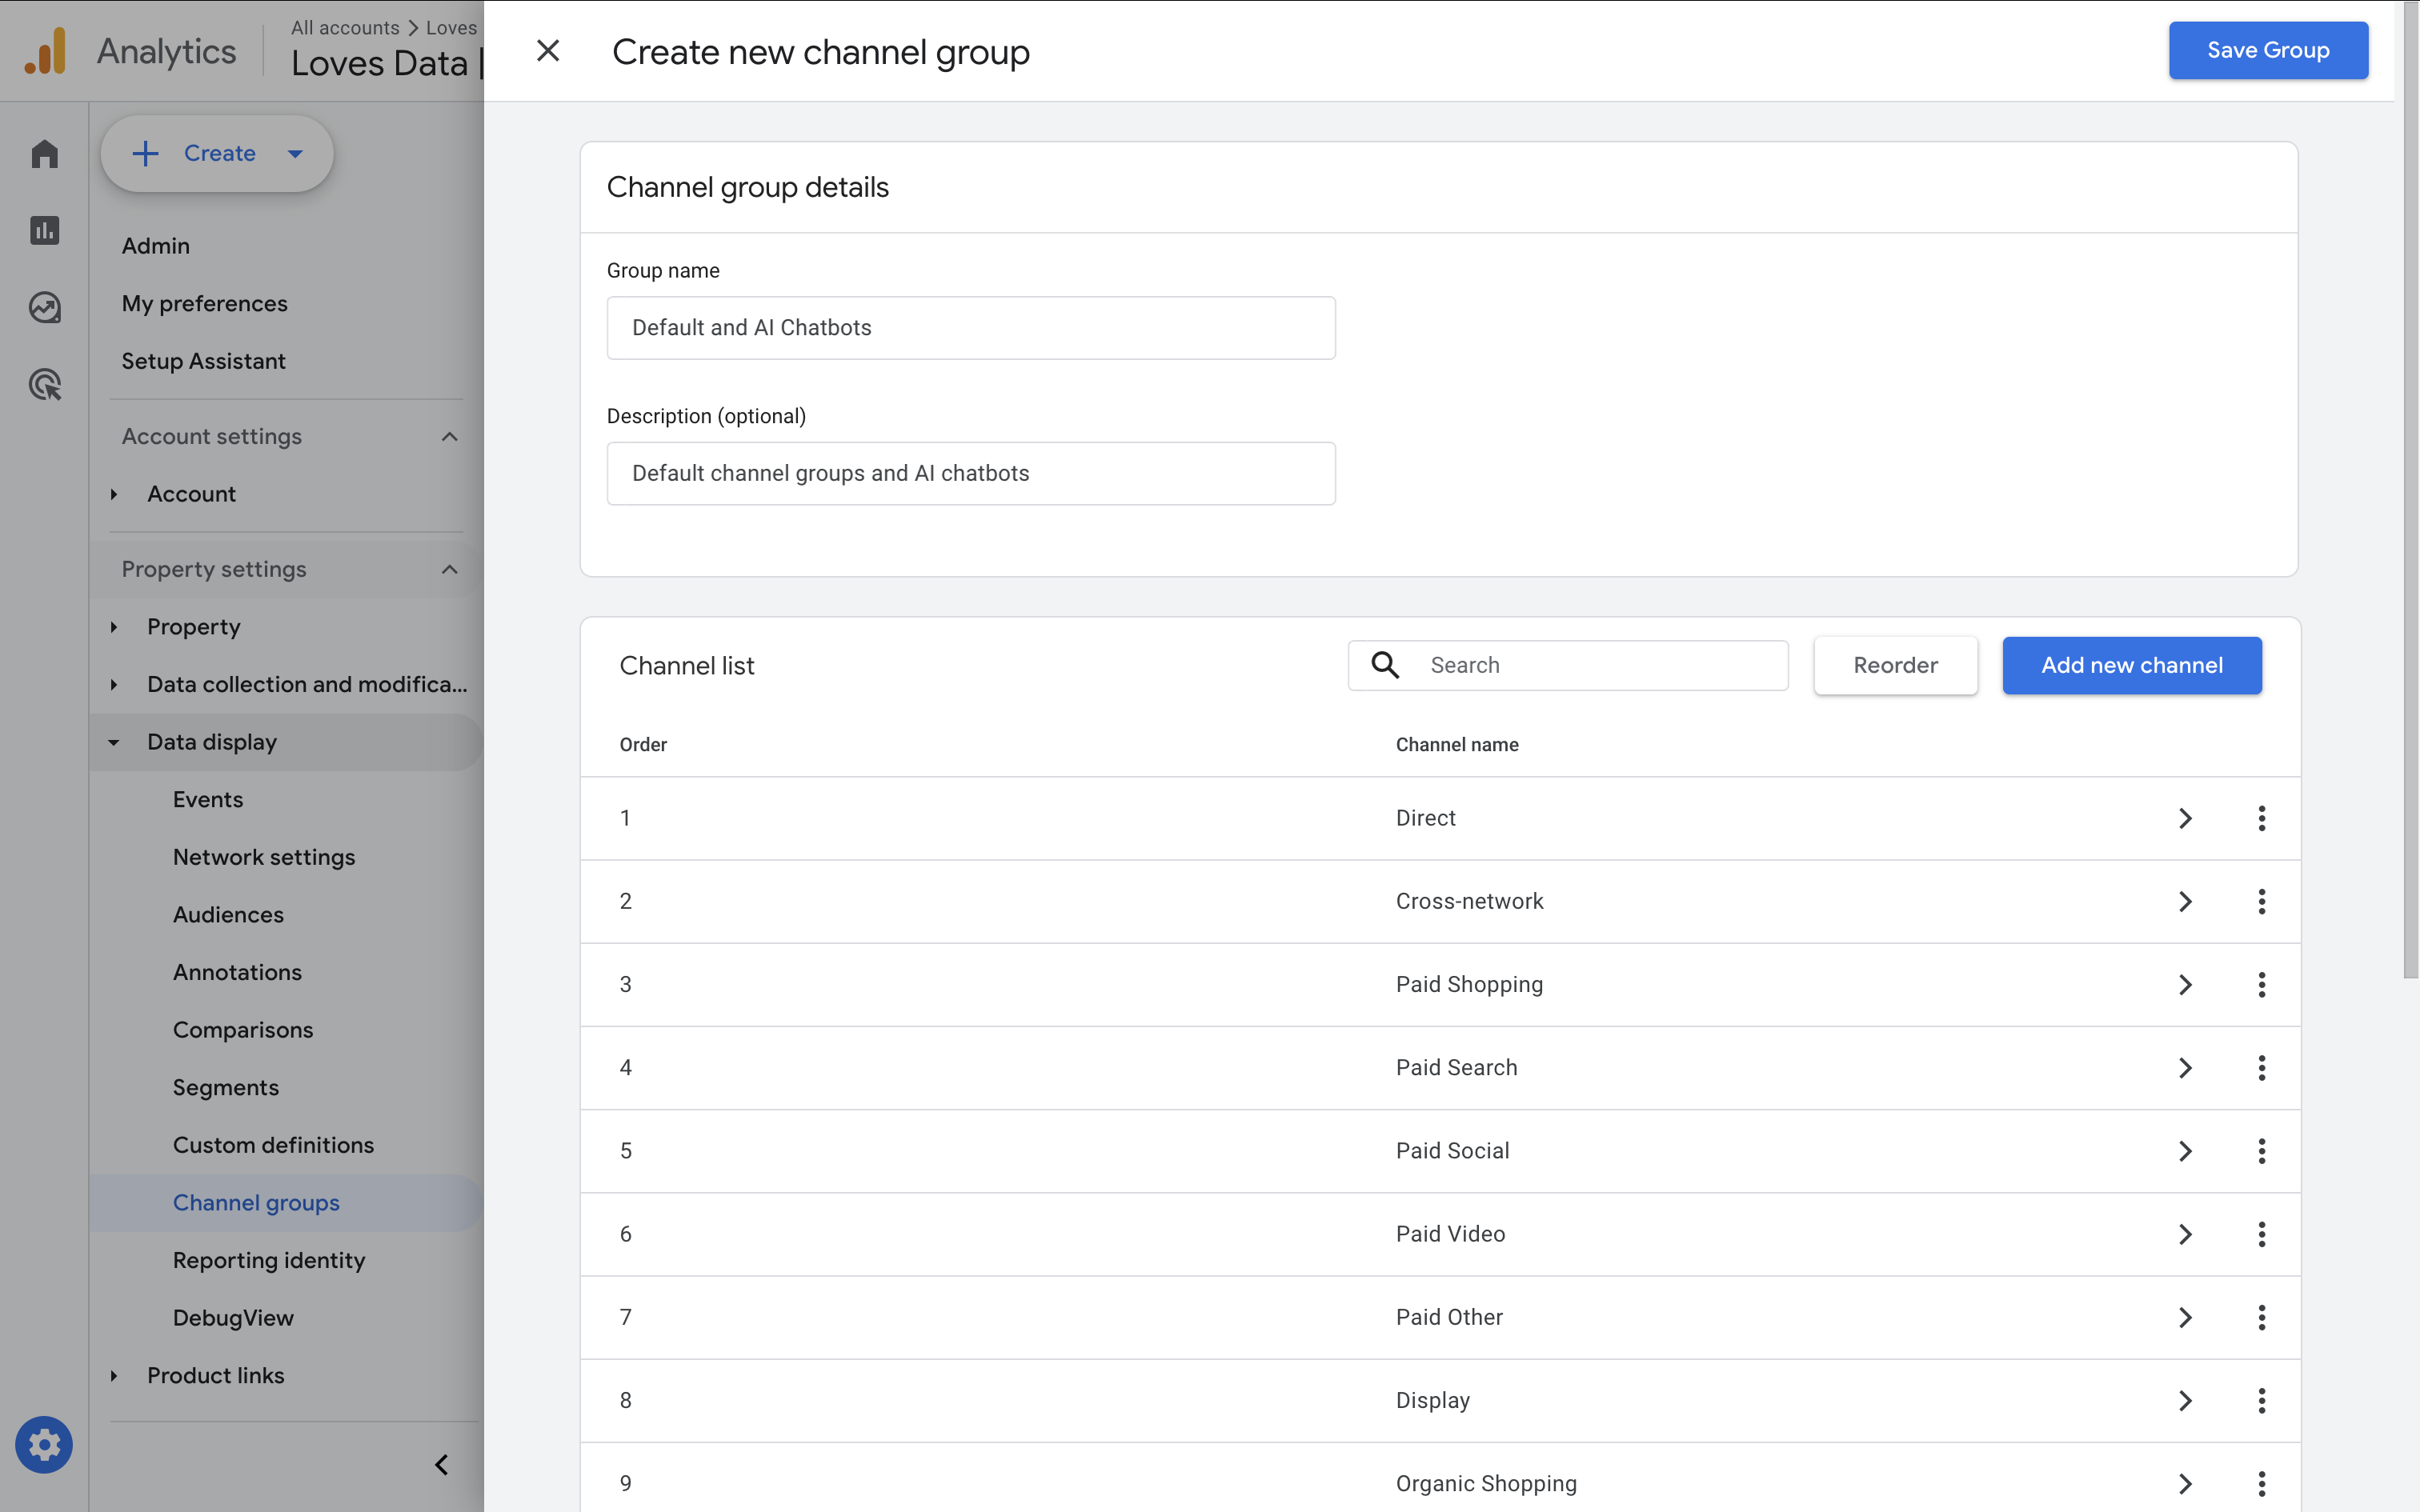
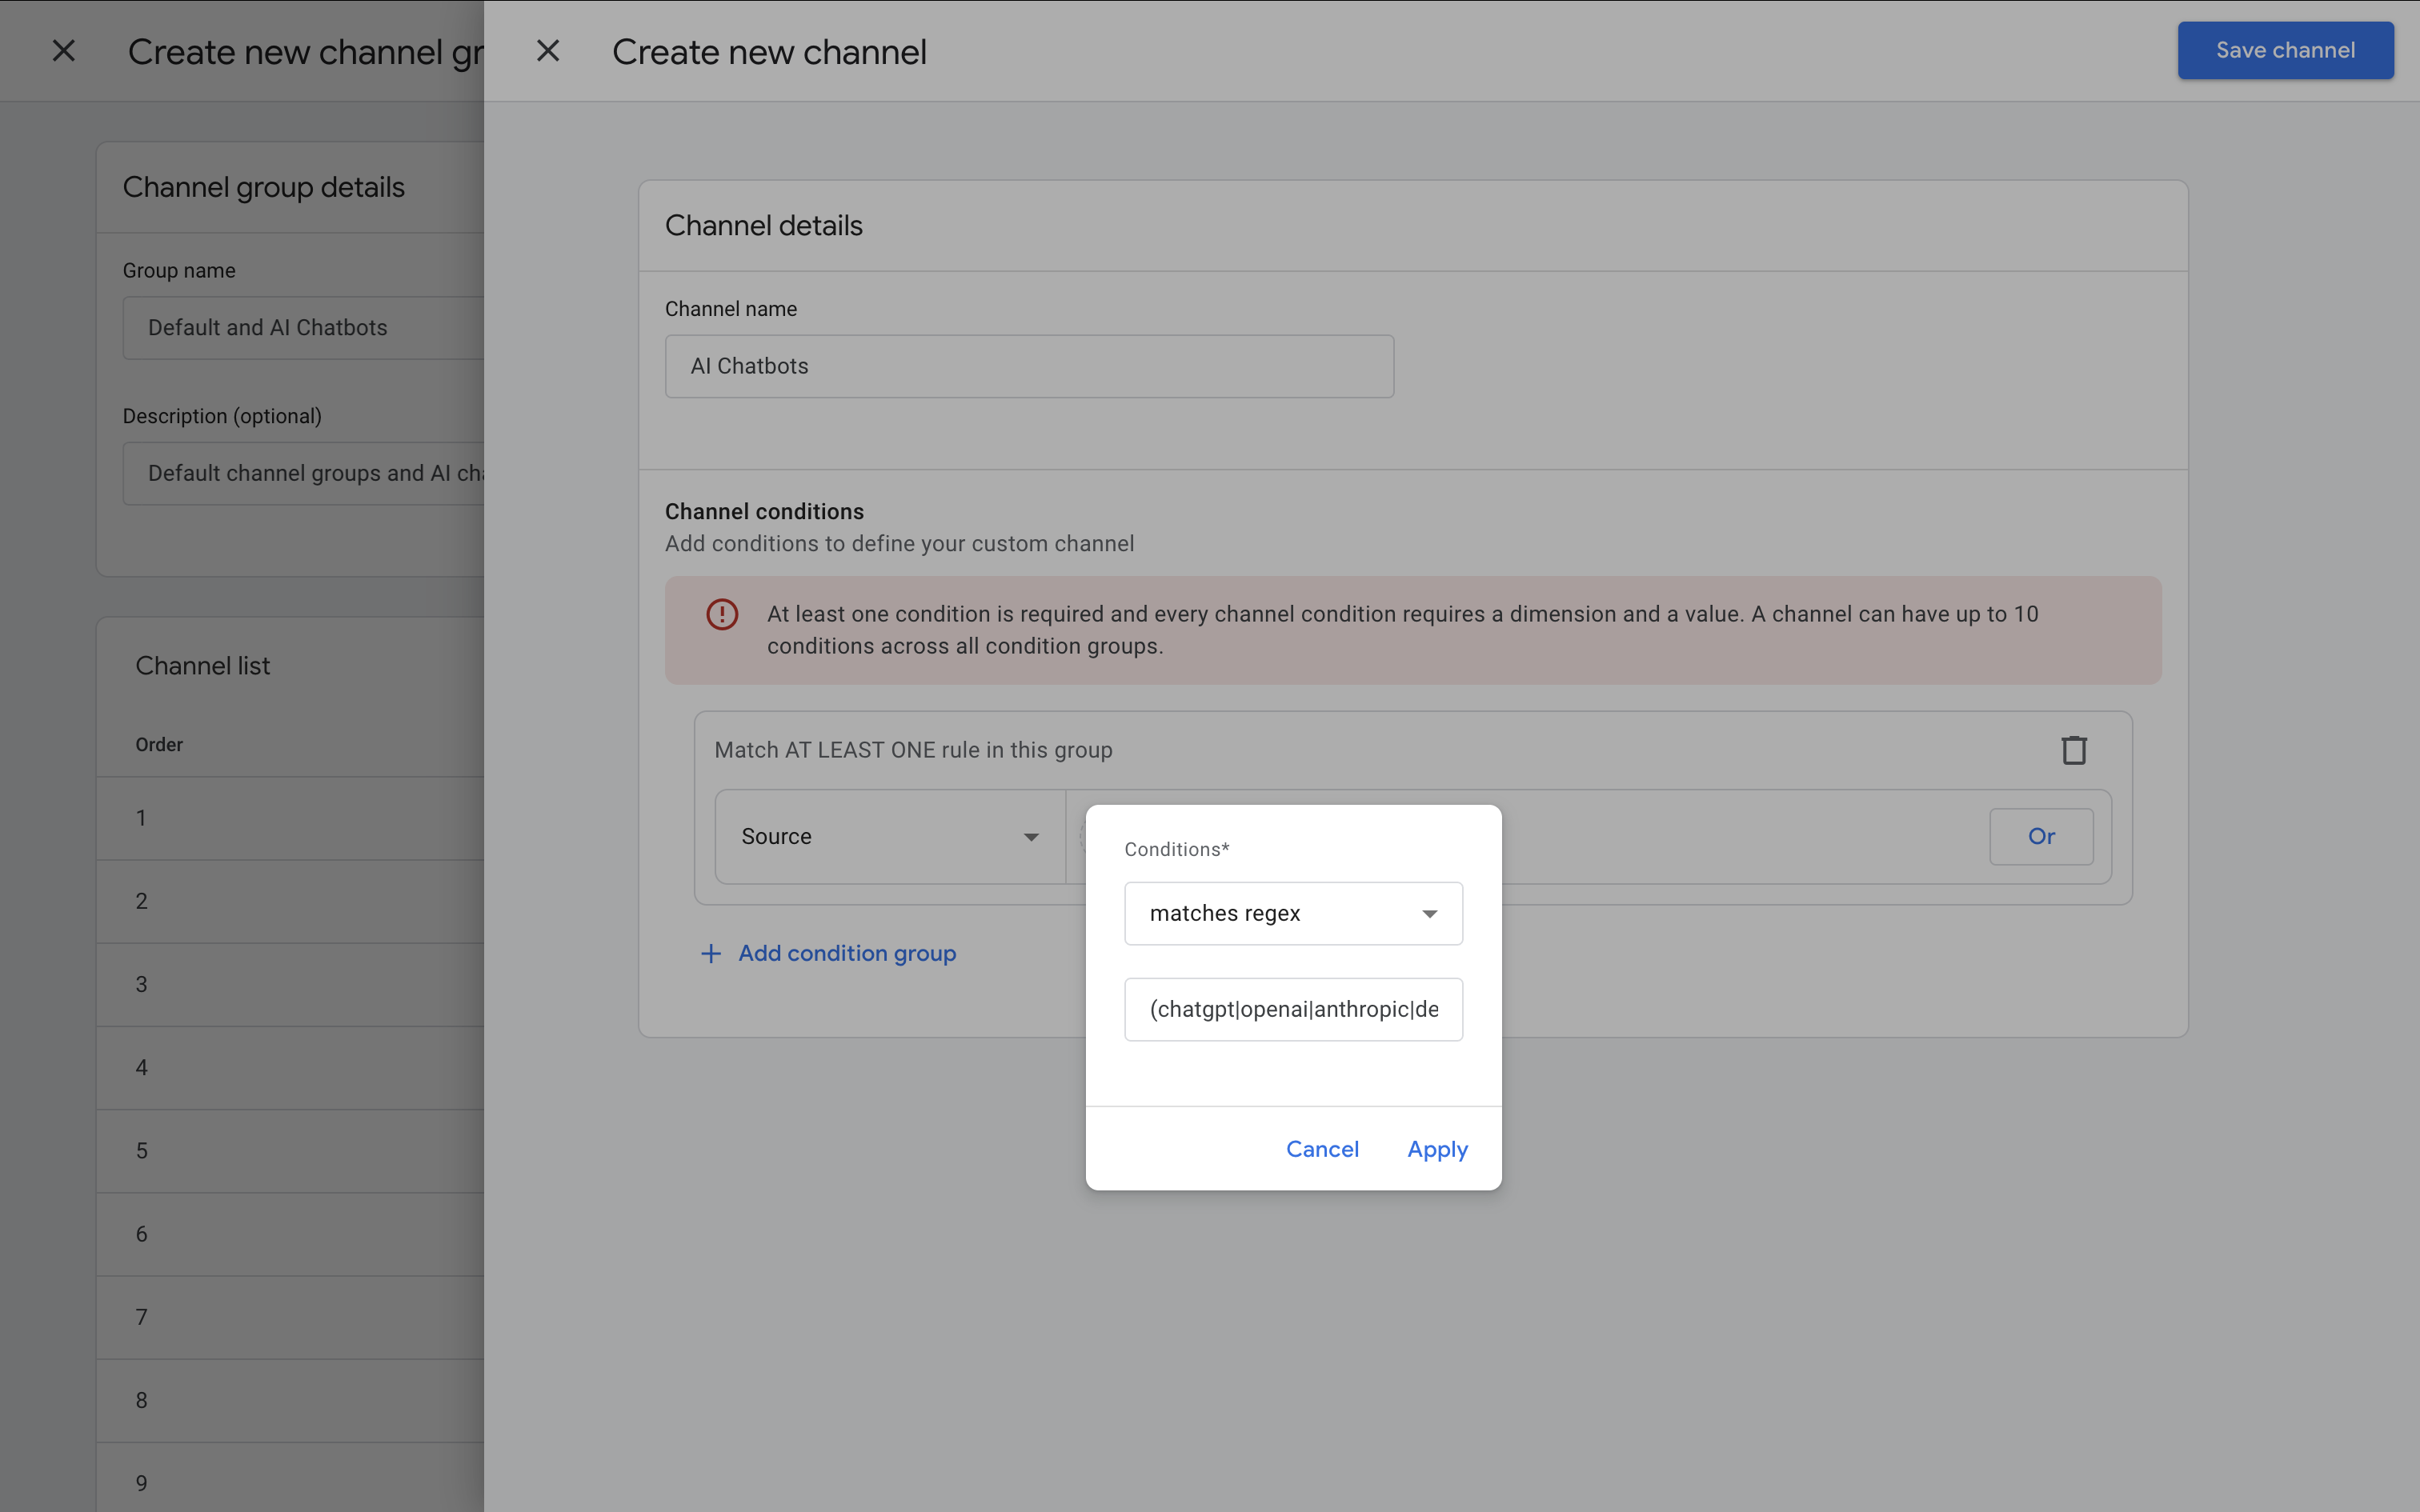
Step 3: Add a new 'AI Chatbots' channel'
Click 'Add New Channel' and name it something like 'AI Chatbots'. Add a condition group for 'Source' with 'Matches Regex', then paste your pattern.
Here's the regex we used previously:
(chatgpt|openai|anthropic|deepseek|grok).com|(gemini|bard).google.com|(perplexity|claude).ai|(copilot.microsoft|edgeservices.bing).com|edge\scopilot
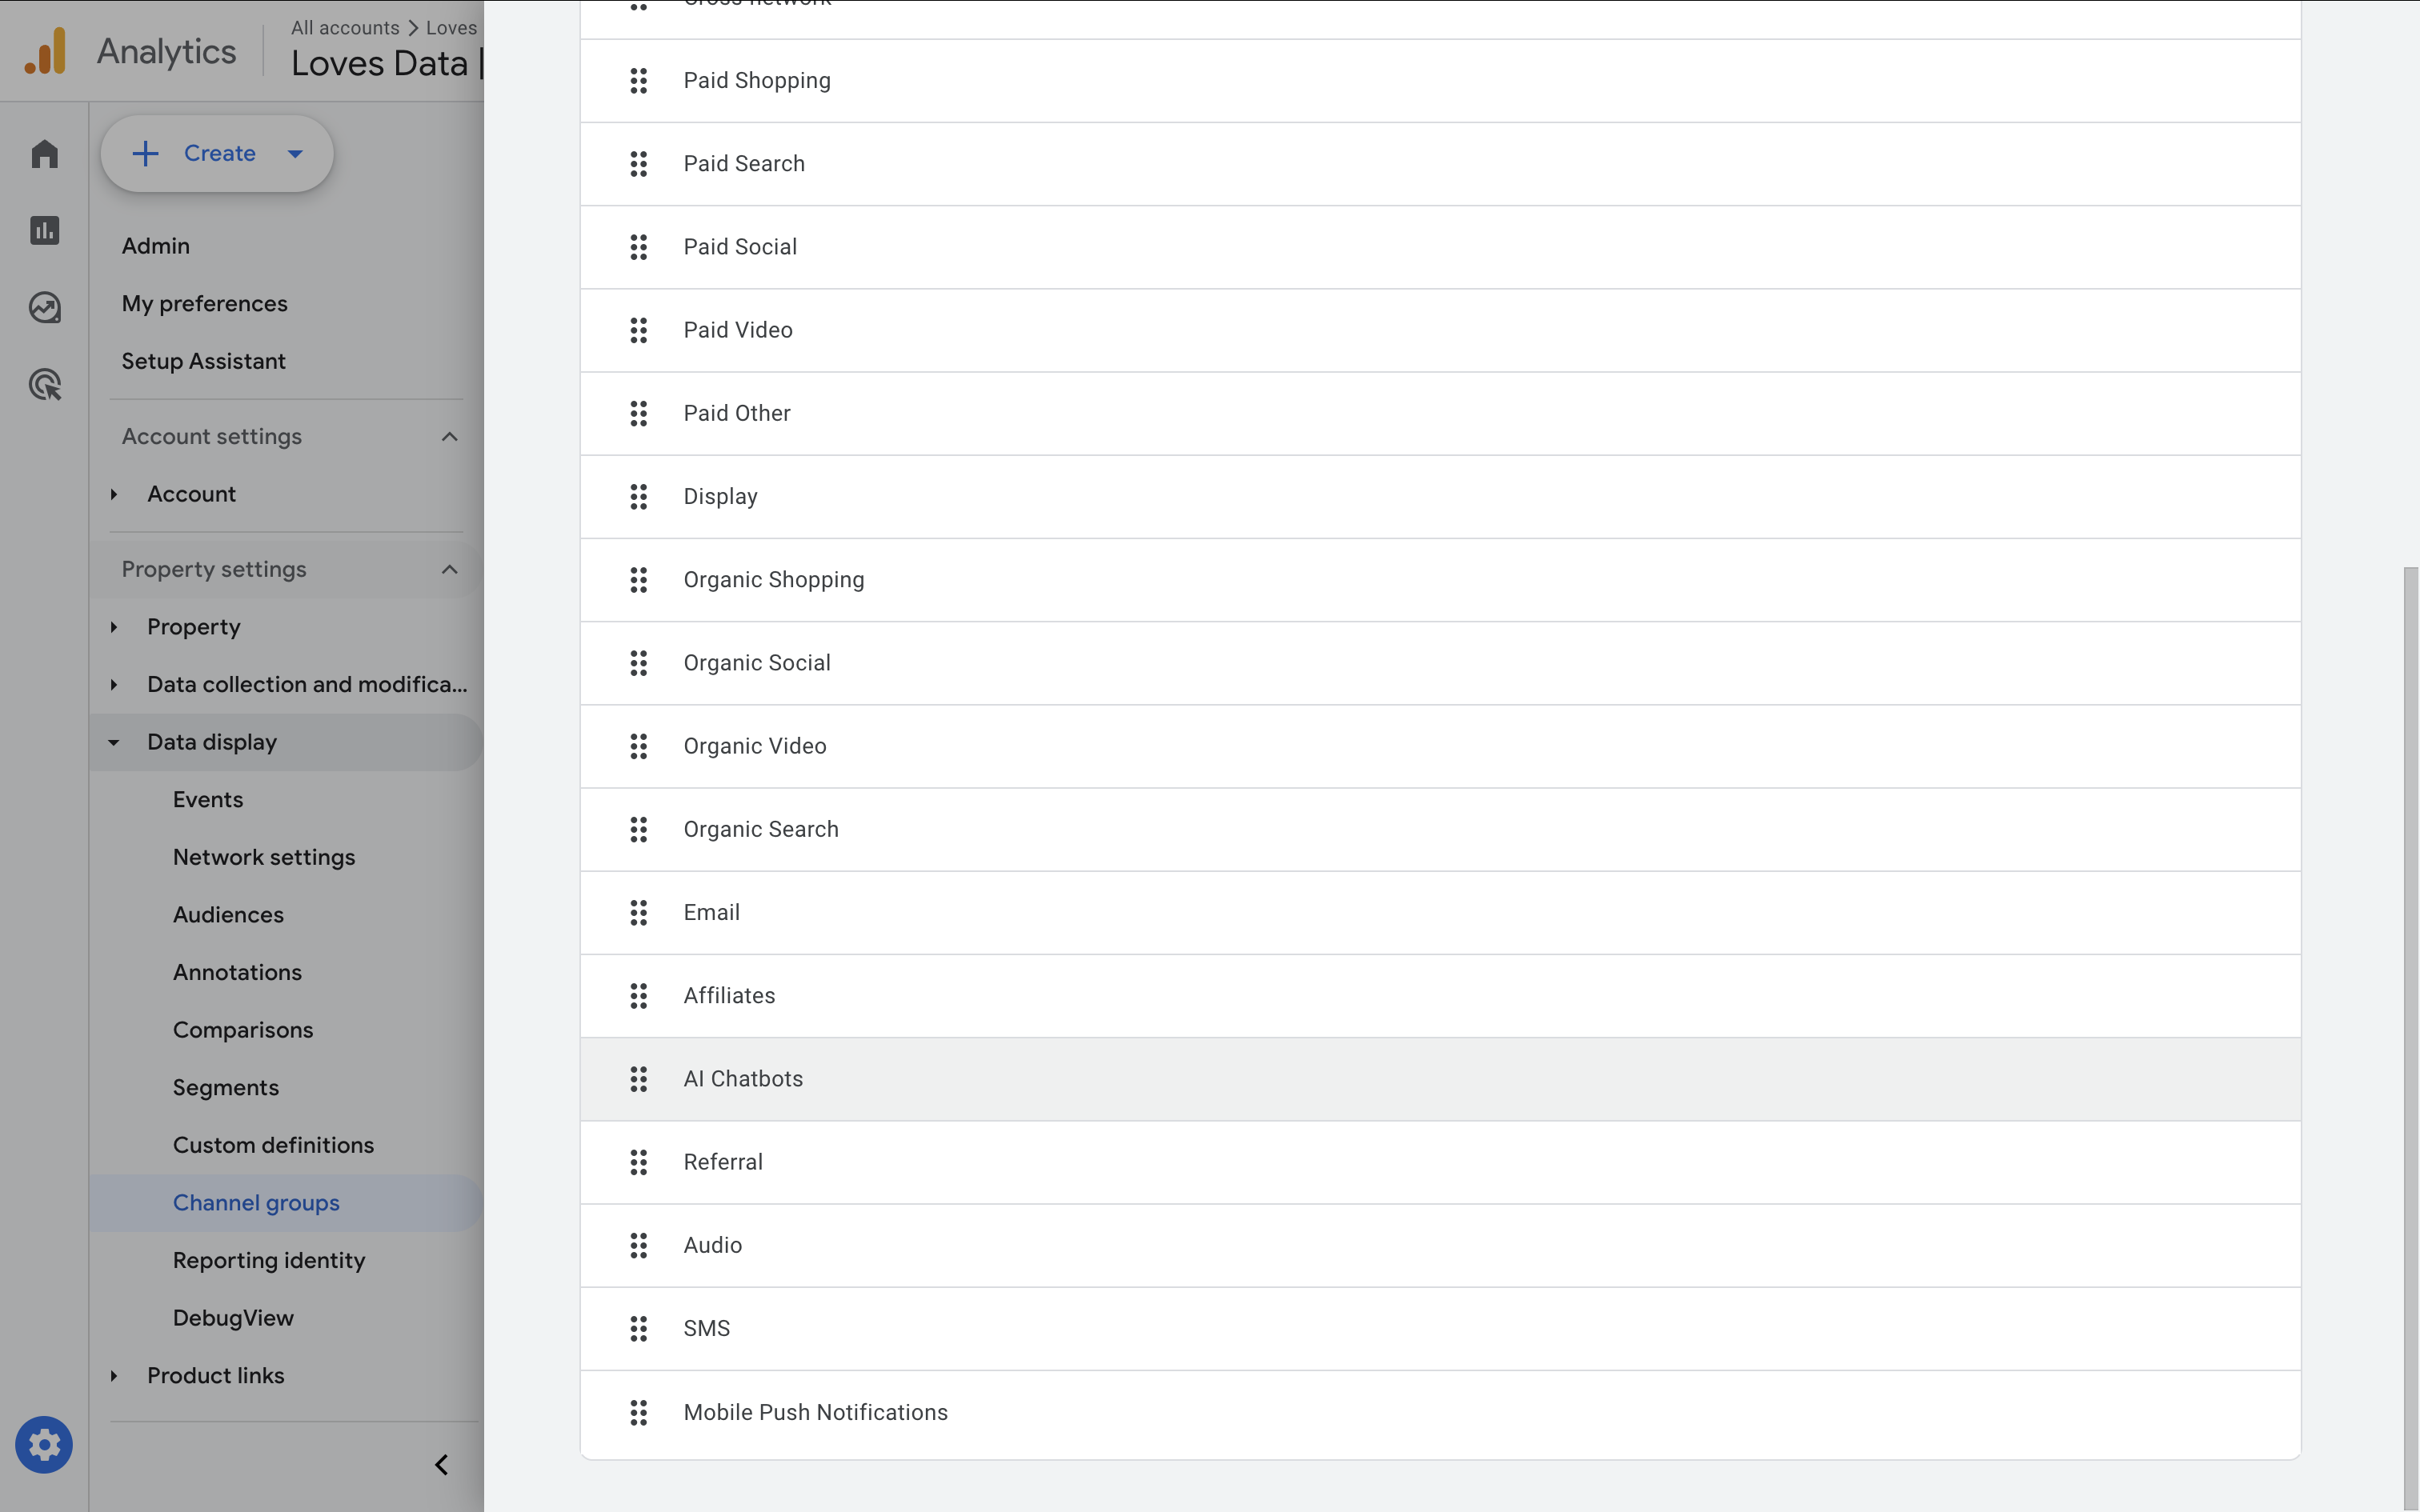
Step 4: Reorder channels
This is crucial. GA4 evaluates channel rules in order, top to bottom. If 'Referral' is listed above your new AI channel, AI visits will be assigned to Referral first. Click 'Reorder' and move 'AI Chatbots' above 'Referral', then click 'Apply'.
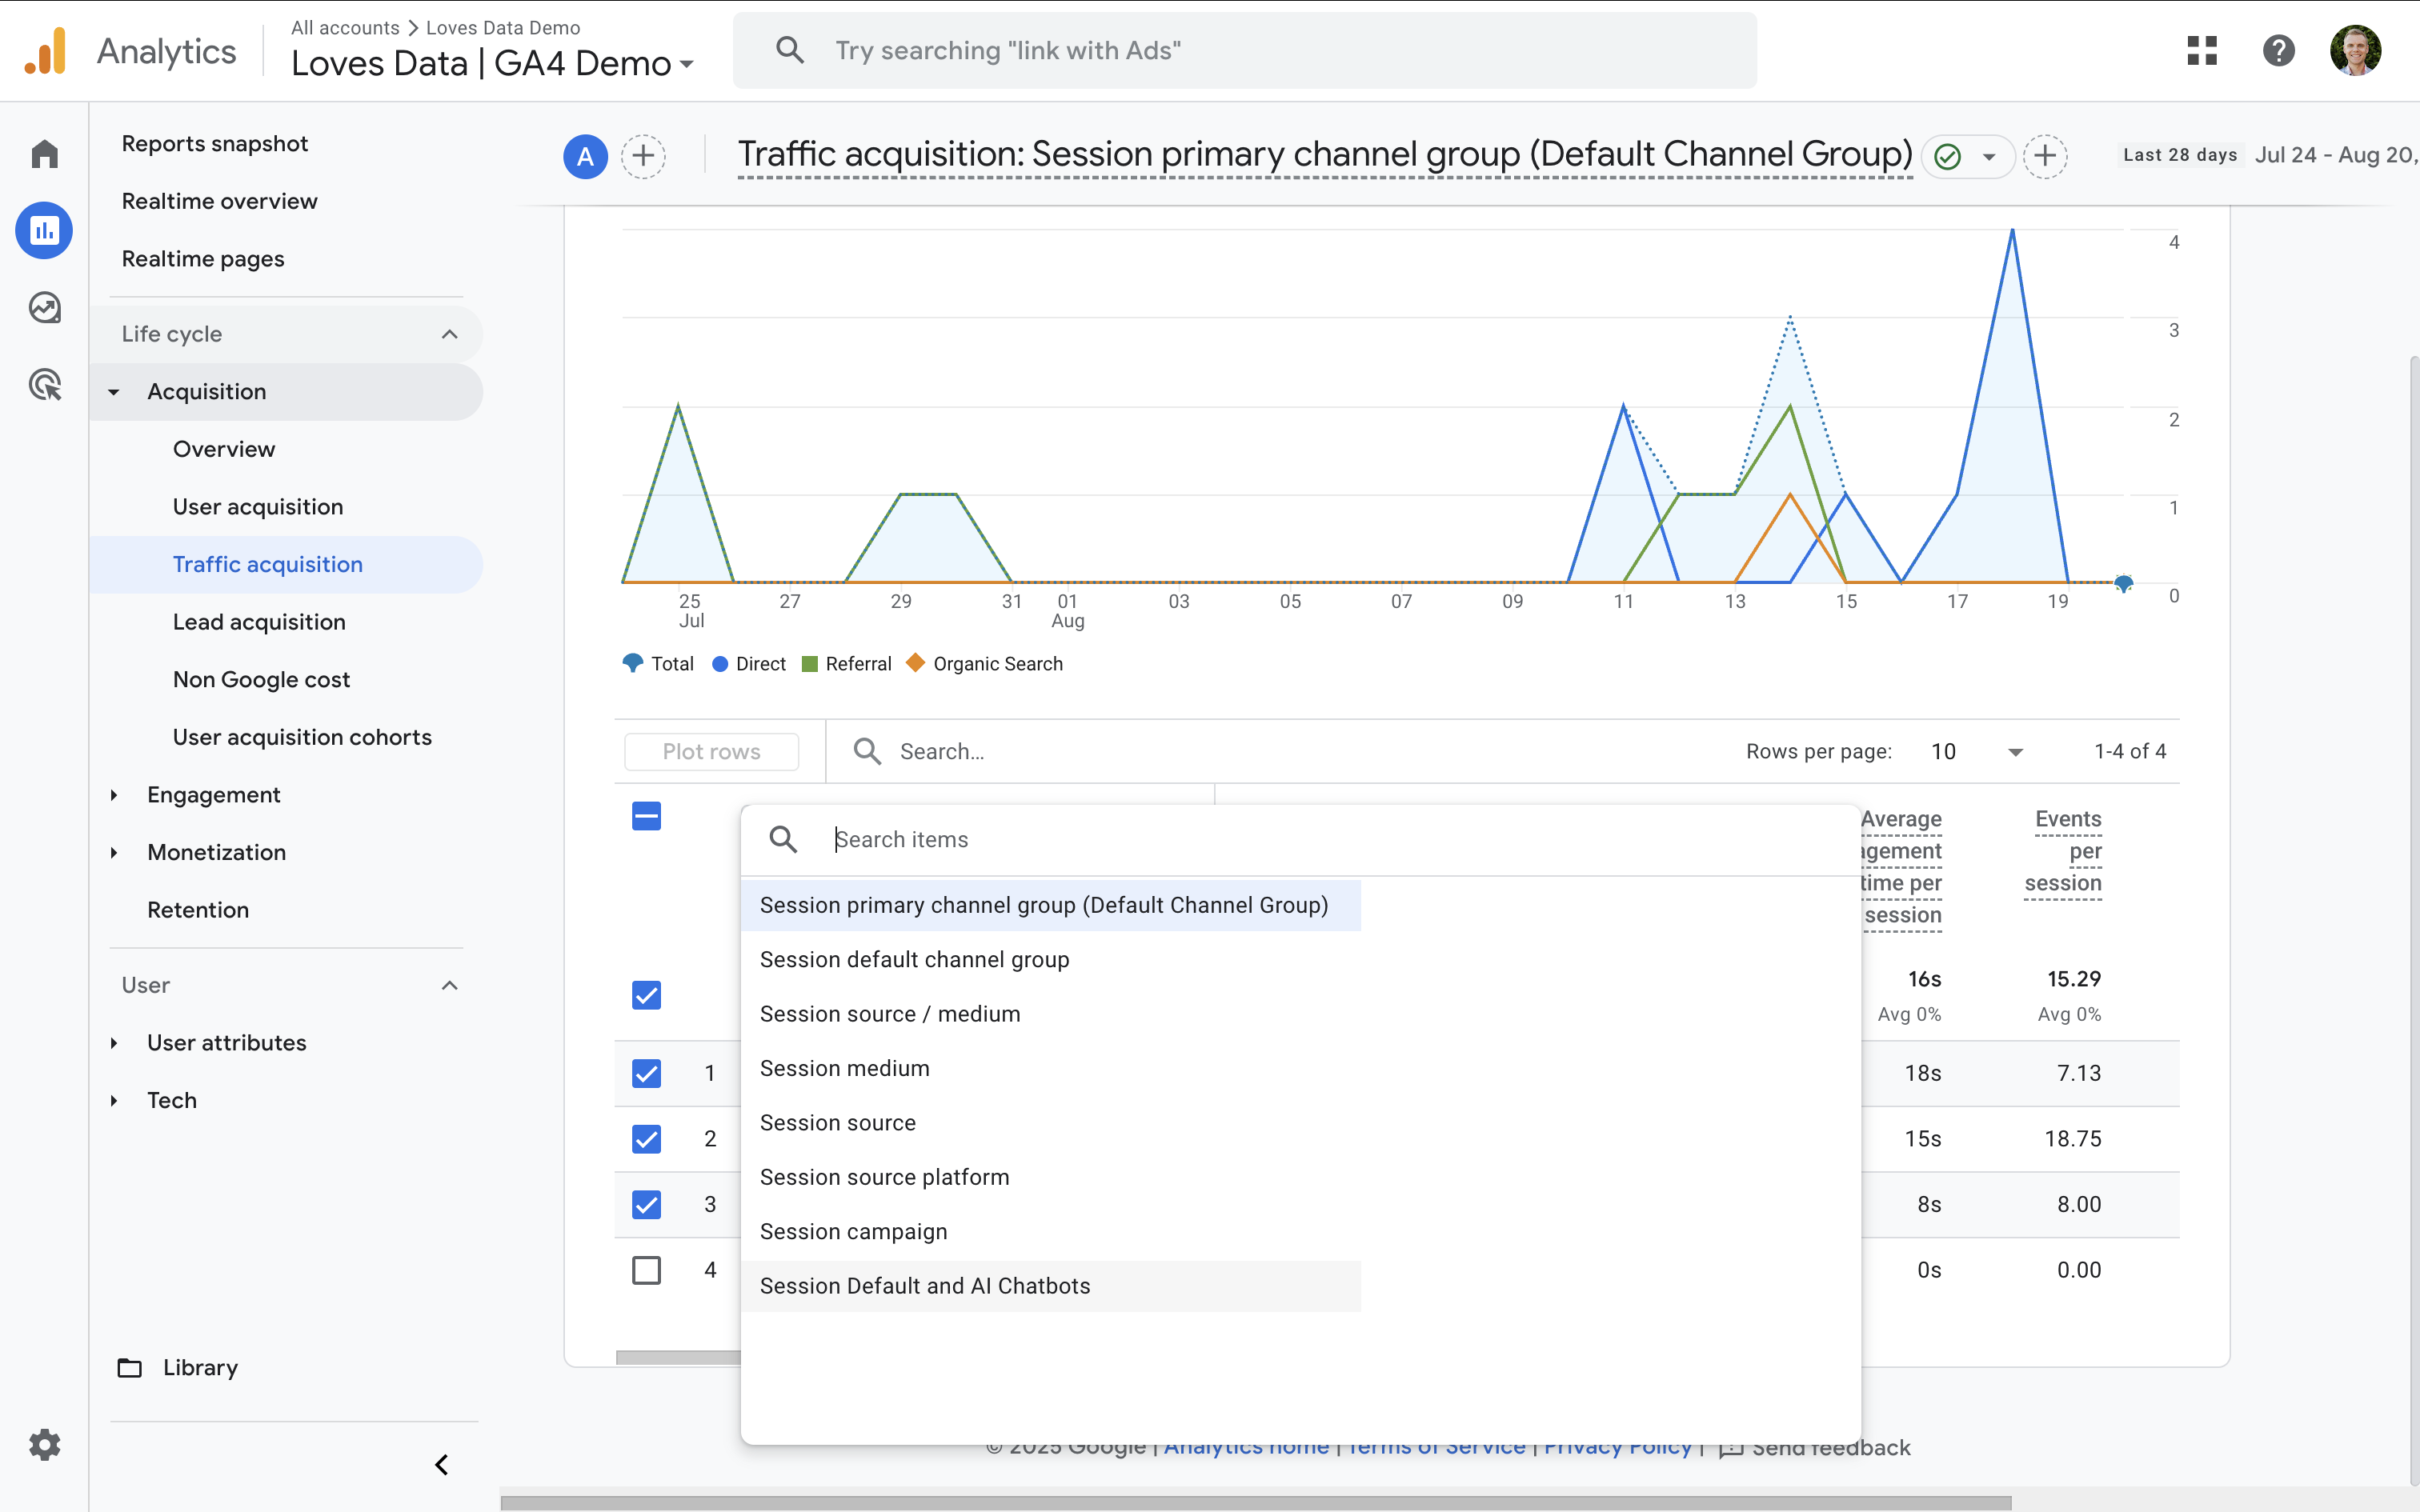
Step 5: Save and use in reports
Save your channel group. You can now select it as the primary dimension in standard reports. GA4 applies your channel rules to historical data, so you can immediately compare AI chatbots against your other channels.
Analyze and Extend Your AI Reporting
With your AI reporting options configured, here are some practical ways to apply your data.
See where AI visitors land
Combine your exploration or the AI channel with landing pages to find the content AI tools most often recommend. Use what you learn to adjust headlines, clarify introductions, and add helpful summaries.
Compare engagement and conversions
Review engagement rate, average engagement time, and your key event metrics. If AI-driven visitors convert differently from other channels, consider tailoring your on-page experience for these journeys.
Keep your regex fresh
AI platforms evolve – and so will the sources you see in GA4. Check the standard source reports regularly and updated your regular expressions as traffic sources change.
Quality and intent
Some AI visits arrive from chat interfaces with a clear next step in mind – others are more exploratory. Look beyond traffic volume to measure the content and paths that matter to your business.
Helpful tips and common mistakes to avoid
- Case sensitivity: GA4's regex is case-sensitive. Include the exact source values you observe, or adjust values when they're collected.
- Over-broad regex: Avoid catch-all patterns that accidentally include unrelated sources. Start small, check, then expand.
- Channel ordering: Always place your AI channel above referrals, otherwise it won’t capture the traffic you expect.
- 'Not set' medium: If you see AI-related sources with not set, investigate how the visit was generated – crawlers, previews, or AI search can behave differently.
Conclusion and Next Steps
You're likely to see a growing number of people finding your website using AI assistants. GA4 doesn’t automatically label this traffic, so taking the time to configure your property and reports is worth the effort. Start by spotting AI sources in the traffic acquisition report, then create a focused Exploration report and create customized standard reports for your team. When you’re ready, add an AI chatbots channel group so AI appears alongside your other channels.
From there, keep things simple – review landing pages, engagement, and conversions. Refine your regex as new tools appear, and continue improving the pages AI visitors are most likely to see first.