Google Ads Enhanced Conversions with User-Provided Data Tag (GTM Setup Guide)
Benjamin Mangold
How to Set Up Enhanced Conversions in Google Ads Using the User-Provided Data Tag in Google Tag Manager
Enhanced conversions in Google Ads help improve the accuracy of your conversion tracking by securely sending hashed user data – like email addresses, phone numbers, and mailing addresses – to Google Ads. This helps Google better match conversions across devices and sessions, ultimately improving your campaign performance and reporting.
In this step-by-step guide, you’ll learn how to set up enhanced conversions using the Google Ads User-Provided Data Event tag in Google Tag Manager (GTM). This method replaces the older approach of attaching user data directly to your conversion tag.
Whether your website runs on WordPress, Wix, Squarespace, or another platform that supports Google Tag Manager, the steps in this guide will work reliably. You can also follow along in my video tutorial on YouTube:
Table of Contents
- Step 1: Identify the Form You Want to Track
- Step 2: Create a User-Provided Data Variable in Google Tag Manager
- Step 3: Create a Form Submission Trigger
- Step 4: Configure the Google Ads User-Provided Data Event Tag
- Step 5: Ensure Your Google Ads Conversion Tracking Tag Is Set Up
- Step 6: Test Your Setup Using Google Tag Manager Preview Mode
- Step 7: Publish Your Changes
- Additional Tips and Resources
- Frequently Asked Questions
- Wrapping Up
Step 1: Identify the Form You Want to Track
Start by identifying the forms on your website where people submit their personal details. This could include a contact form, lead generation form, or your ecommerce checkout.
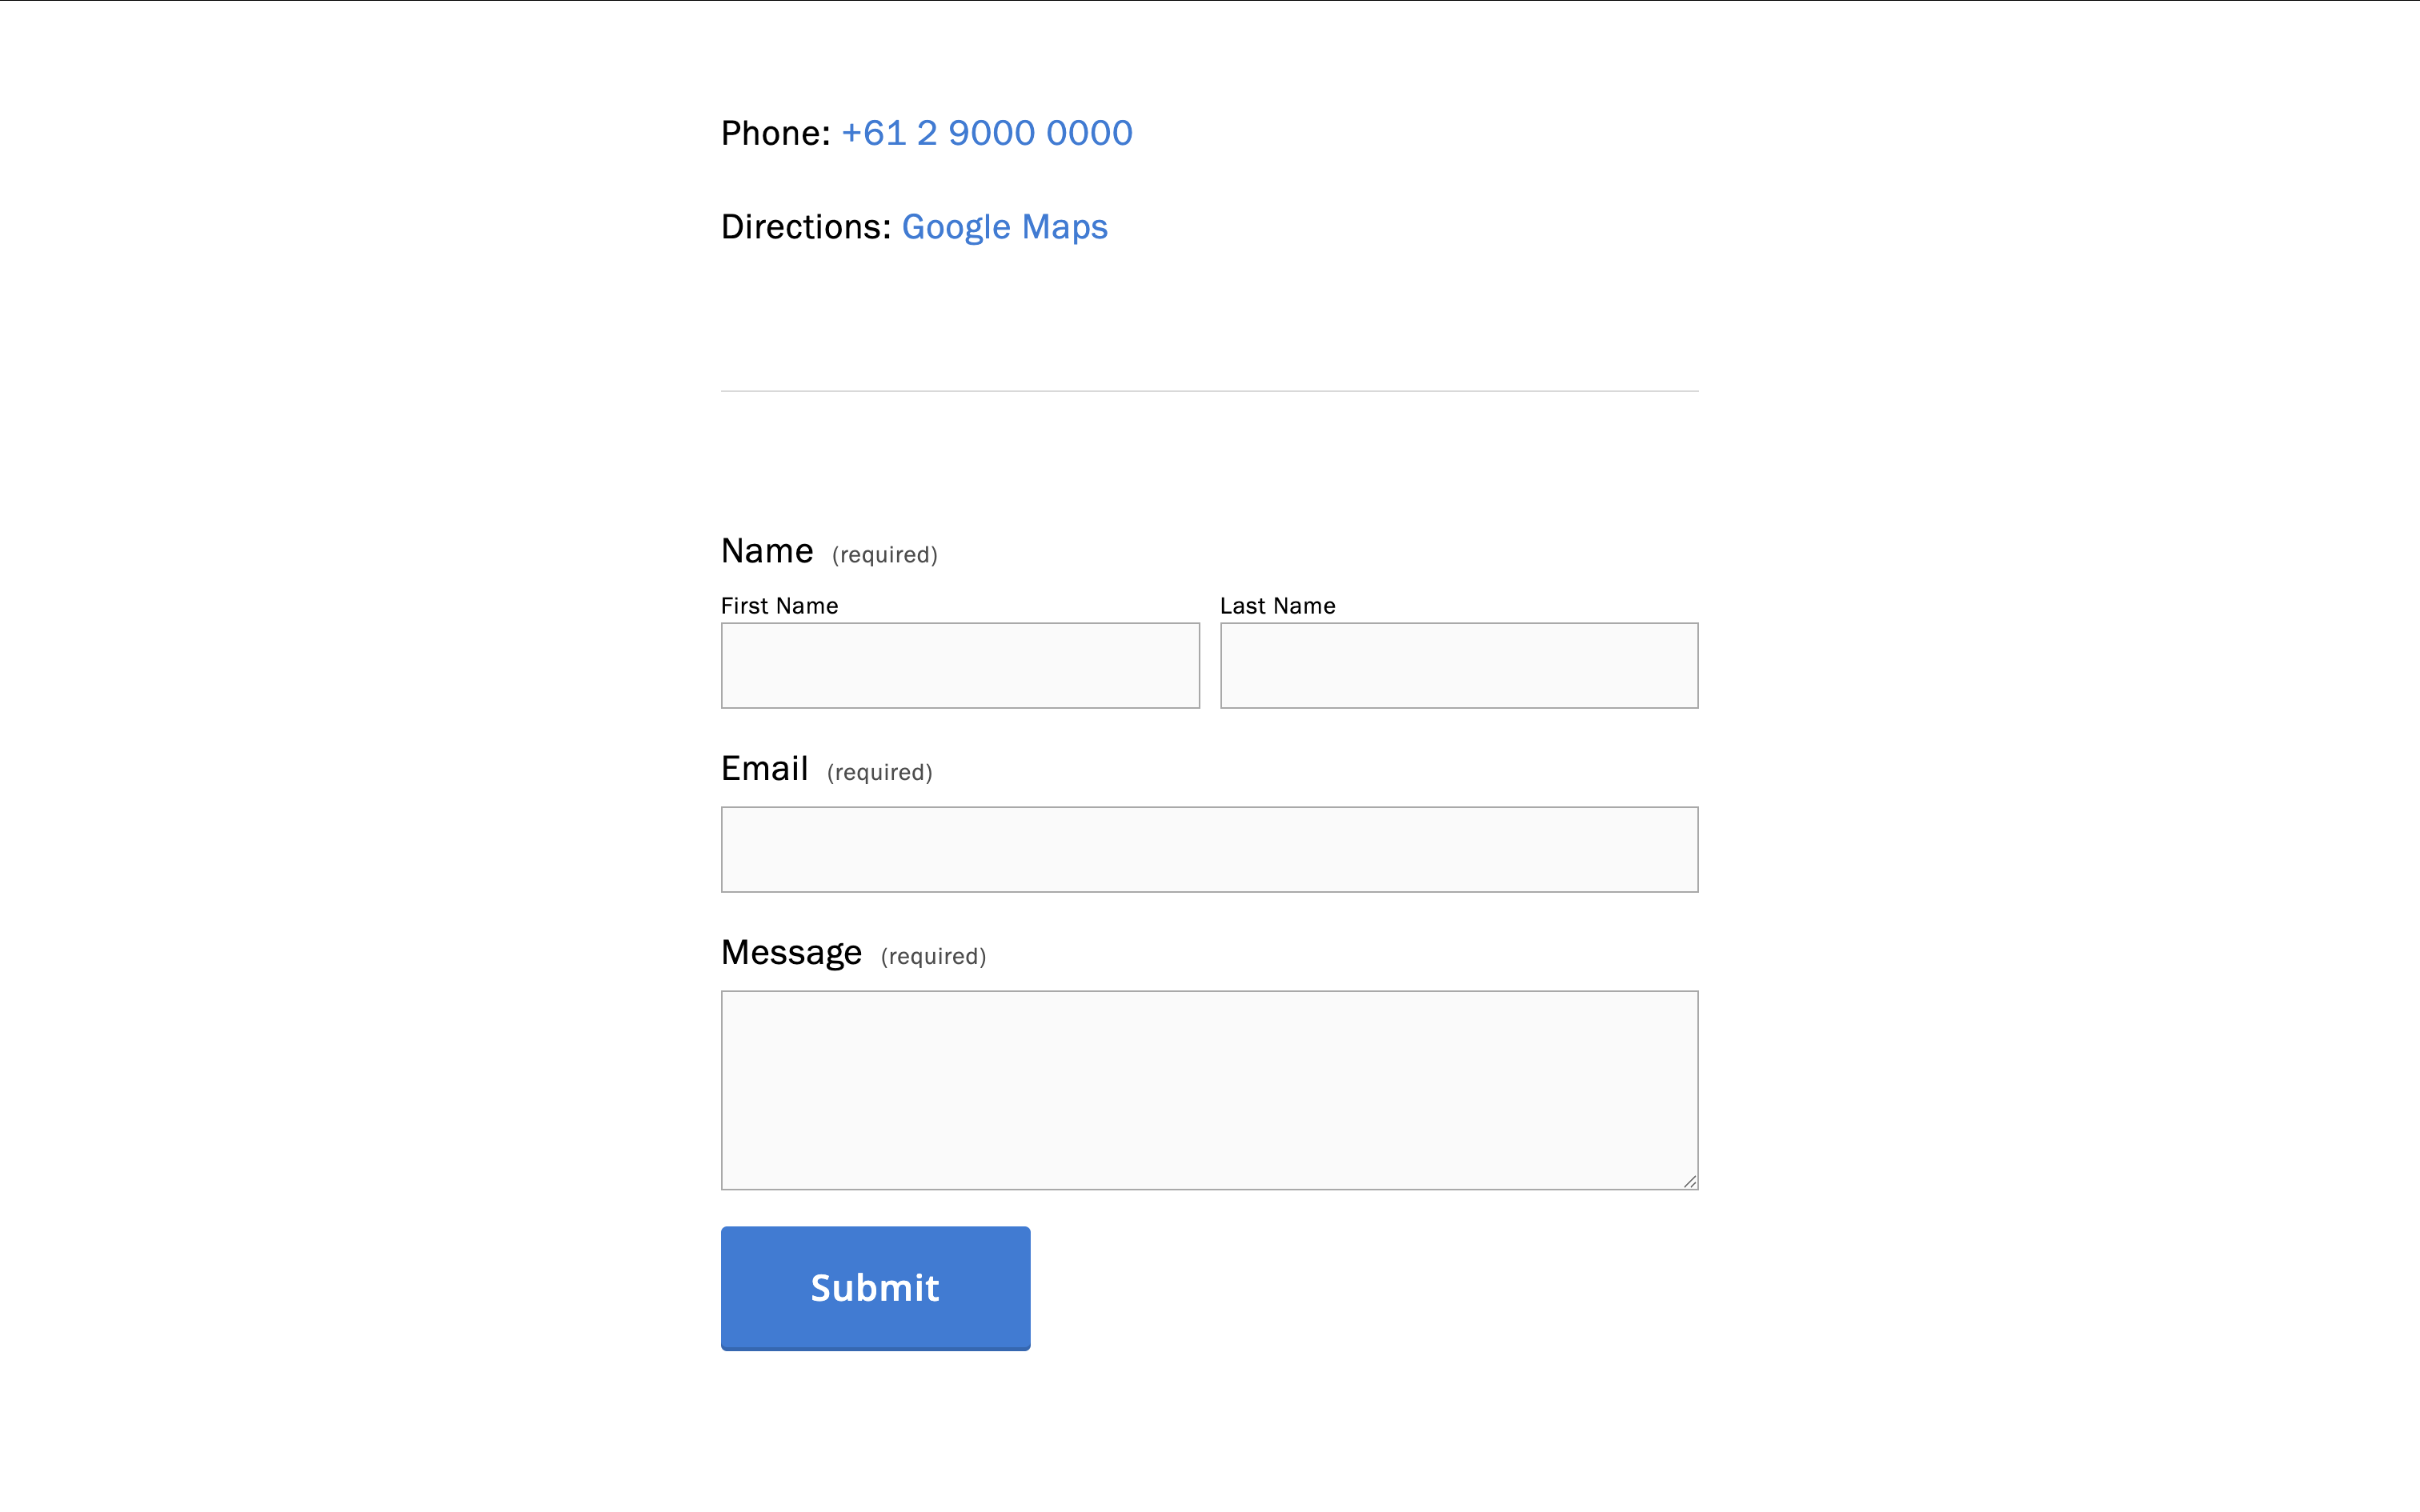
Enhanced conversions work by capturing user data submitted in these forms – such as email addresses – and sending it to Google Ads in a hashed format.
Step 2: Create a User-Provided Data Variable in Google Tag Manager
Now let’s create a variable that will automatically collect user data on your website:
- Navigate to ‘Variables’ in Google Tag Manager and select ‘New’.
- Name your variable something like User-Provided Data | Automatic.
- Select ‘Variable Configuration’, then scroll down and choose ‘User-Provided Data’.
- Choose ‘Automatic Collection’.
This tells GTM to detect email addresses, phone numbers, names, and addresses automatically.
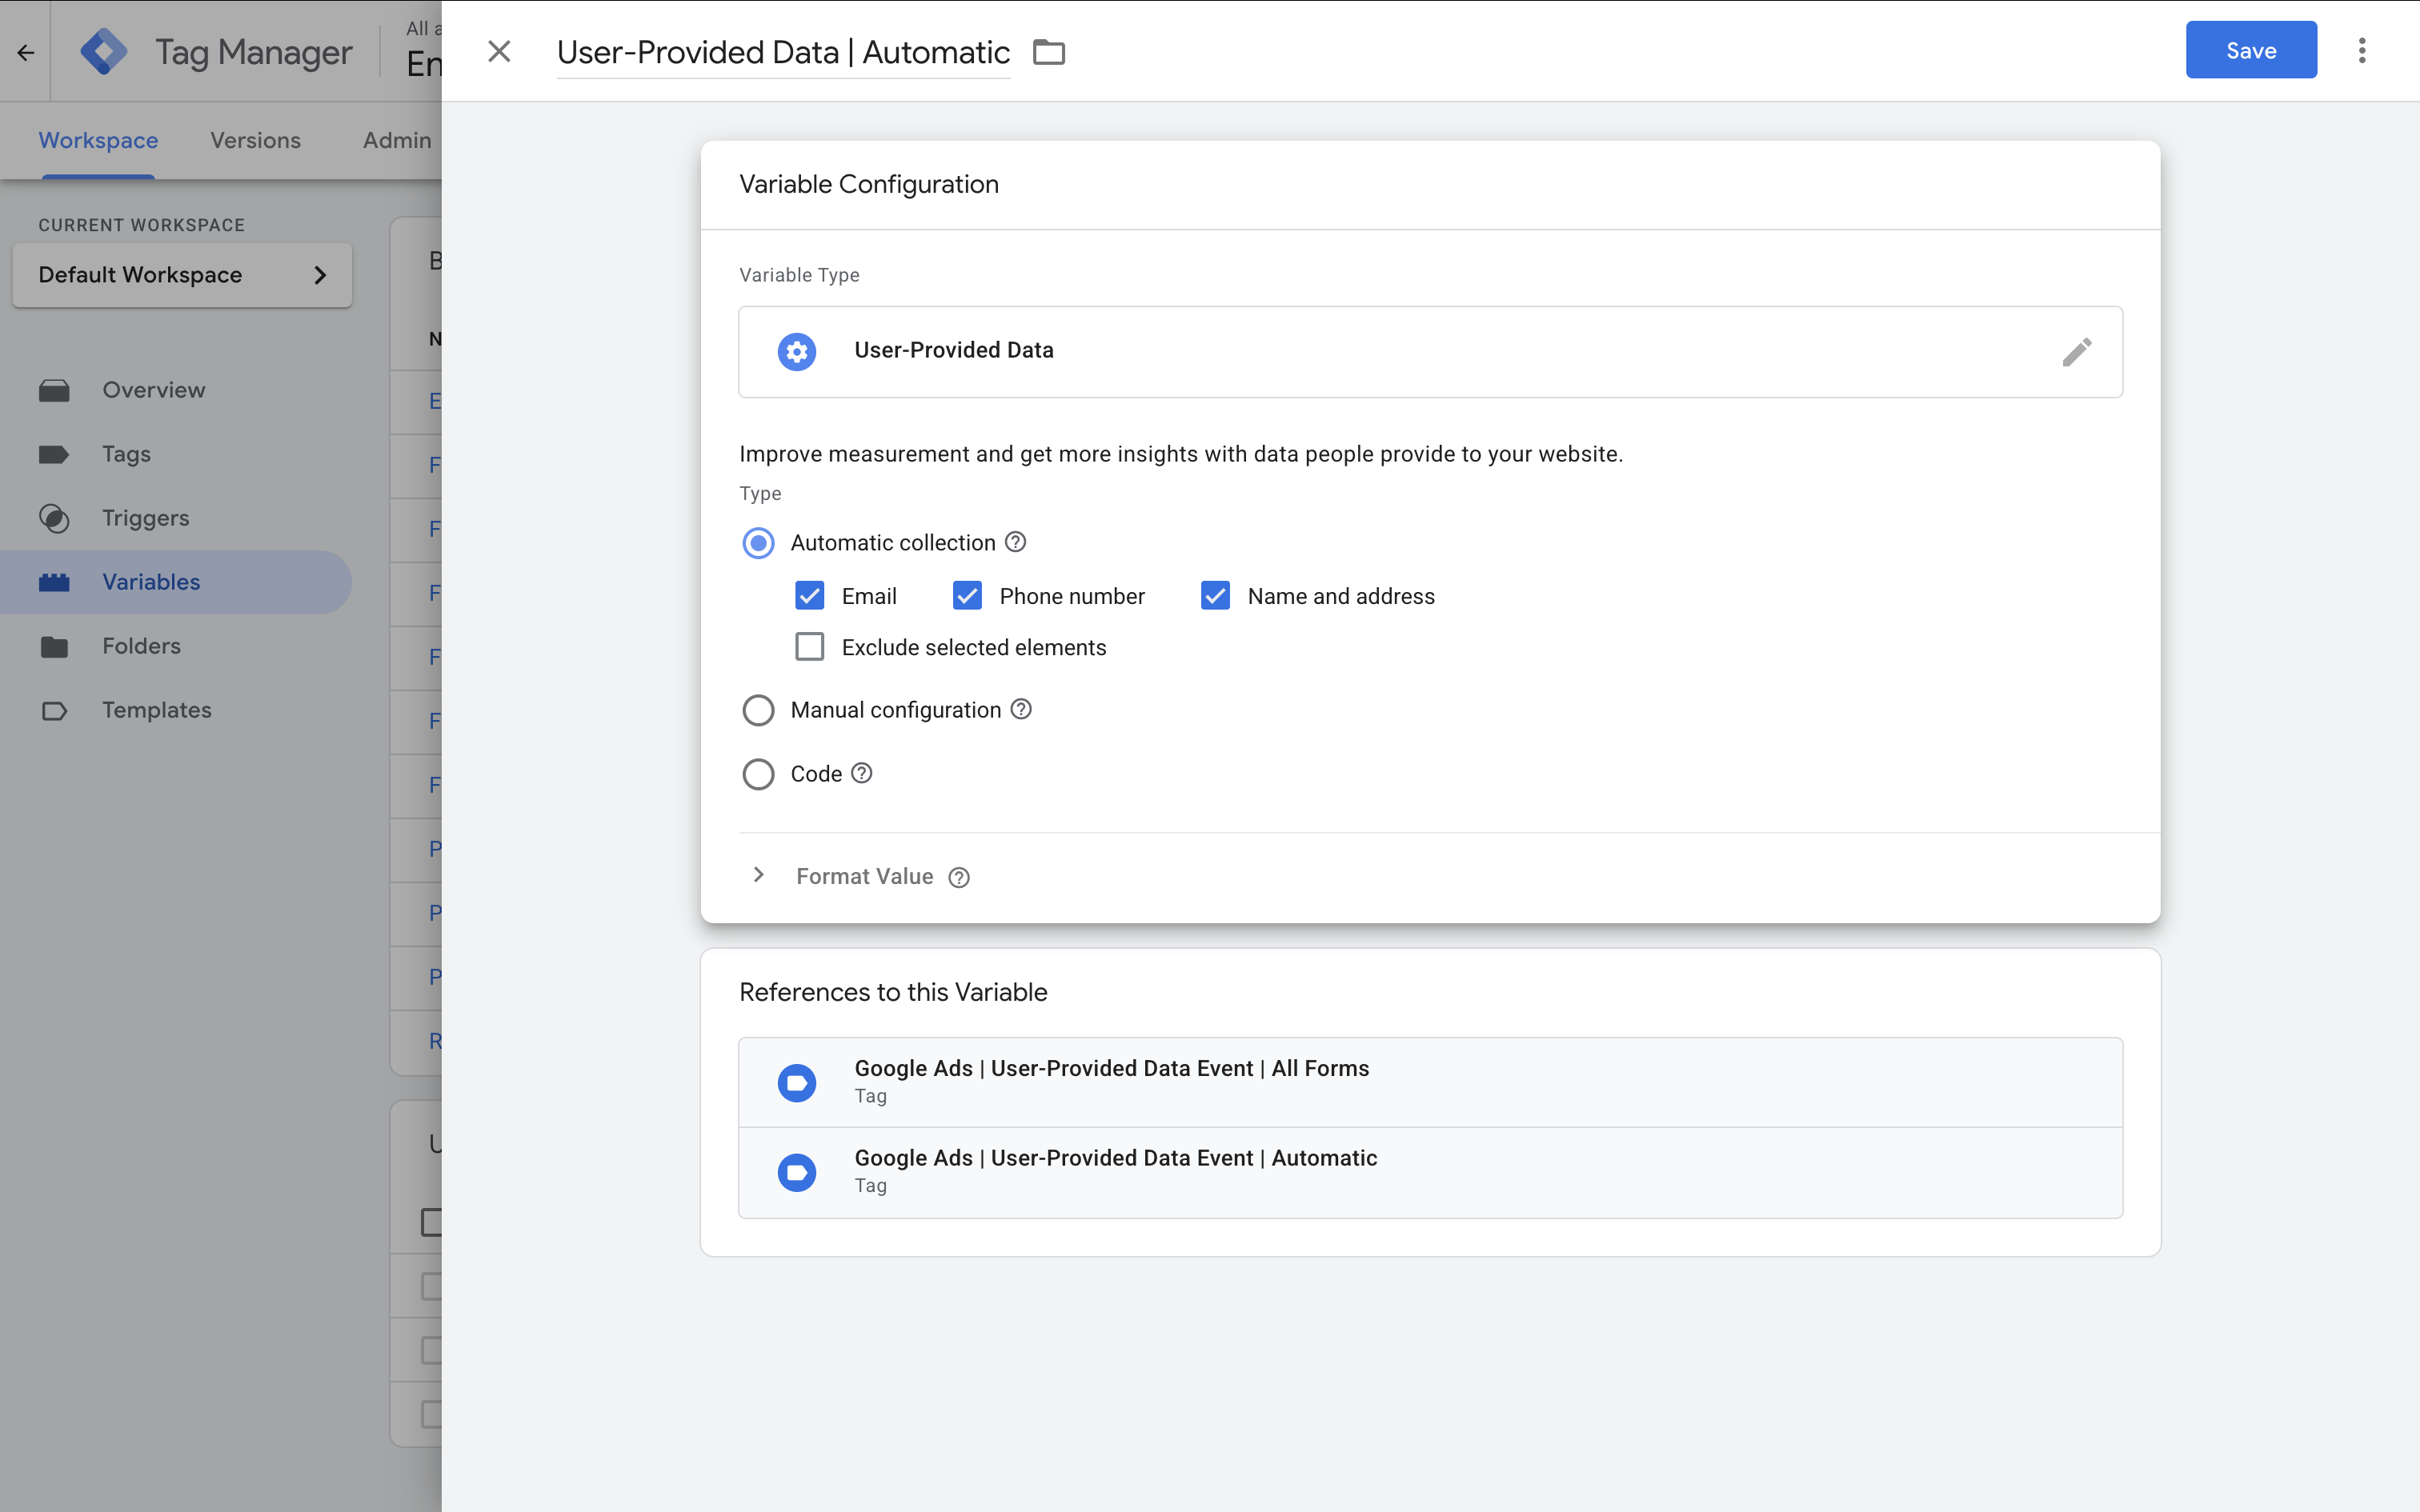
Tip: If your site includes your own business contact details – like an email or phone number – these could be automatically detected too. You can prevent this by enabling the ‘Exclude Selected Elements’ option and entering the relevant CSS selector.
Step 3: Create a Form Submission Trigger
Next, create a trigger to fire your tag when someone submits a form:
- Navigate to ‘Triggers’ and select ‘New’.
- Name your trigger something like Form Submission | All Forms.
- Select ‘Trigger Configuration’ and choose ‘Form Submission’.
- By default, it will fire on all forms – but you can choose ‘Some Forms’ to limit it to specific pages or URLs.
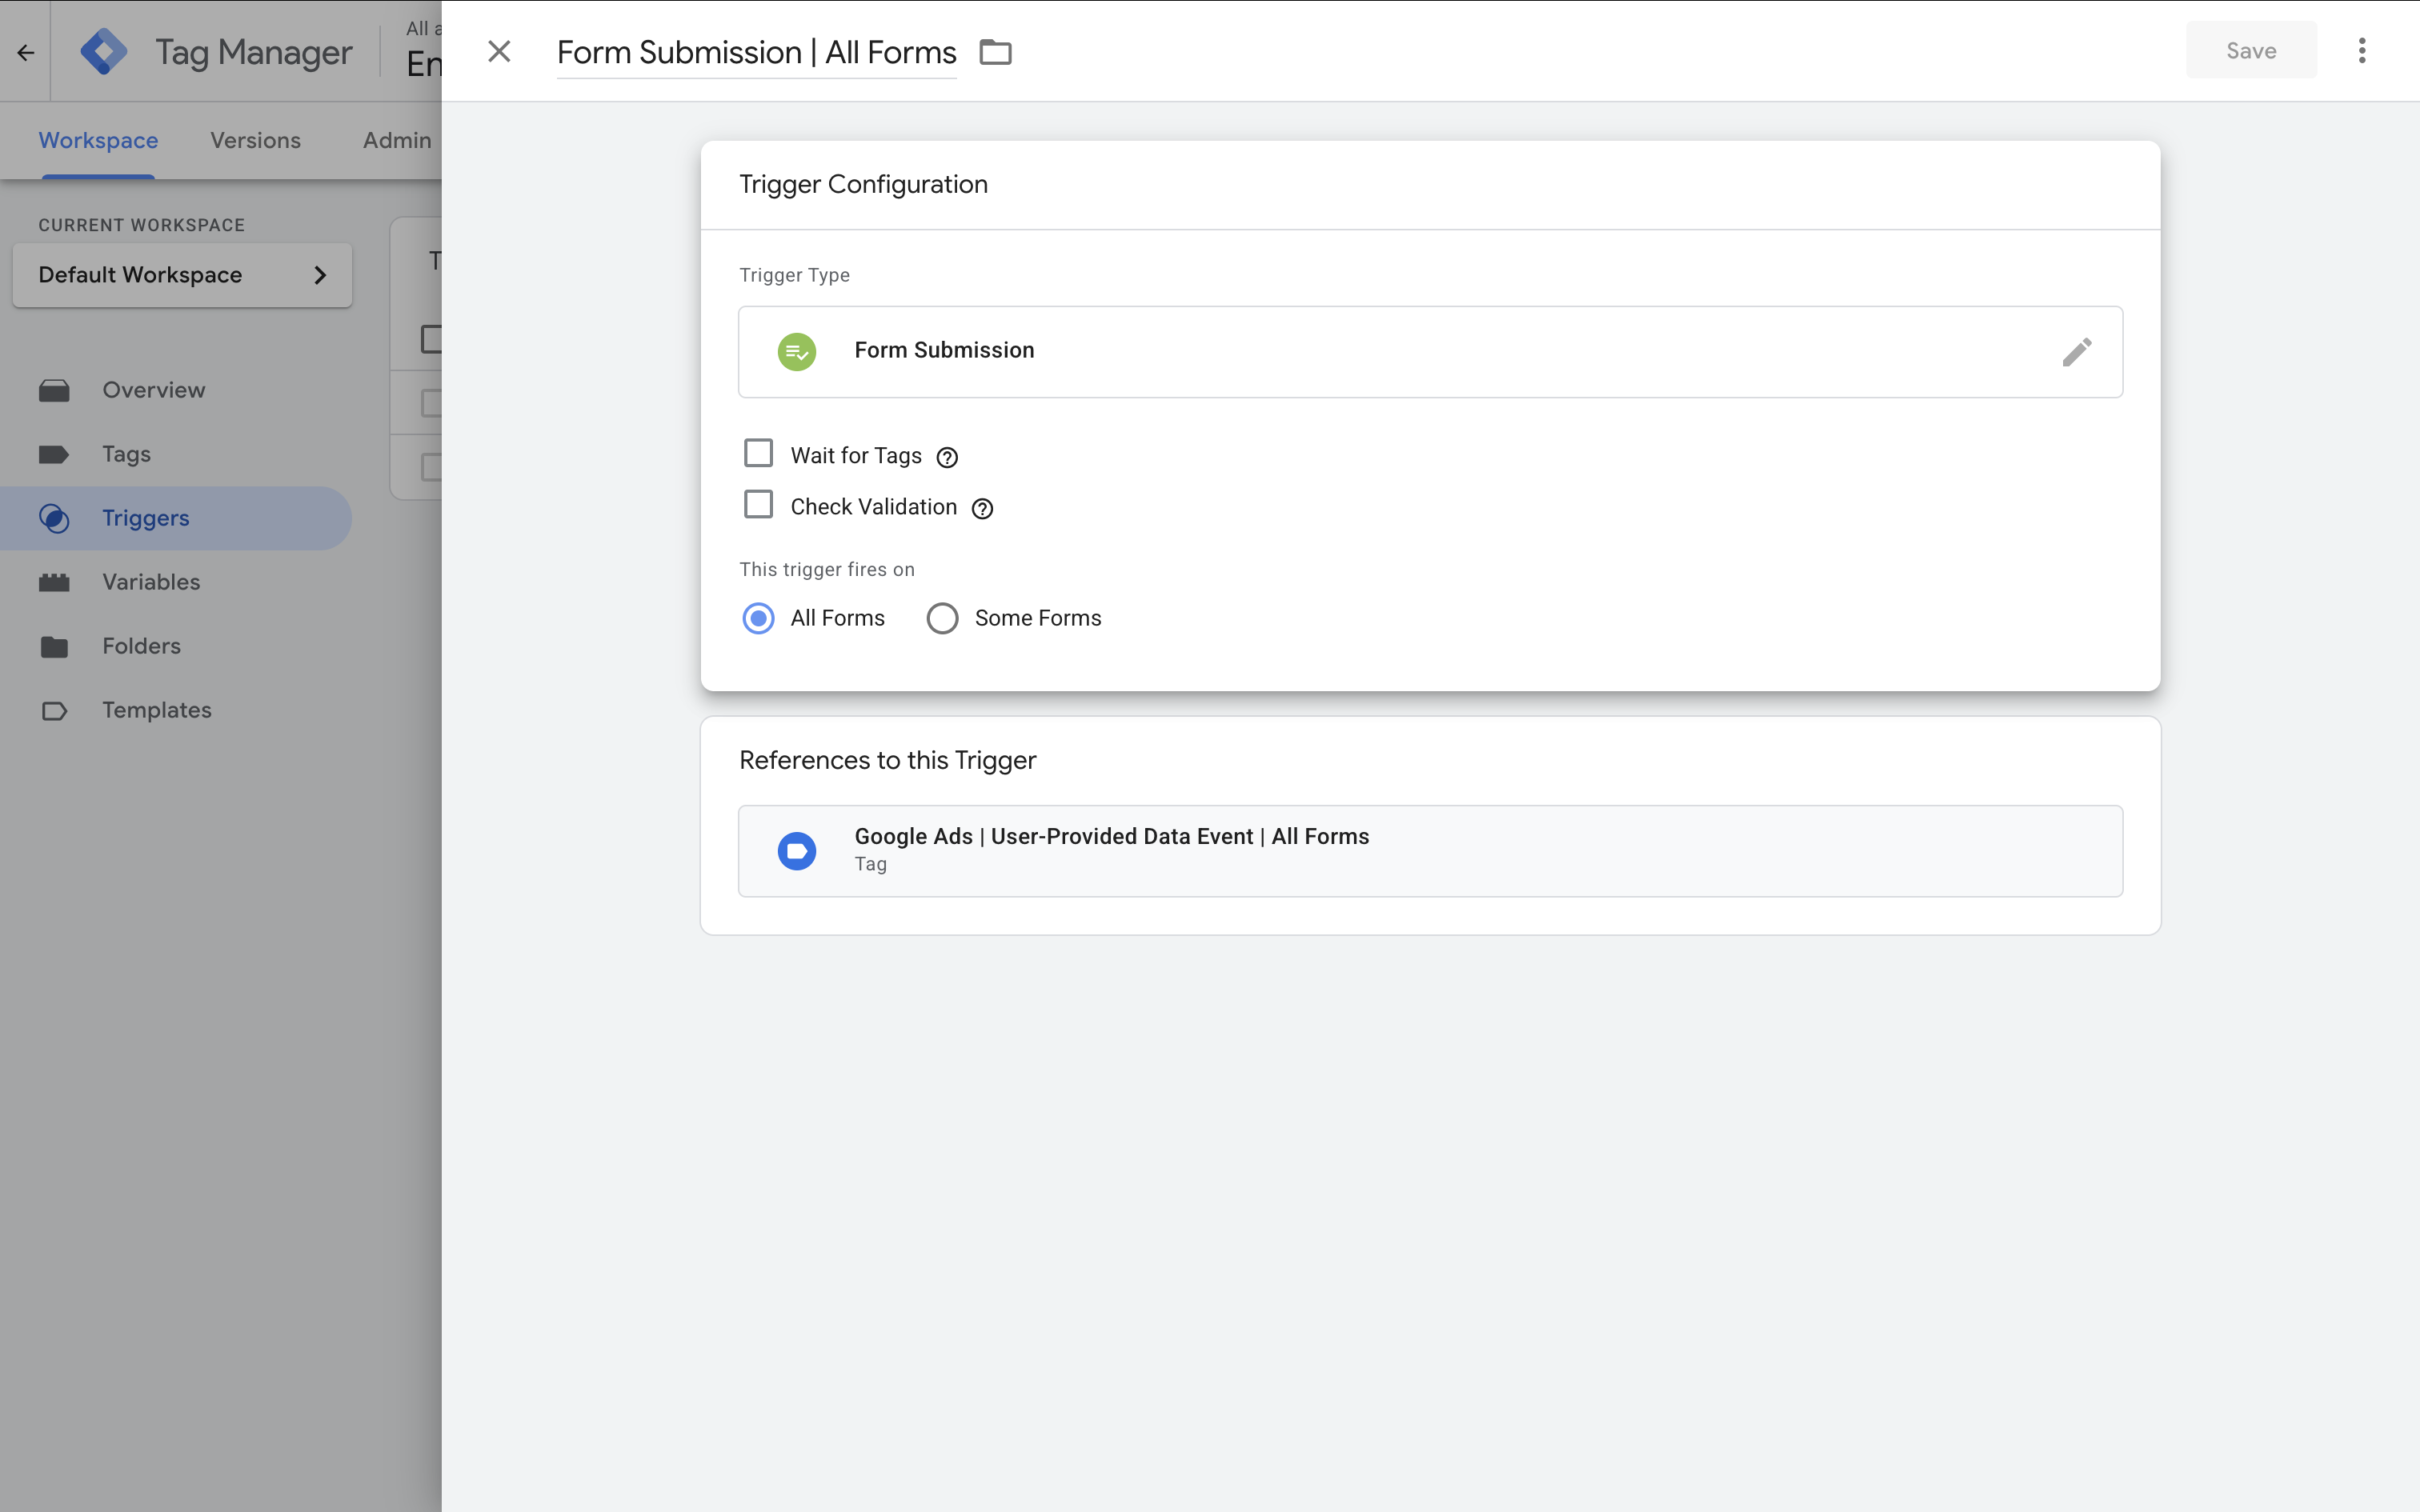
Tip: If you know the exact URLs of your forms, it’s a good idea to apply filters. This ensures your tag will only fire for the forms you specify.
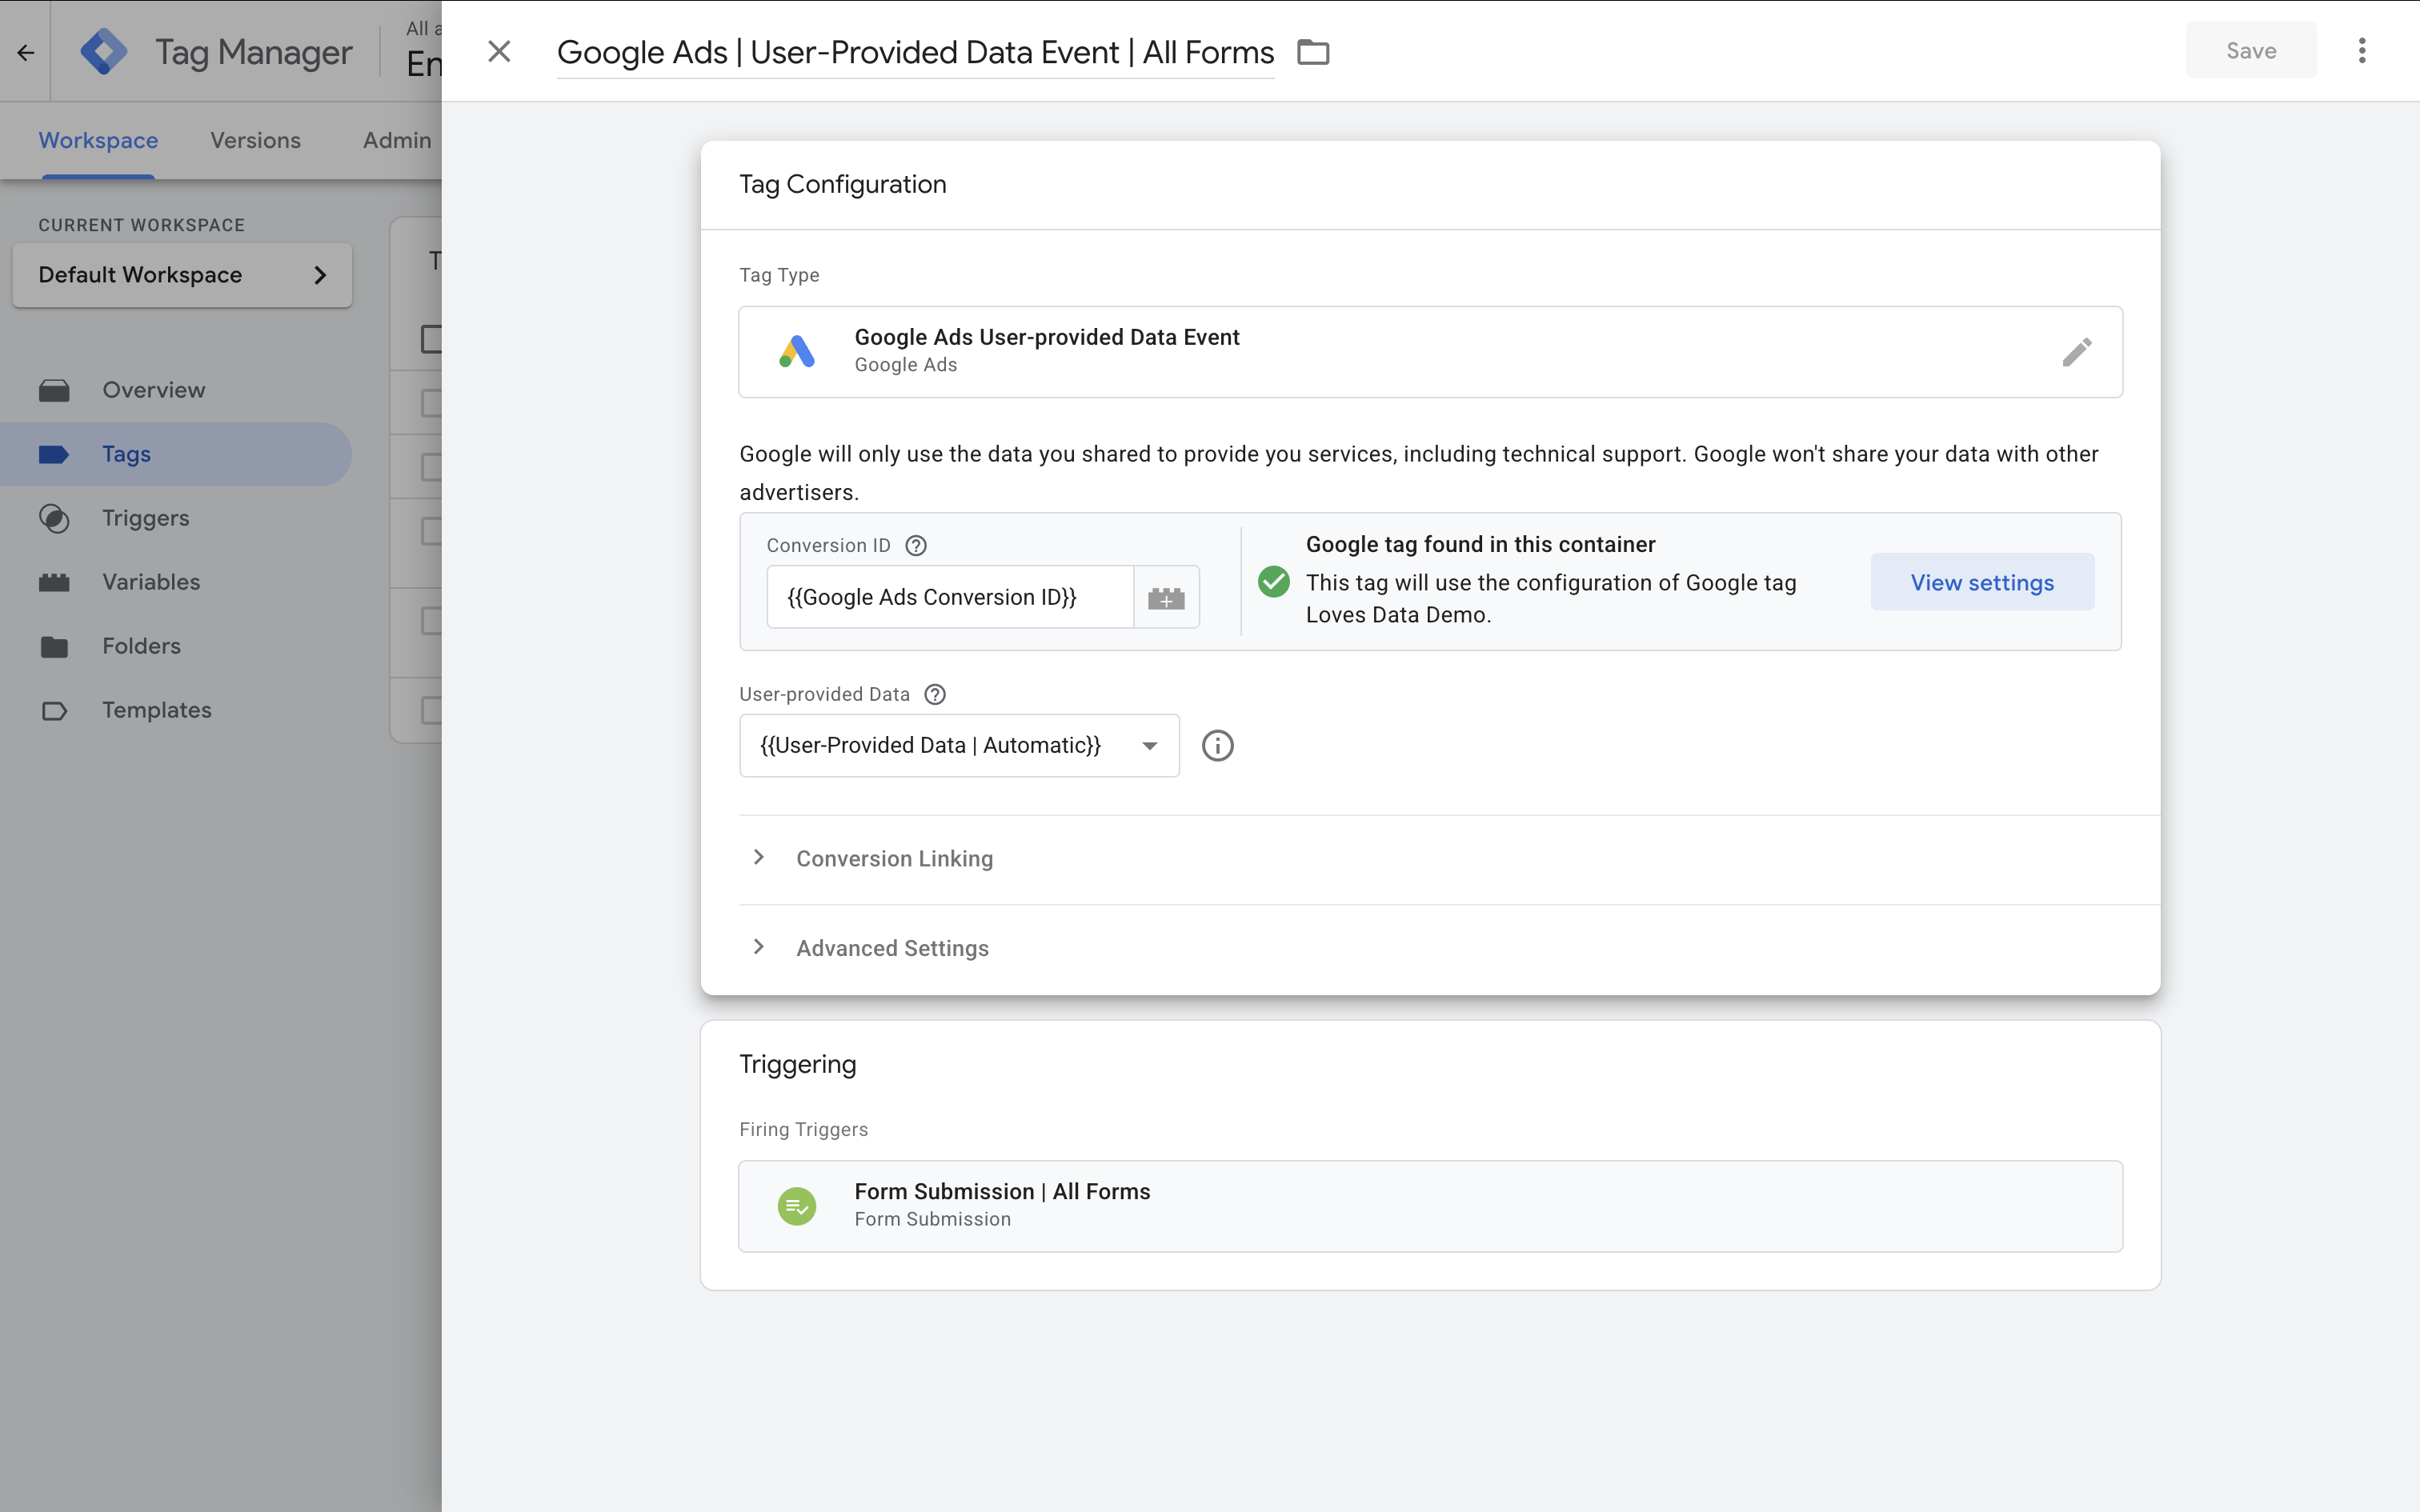
Step 4: Configure the Google Ads User-Provided Data Event Tag
Now set up the tag that will send the hashed user data to Google Ads:
- Head to ‘Tags’ and select ‘New’.
- Name your tag – for example, Google Ads | User-Provided Data Event | All Forms.
- Choose ‘Tag Configuration’ and select ‘Google Ads User-Provided Data Event’.
- Enter your Google Ads Conversion ID (just the numbers – leave out the “AW-” prefix).
- Under ‘User Provided Data’, choose the variable you created earlier.
- Select the form submission trigger you created in step 3.
Step 5: Ensure Your Google Ads Conversion Tracking Tag Is Set Up
You’ll also need to configure a standard Google Ads conversion tracking tag that fires when a form is successfully submitted.
If you haven’t set this up yet, you can follow my conversion tracking tutorial for step-by-step instructions.
Also check that Enhanced Conversions are enabled in your conversion action settings in Google Ads – this allows Google to use the user data for better matching.
Step 6: Test Your Setup Using Google Tag Manager Preview Mode
Before you publish, it’s important to test your setup:
- Select ‘Preview’ in Google Tag Manager to launch Tag Assistant.
- Enter your website’s URL and click ‘Connect’.
- Submit the form on your website.
- Check that both the user-provided data tag and the conversion tracking tag have fired.
Select the form submission event, choose your user-provided data tag, and confirm that the email or other personal data has been captured.
Then select your Google Ads conversion hit and check the em parameter. It should start with TV.1.~em~ followed by a hashed string.
Tip: You can also use Google’s EC Assist Chrome extension to help confirm your enhanced conversions are working correctly.
Step 7: Publish Your Changes
Once you’ve tested and confirmed everything is working, select ‘Submit’ in Google Tag Manager to publish your changes.
Well done – you’ve successfully set up enhanced conversions using the User-Provided Data Event tag!
Additional Tips and Resources
- Master Conversion Tracking with GTM
- Getting Help with Google Ads
- An Easy Step-by-Step Setup Guide for Google Tag Manager
- Using “EC Assist” to Check Enhanced Conversions
Frequently Asked Questions
What are Enhanced Conversions in Google Ads?
They use hashed customer data like email addresses to improve conversion matching across devices and browsers – leading to more accurate reporting and bidding opportunities.
Do I need user consent?
Yes – you should ensure your implementation complies with privacy laws like GDPR and CCPA. Always use appropriate consent mechanisms before collecting or sending user data.
Will this work on any website platform?
Yes – as long as your website supports Google Tag Manager, this method will work. That includes WordPress, Wix, Squarespace, Shopify, and more.
What if the tag picks up my business contact info?
You can prevent this by excluding those elements in your User-Provided Data variable settings. Use CSS selectors like .footer-email to avoid capturing business info.
How do I verify it’s working?
Use GTM’s Preview mode and Tag Assistant. Look for the em parameter on the conversion hit. You can also use the EC Assist Chrome extension for confirmation.
Do I need both tags?
Yes – one tag sends the hashed user data, and the other records the conversion. Both are required for enhanced conversions to work correctly.
Can I track multiple forms?
Absolutely. Just create separate triggers for each form and link them to your tags as needed.
Wrapping Up
Enhanced conversions can improve the accuracy of your Google Ads conversion tracking – especially when users switch devices or browsers. By using Google Tag Manager and the User-Provided Data Event tag, you gain more flexibility and transparency in your setup.
Just remember to exclude your business contact info, test carefully, and make sure both tags are firing correctly. If you’d like to go deeper, check out my online courses.
Want to learn more? Explore my in-depth courses covering Google Ads, Google Analytics, Google Tag Manager, and Looker Studio. They're perfect if you're ready to take your skills to the next level.