How to Set Up GTM Server-Side Tagging with Usercentrics
Benjamin Mangold
Server-side tagging gives you more control, better data accuracy, improved performance, and additional options to handle user privacy. In this guide, you'll learn how to set up Google Tag Manager (GTM) server-side tagging using Usercentrics' server-side tagging solution. You will also learn how to connect it to your Cookiebot banner so tags are triggered based on consent selections people make.
We'll start by walking through the steps to create your web and server containers, then we'll set up our tagging server with Usercentrics. Finally, you'll connect Cookiebot to your server-side container.
What you will cover:
- What is GTM Server-Side Tagging?
- Why Use Usercentrics for Server-Side Tagging?
- Step 1: Create a Web Container in Google Tag Manager
- Step 2: Install GTM on Your Website
- Step 3: Add the Google Tag for GA4 to Your Web Container
- Step 4: Create a Server-Side Container and Configure Usercentrics
- Step 5: Configure a Custom Domain and DNS
- Step 6: Connect the Custom Domain to Your Server-Side Container
- Step 7: Configure Clients and Tags in the Server-Side Container
- Step 8: Update the Web Container to Send Events to the Server
- Step 9: Connect Cookiebot to Your Server-Side Container
- Step 10: Test and Publish
- Troubleshooting Tips
- Conclusion
You can also follow along with my tutorial:
What is GTM Server-Side Tagging?
Server-side tagging loads your analytics and advertising tags from a server instead of in the browser. This is more efficient because you can send data to the server once and it can be forward to multiple platforms simultaneously, including Google Analytics, Google Ads, and other platforms.
This improves performance, reduces client-side loading, and gives you more control over the data that's collected. And when you connect your server container to a consent management platform like Cookiebot, it also helps ensure your analytics and marketing tags respect people's consent choices.
Why Use Usercentrics for Server-Side Tagging?
Usercentrics offers a managed hosting solution for GTM server containers. This means you don't have to set up and manage a server using Google Cloud Platform. It's faster to set up, easier to maintain, and includes integration options for cookie banners and consent handling.
Benefits also include:
- Better privacy and consent control when you connect to your cookie banner.
- Improved performance as browsers send fewer requests.
- More accurate data because there's less reliance on broswer-based tags.
Step 1: Create a Web Container in Google Tag Manager
If you already use GTM on your website, you can use your existing web container. Otherwise, you can create a new container by following these steps:
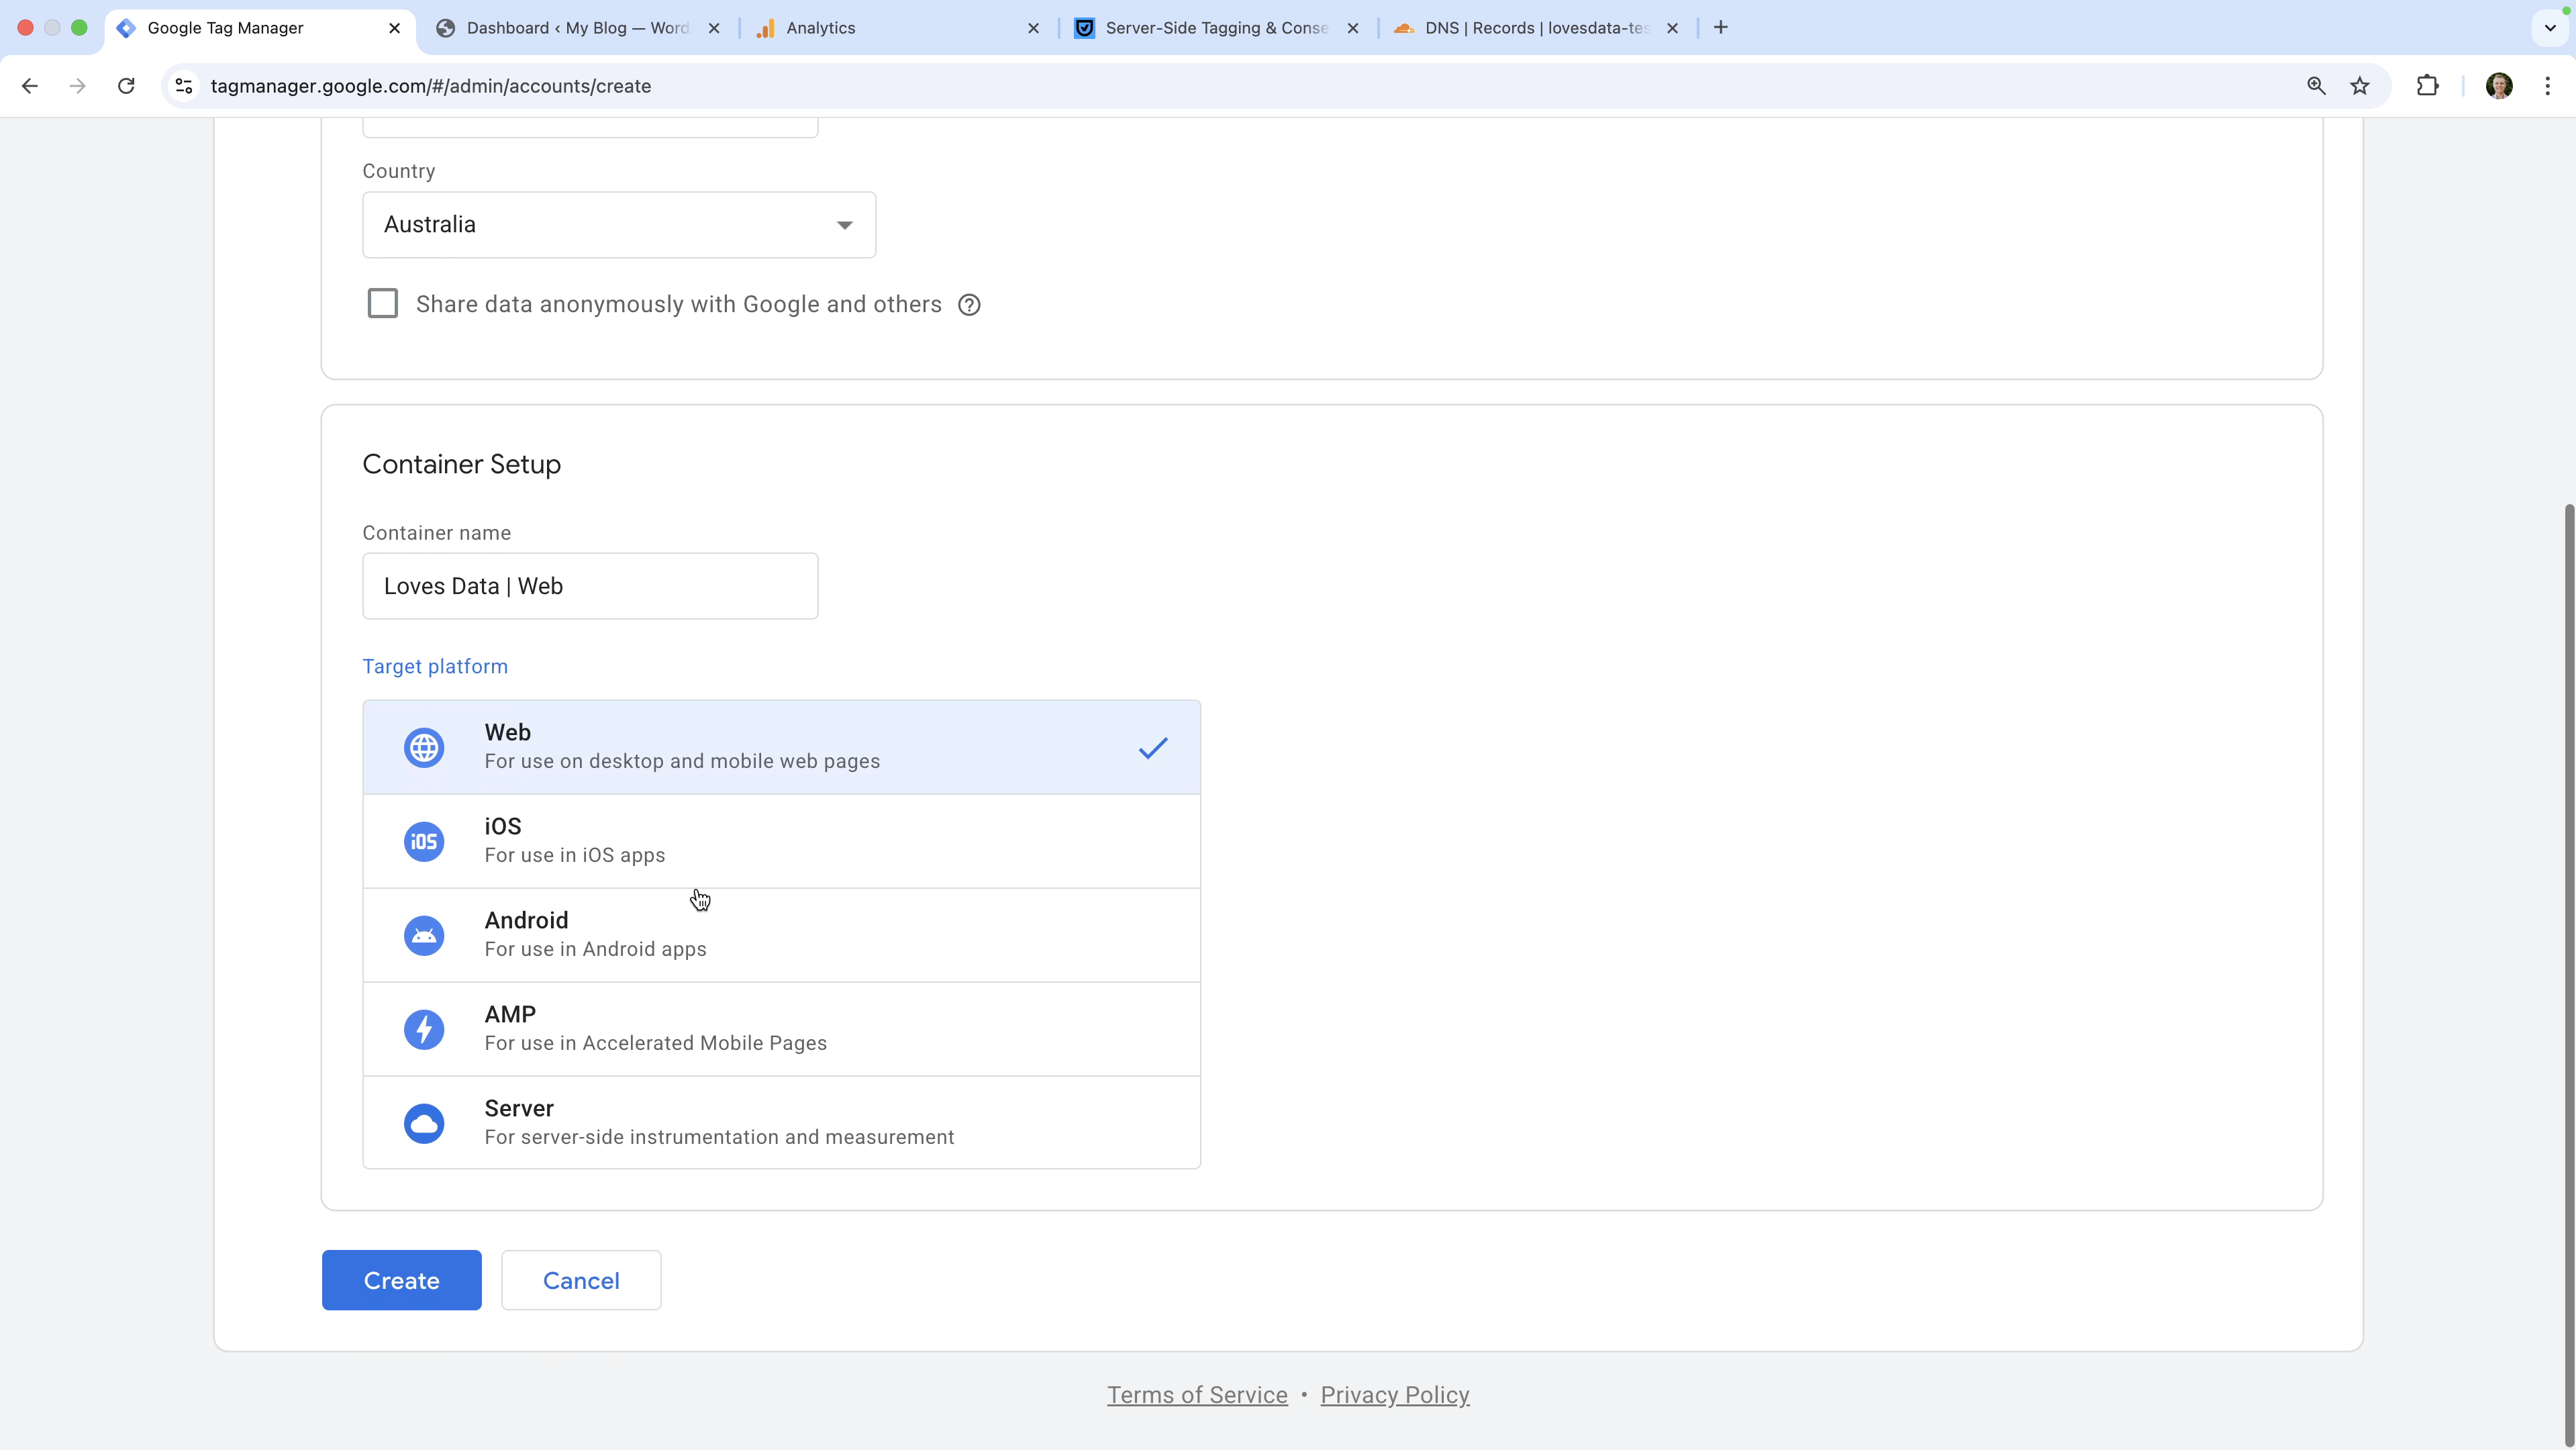
- Sign in to Google Tag Manager and click 'Create Account'.
- Enter a name for your account and select 'Web' as the container type (target platform).
- Name your container and click 'Create'.
Step 2: Install GTM on Your Website
The next step is to install your GTM web container on your website. If you're using WordPress, you can use a plugin like the GTM4WP plugin. Once you've installed the plugin, paste your container ID (for example, GTM-XXXXXXX) into the plugin settings and make sure it's enabled.
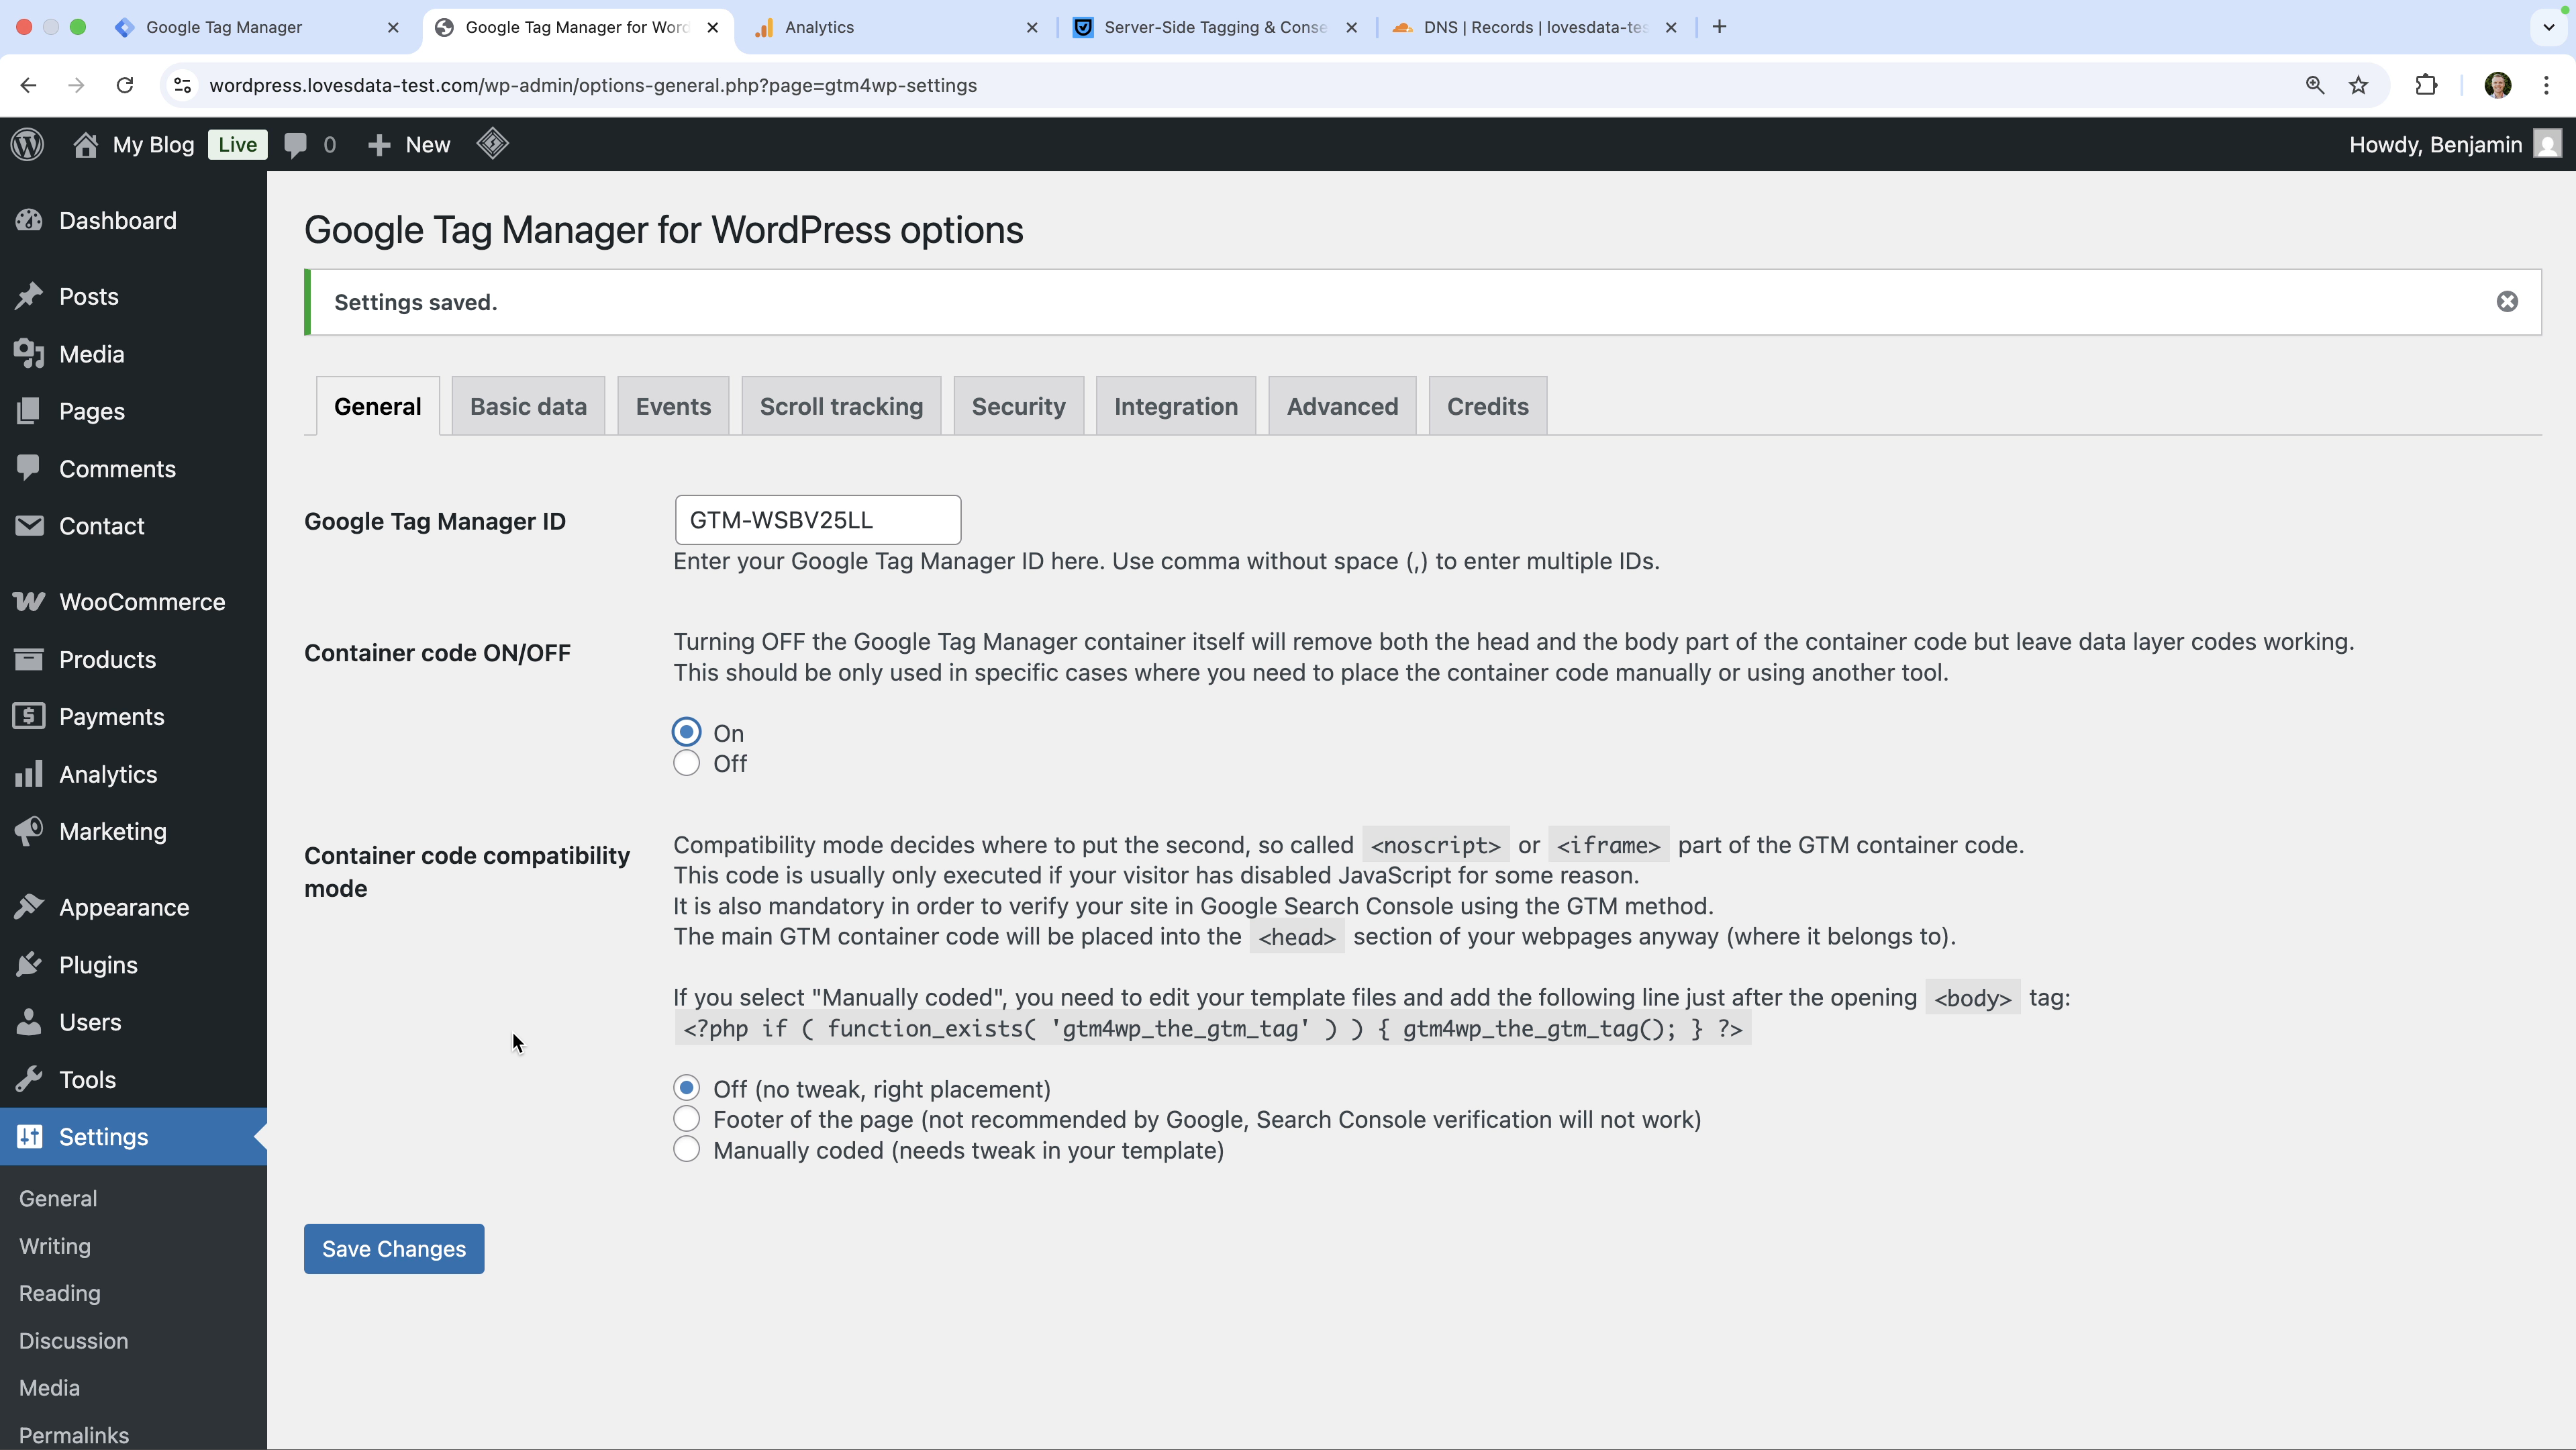
If you're using another website platform, you'll need to add the GTM container code to all of the pages of your website. I recommend searching the support documentation for the platform you're using to find instructions.
Here are some of my tutorials that walk through the steps:
Step 3: Add the Google Tag for GA4 to Your Web Container
Follow these steps to add GA4 (Google Analytics 4) to your GTM web container:
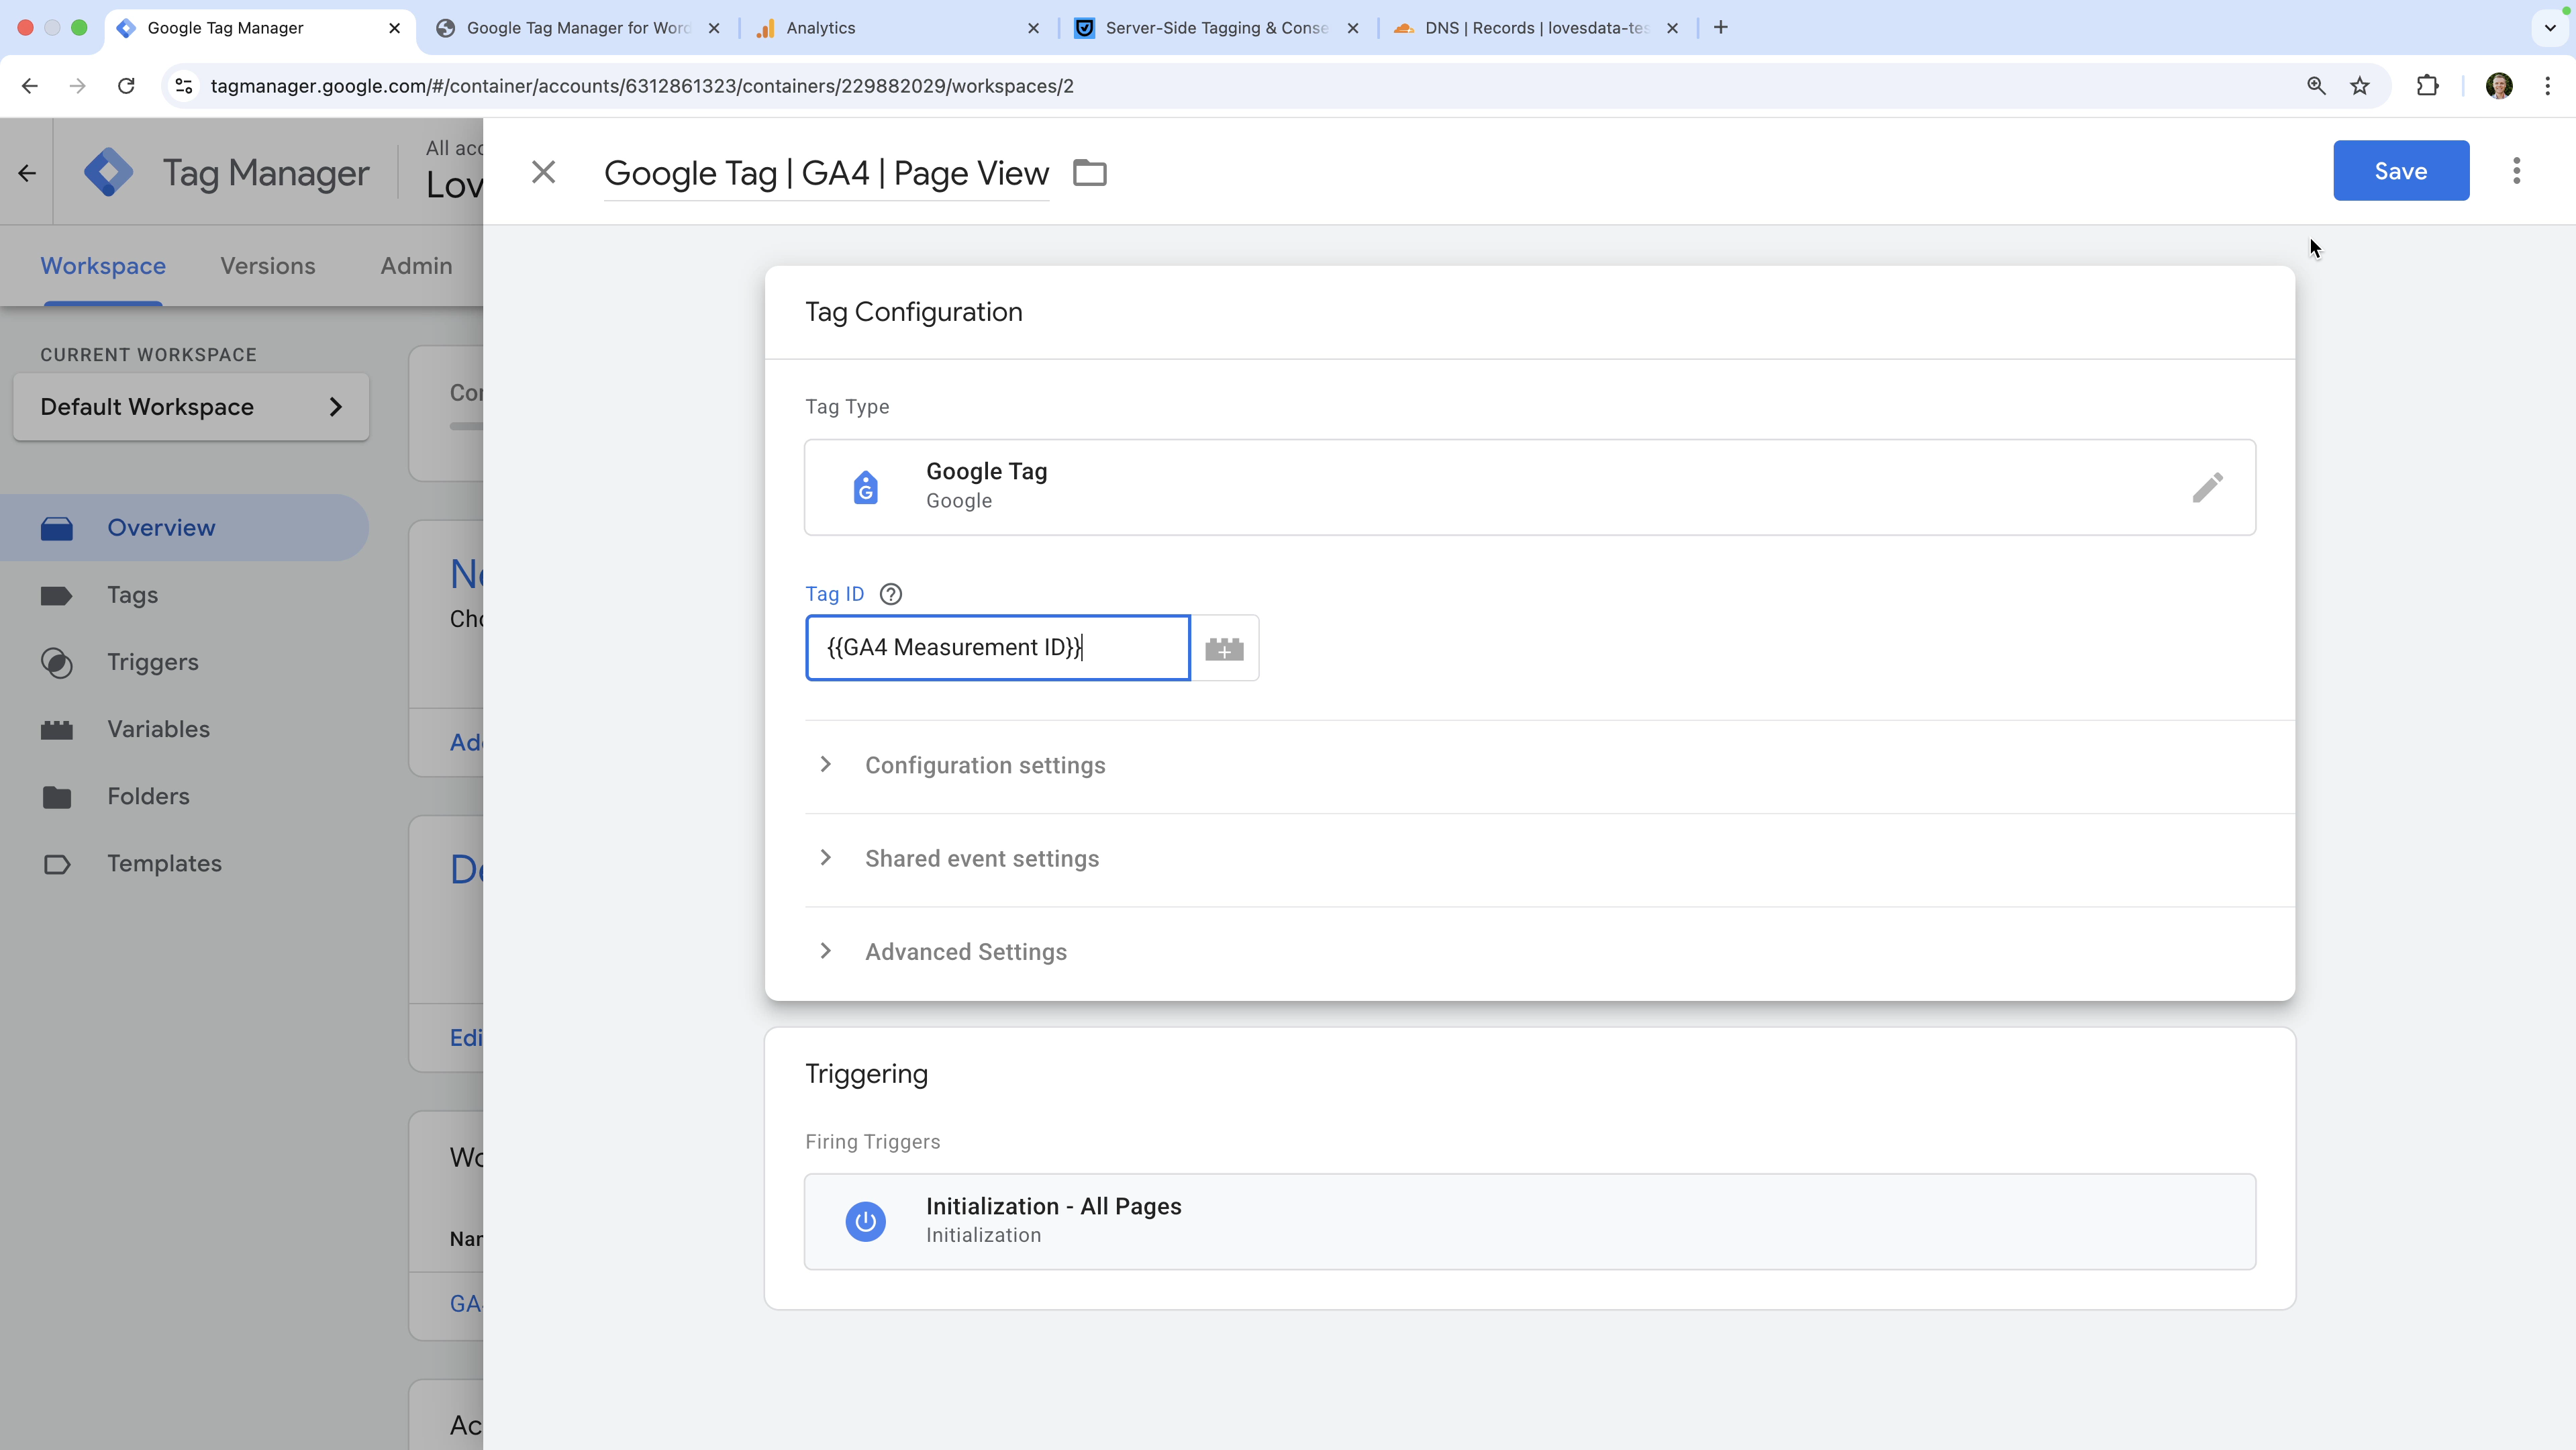
- Create a new tag
- Select 'Tag Configuration' and choose 'Google Tag' as the tag type.
- Enter your GA4 Measurement ID (for example,
G-XXXXXXX). - Ensure the 'Initialization - All Pages' trigger is added to the tag.
- Save the tag.
Step 4: Create a Server-Side Container and Configure Usercentrics
Now, let's move to the server side.
- In your existing GTM account, click the three vertical dots and select 'Create Container'.
- Choose 'Server' as the container type (target platform).
- Choose the option to manually provision your tagging server and copy the configuration snippet that appears.
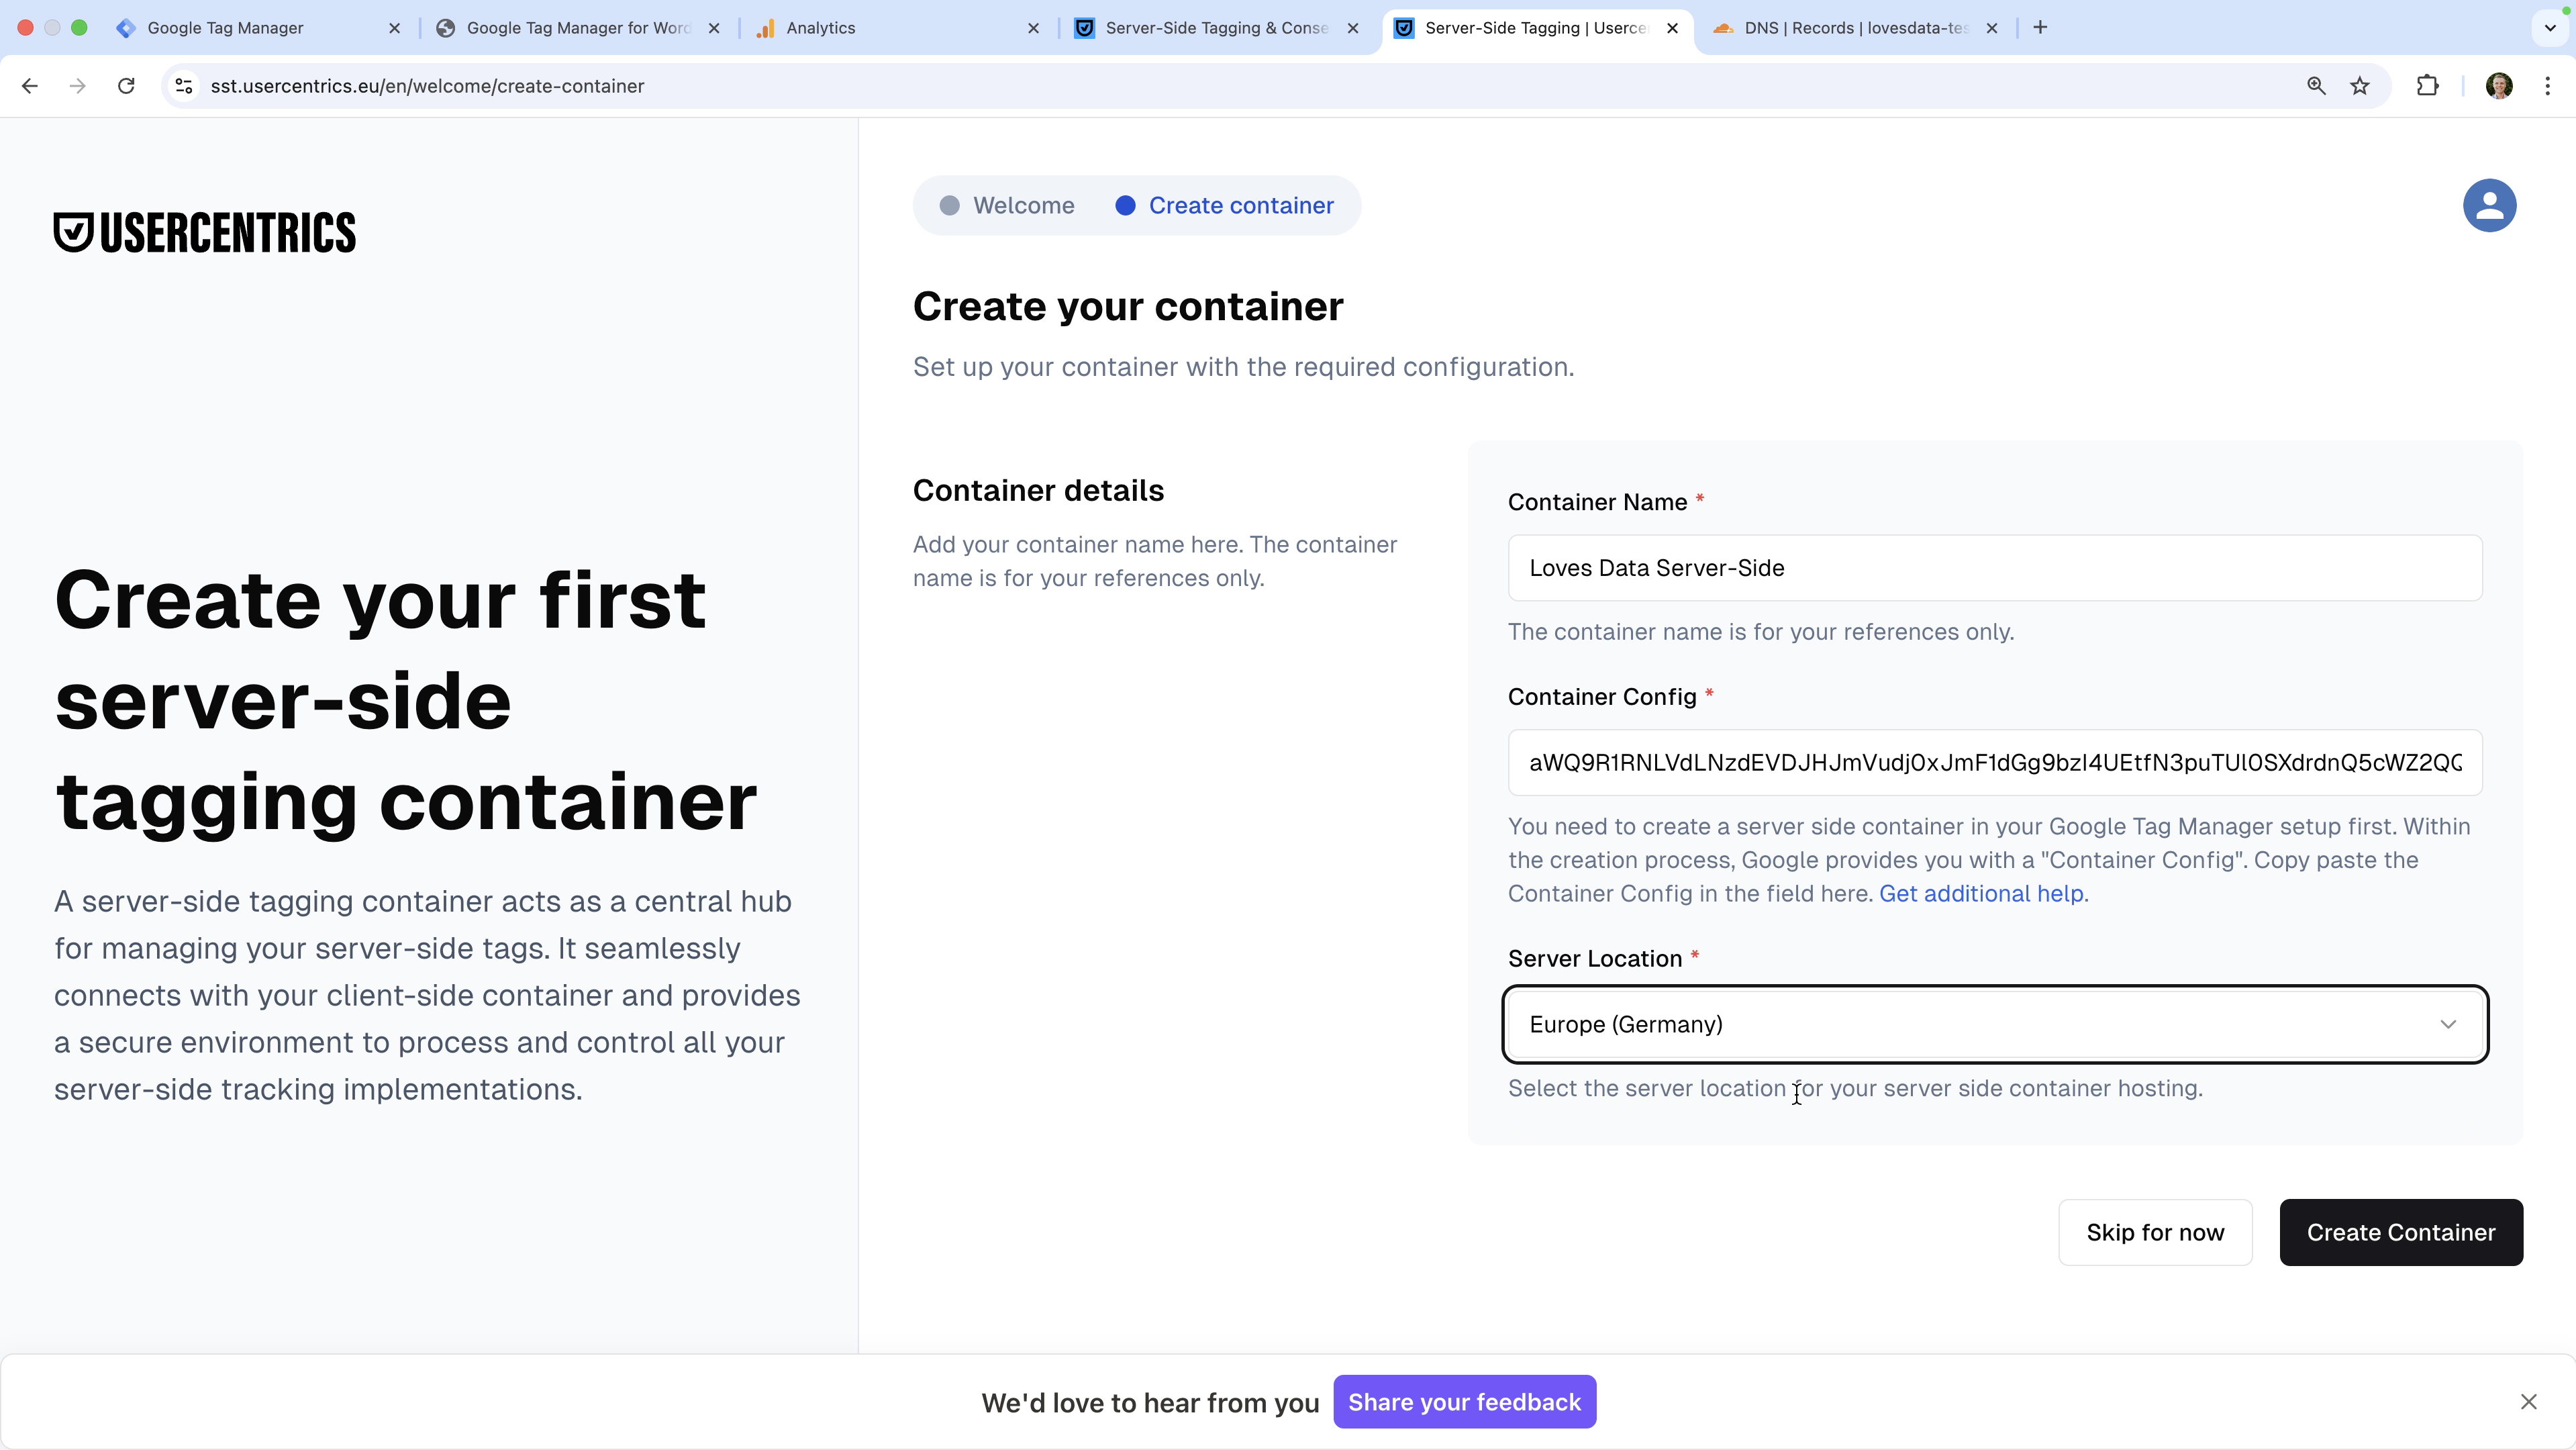
- Head to Usercentrics and create a new Usercentrics server-side tagging server.
- Paste the GTM configuration snippet into Usercentrics to configure the server.
Following these steps means that your GTM server-side container will be linked to your Usercentrics tagging server.
Step 5: Configure a Custom Domain and DNS
The next step is to set up a custom subdomain for your server (for example, by6E74fC.yoursite.com). This ensures first-party cookies are created when people visit your website.
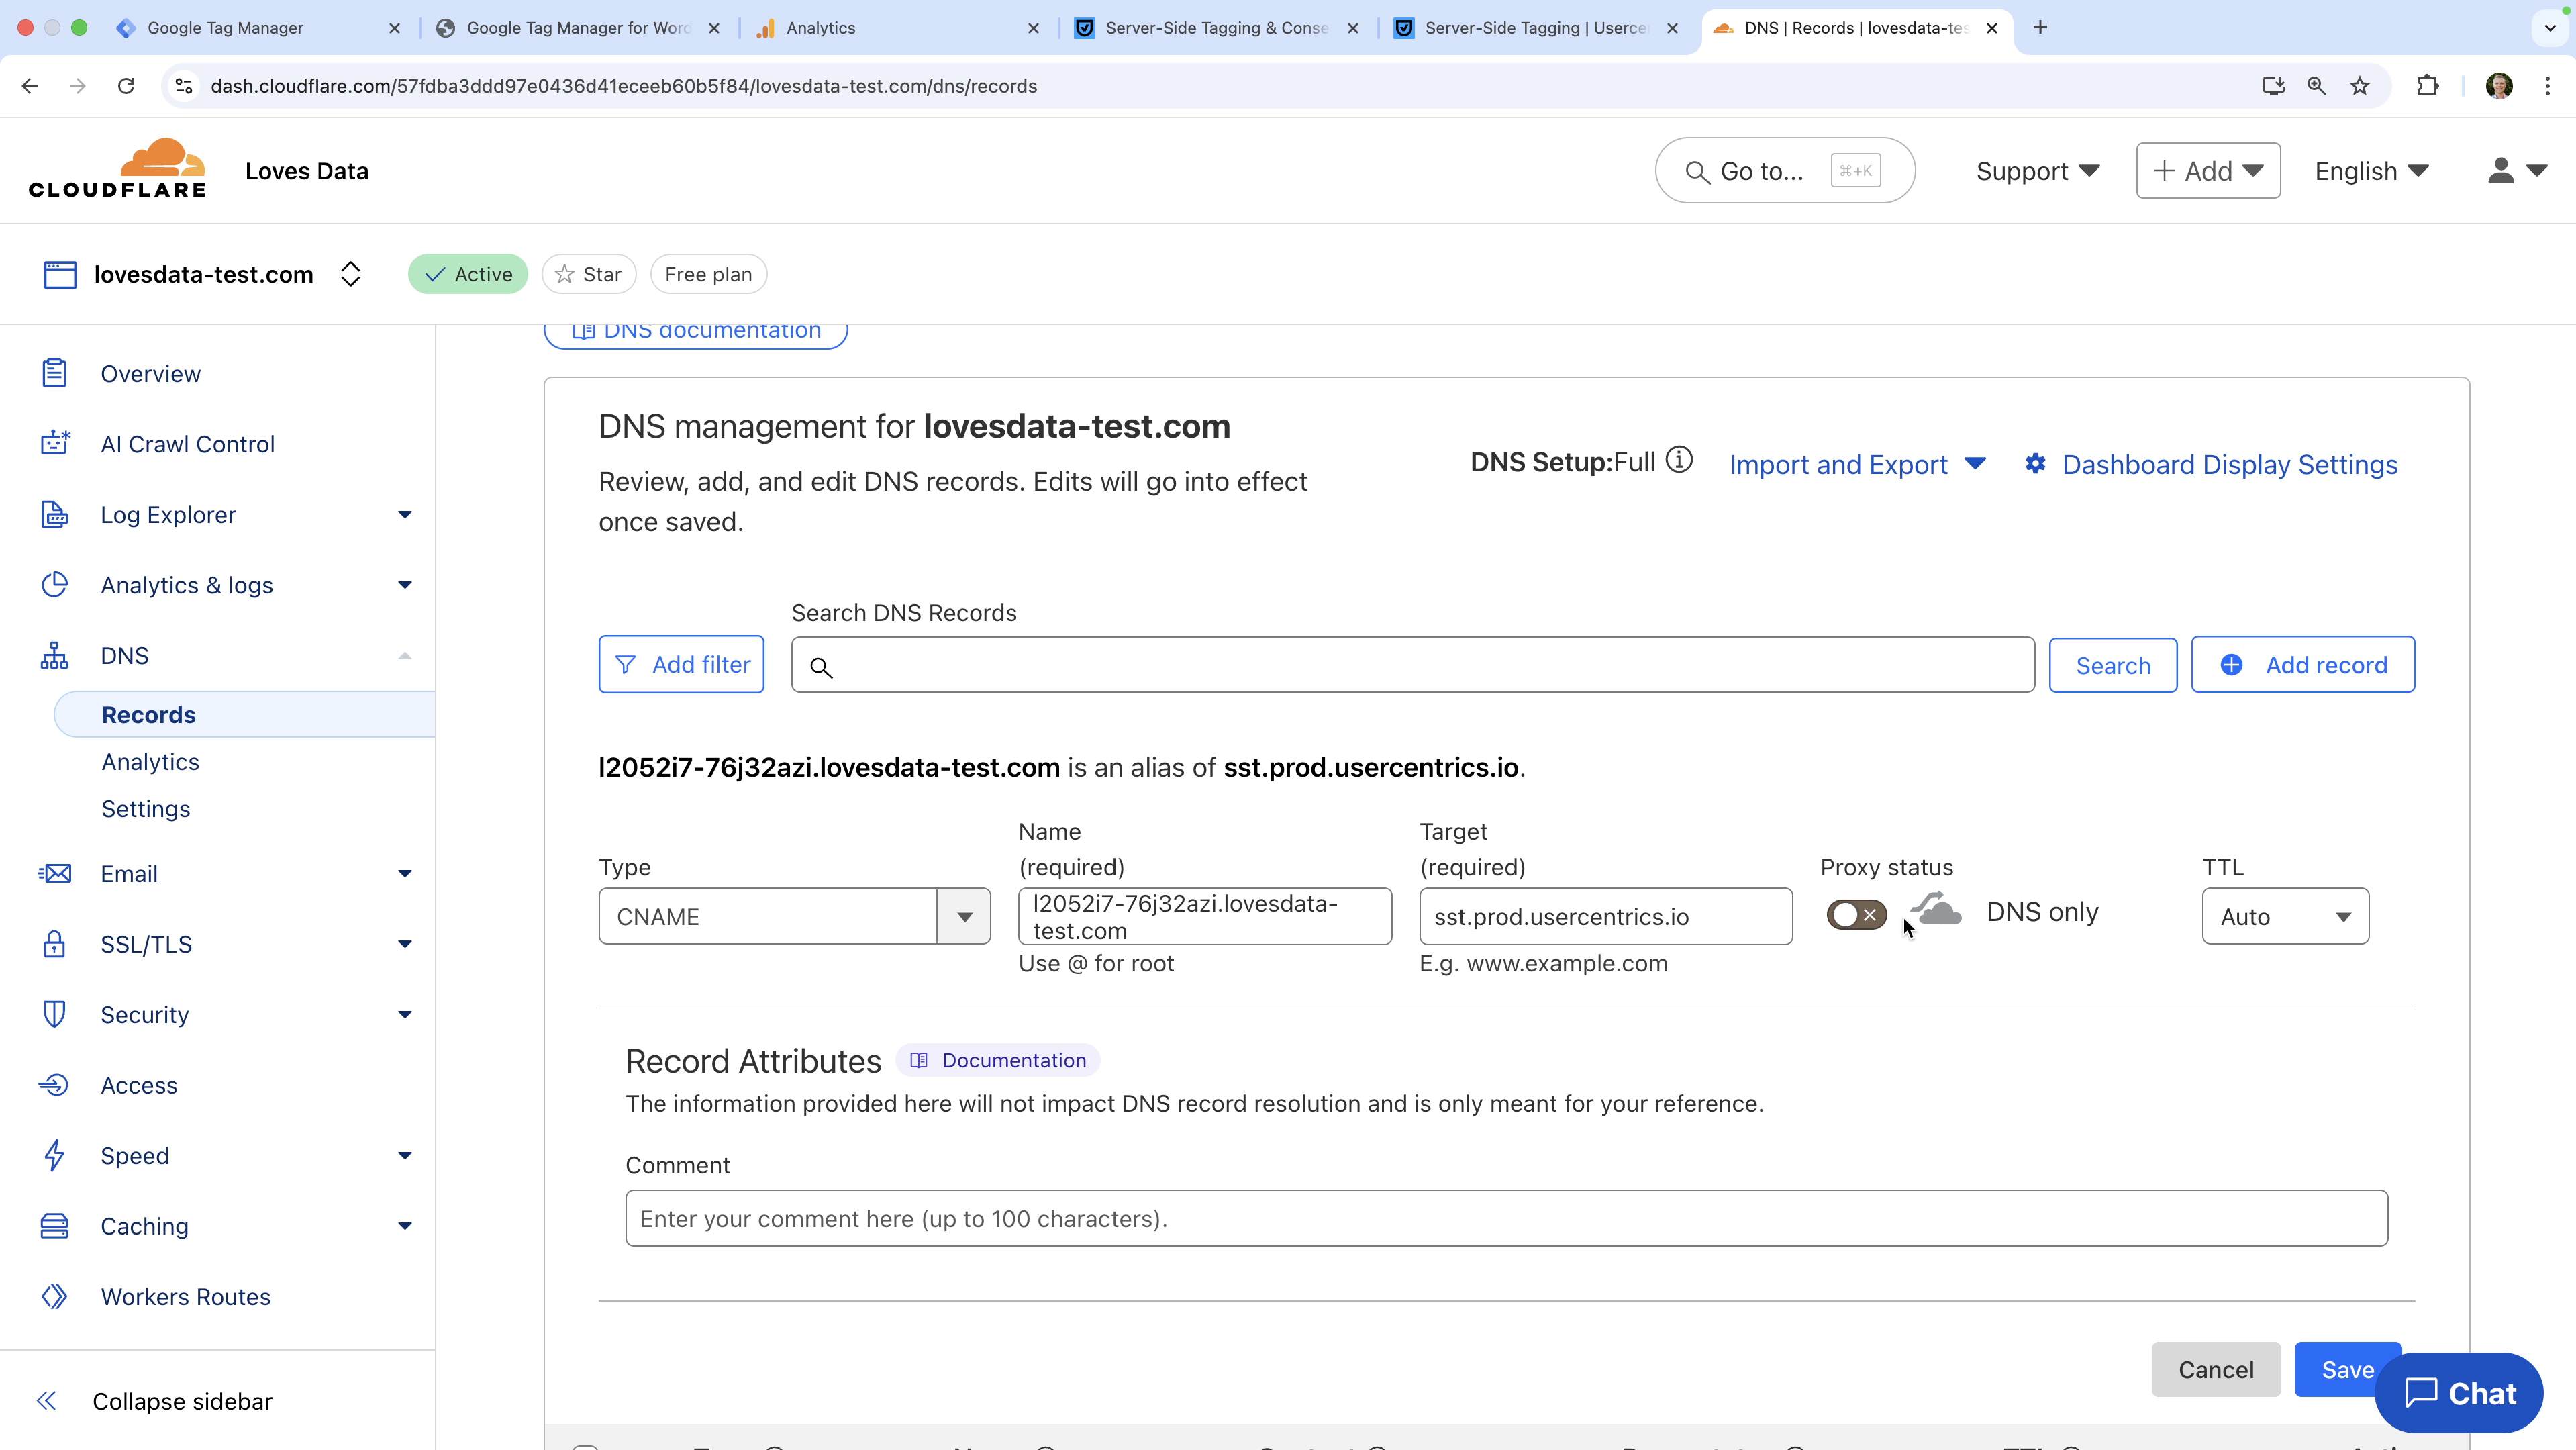
- Sign into your DNS provider (for example, Cloudflare), add a new CNAME record.
- Configure the CNAME record using the value provided by Usercentrics.
- If you're using Cloudflare, ensure that the proxy option is disabled so that the record points directly to Usercentrics.
Step 6: Connect the Custom Domain to Your Server-Side Container
Once the DNS record is verified in Usercentrics, follow these steps to connect your custom domain to your server-side container:
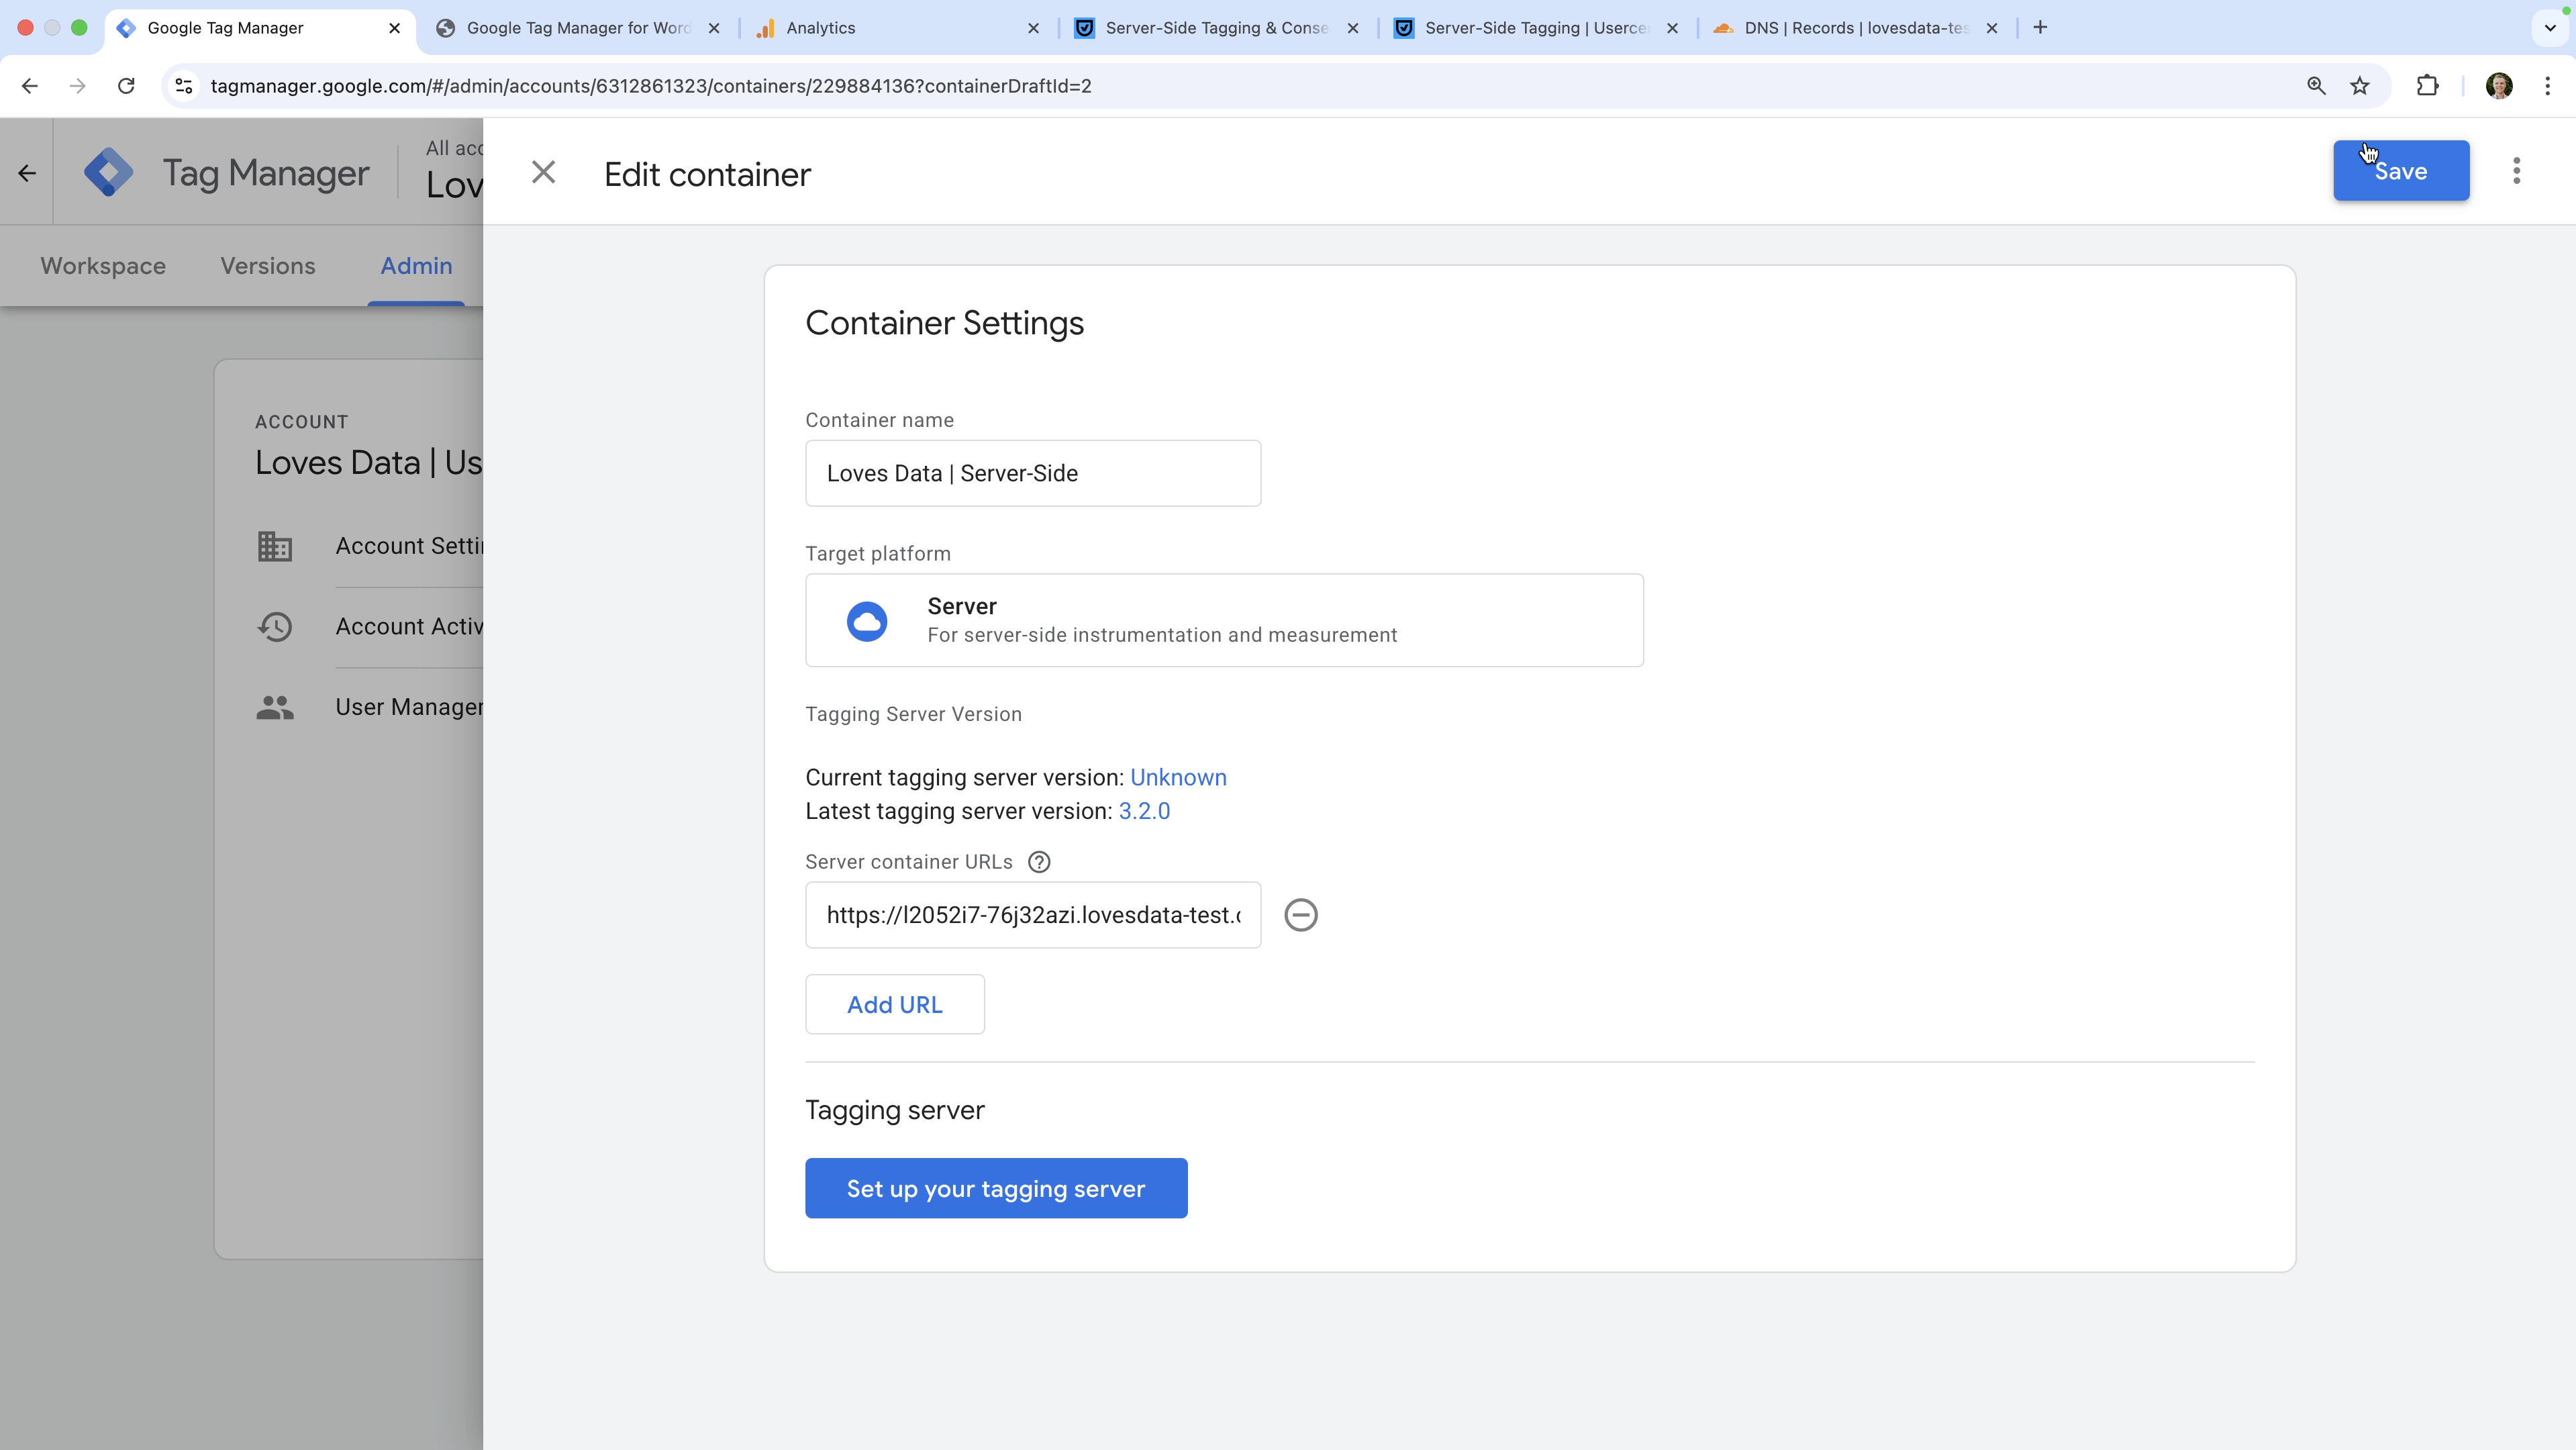
- Open your server-side container in GTM.
- Navigate to 'Admin' and select 'Container Settings'.
- Add your custom URL (for example,
https://by6E74fC.yoursite.com) under 'Server Container URLs' and save your settings.
This allows your GTM server container to receive requests from your domain.
Step 7: Configure Clients and Tags in the Server-Side Container
Now that your server-side container is connected to your Usercentrics tagging server, it's time to configure the server-side container client and set up your first tag. Here are the steps:
- In your GTM server-side container, navigate to 'Clients' (in the 'Workspace').
- Click 'New' to create a new client and select 'Google Tag Manager: Web Container' as the client type.
- Enter the container ID from your GTM web container (for example,
GTM-XXXXXXX). - Click 'Save'.

Next, you can create a GA4 tag inside the server-side container by following these steps:
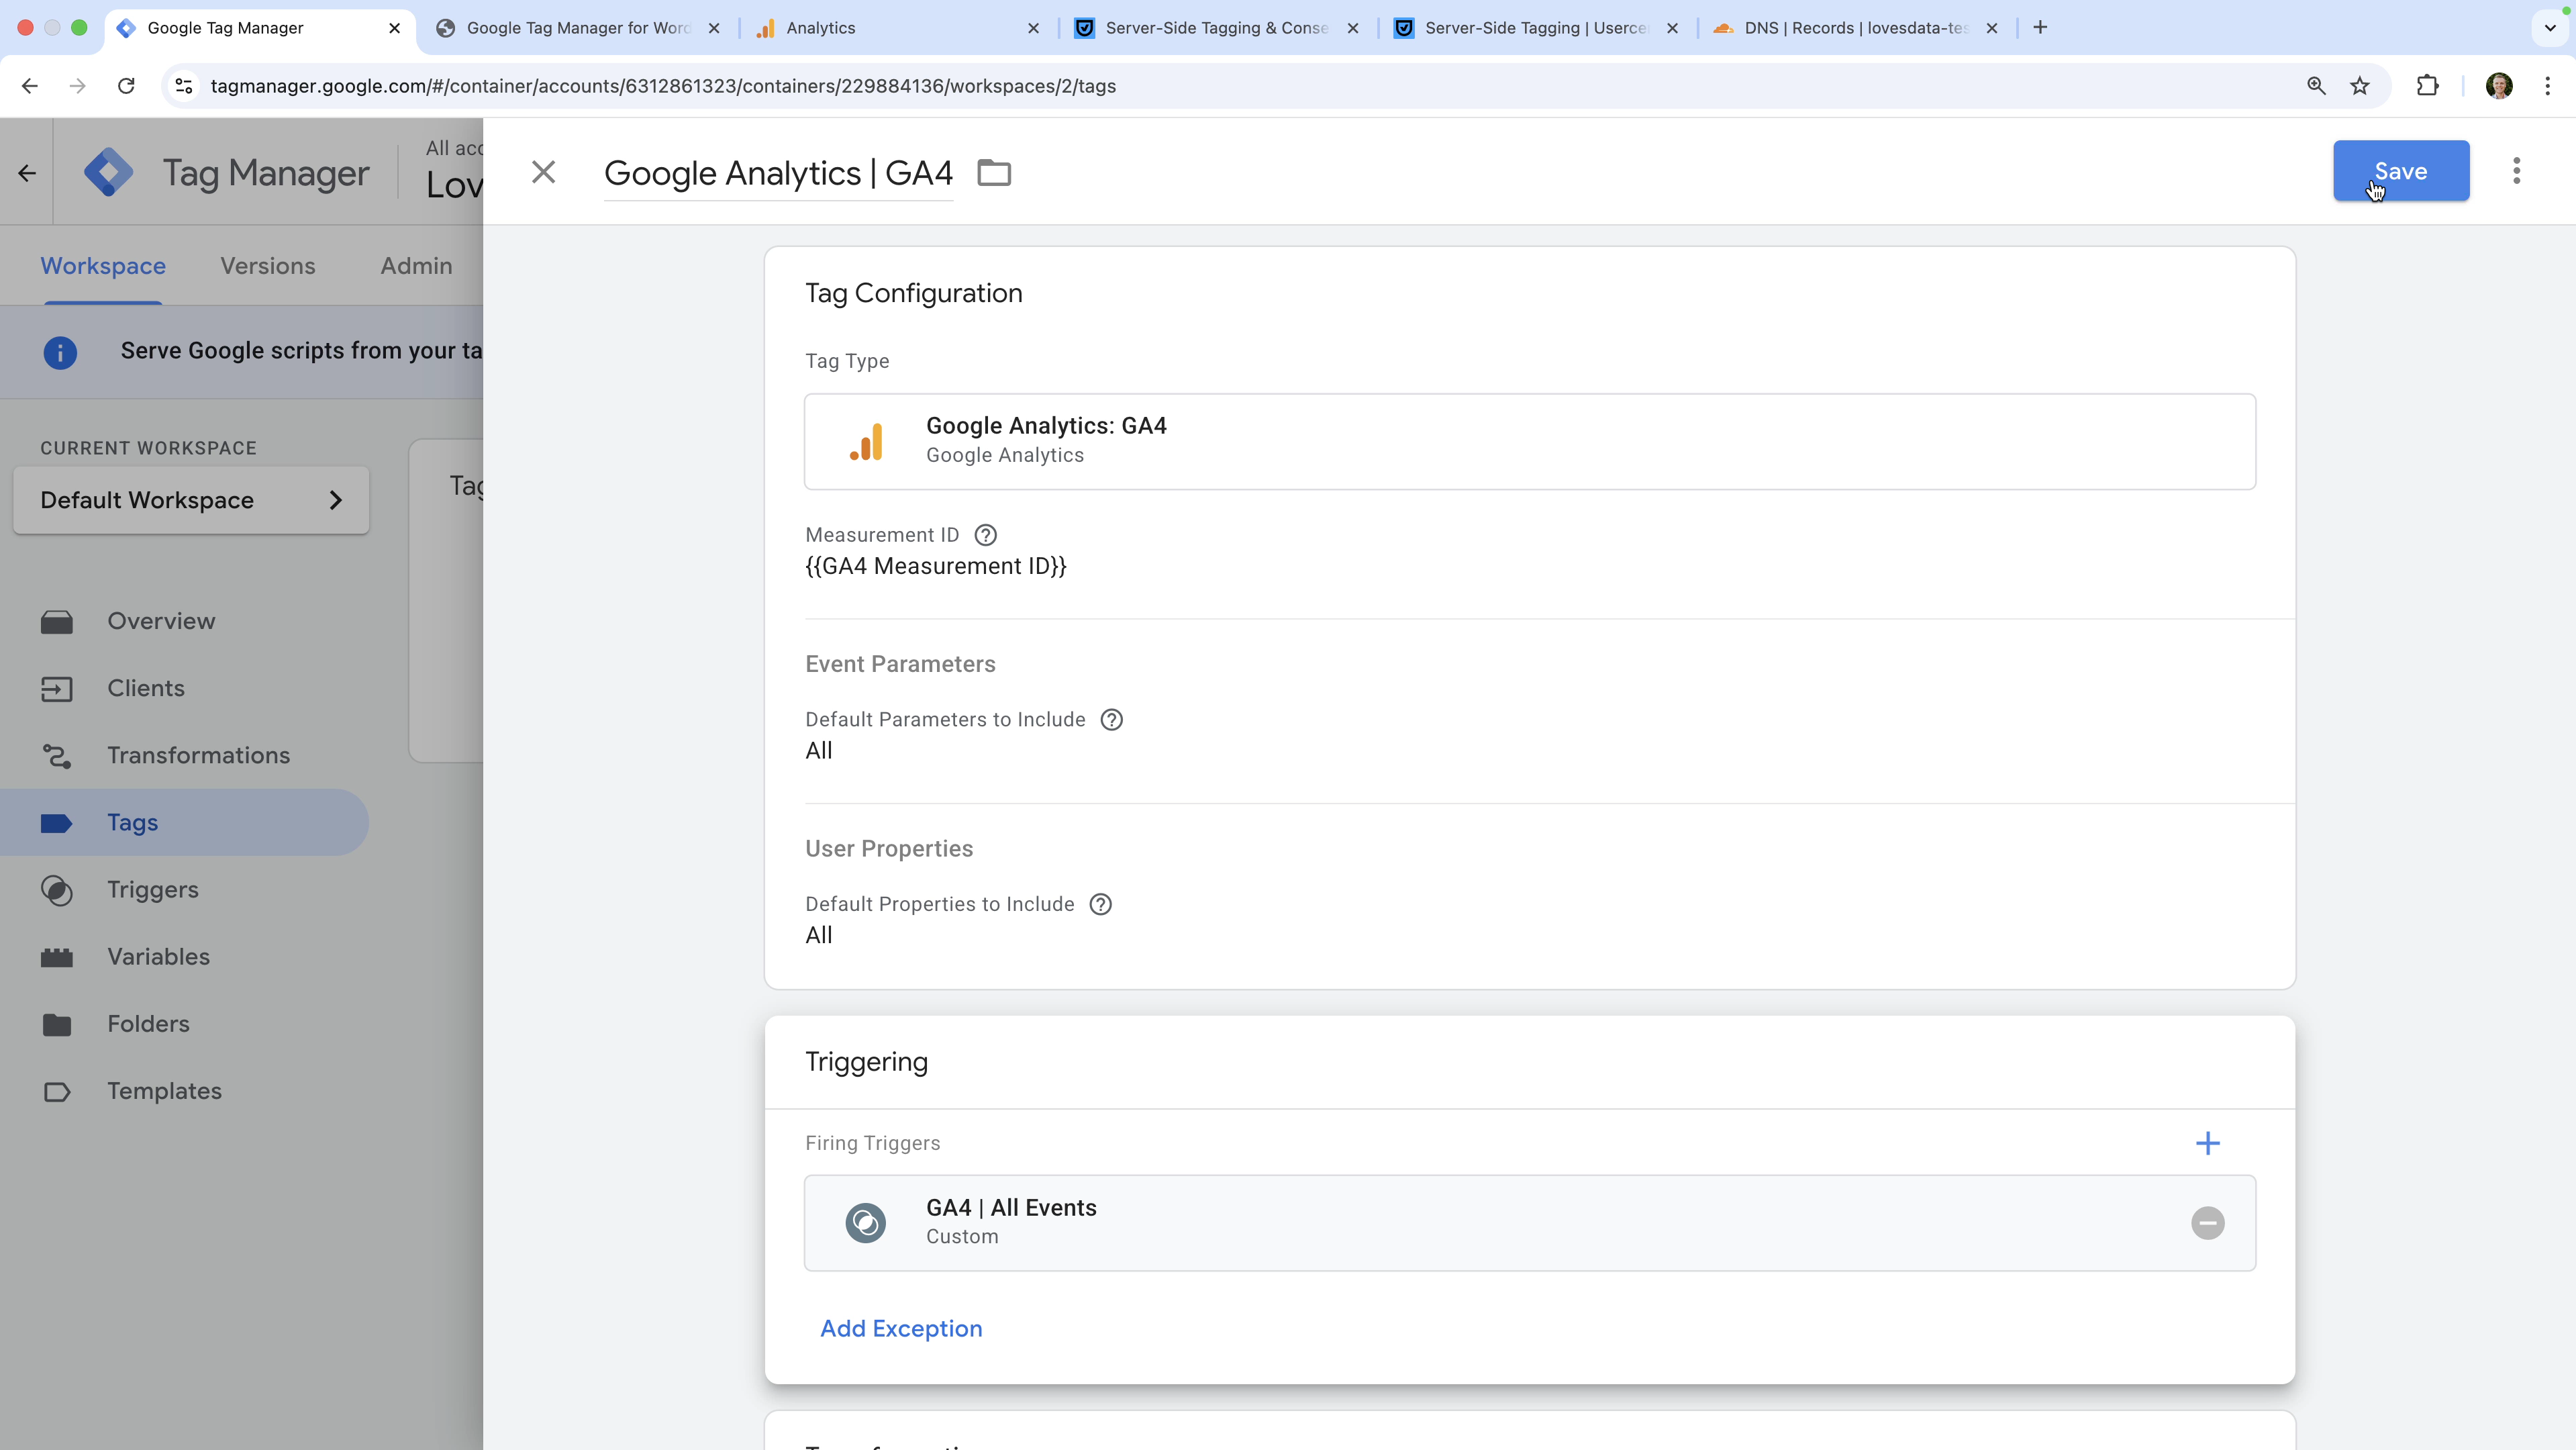
- Navigate to 'Tags' and click 'New'.
- Name the tag (for example, 'Google Analytics | GA4')
- Select 'Google Analytics: GA4' as the tag type.
- Enter your GA4 Measurement ID, this should be the same as the one used in your GTM web container (for example,
G-XXXXXXX). - Create a custom trigger that will fire your tag when the 'Client Name' equals
GA4and apply the trigger to your tag. - Click 'Save'.
Step 8: Update the Web Container to Send Events to the Server
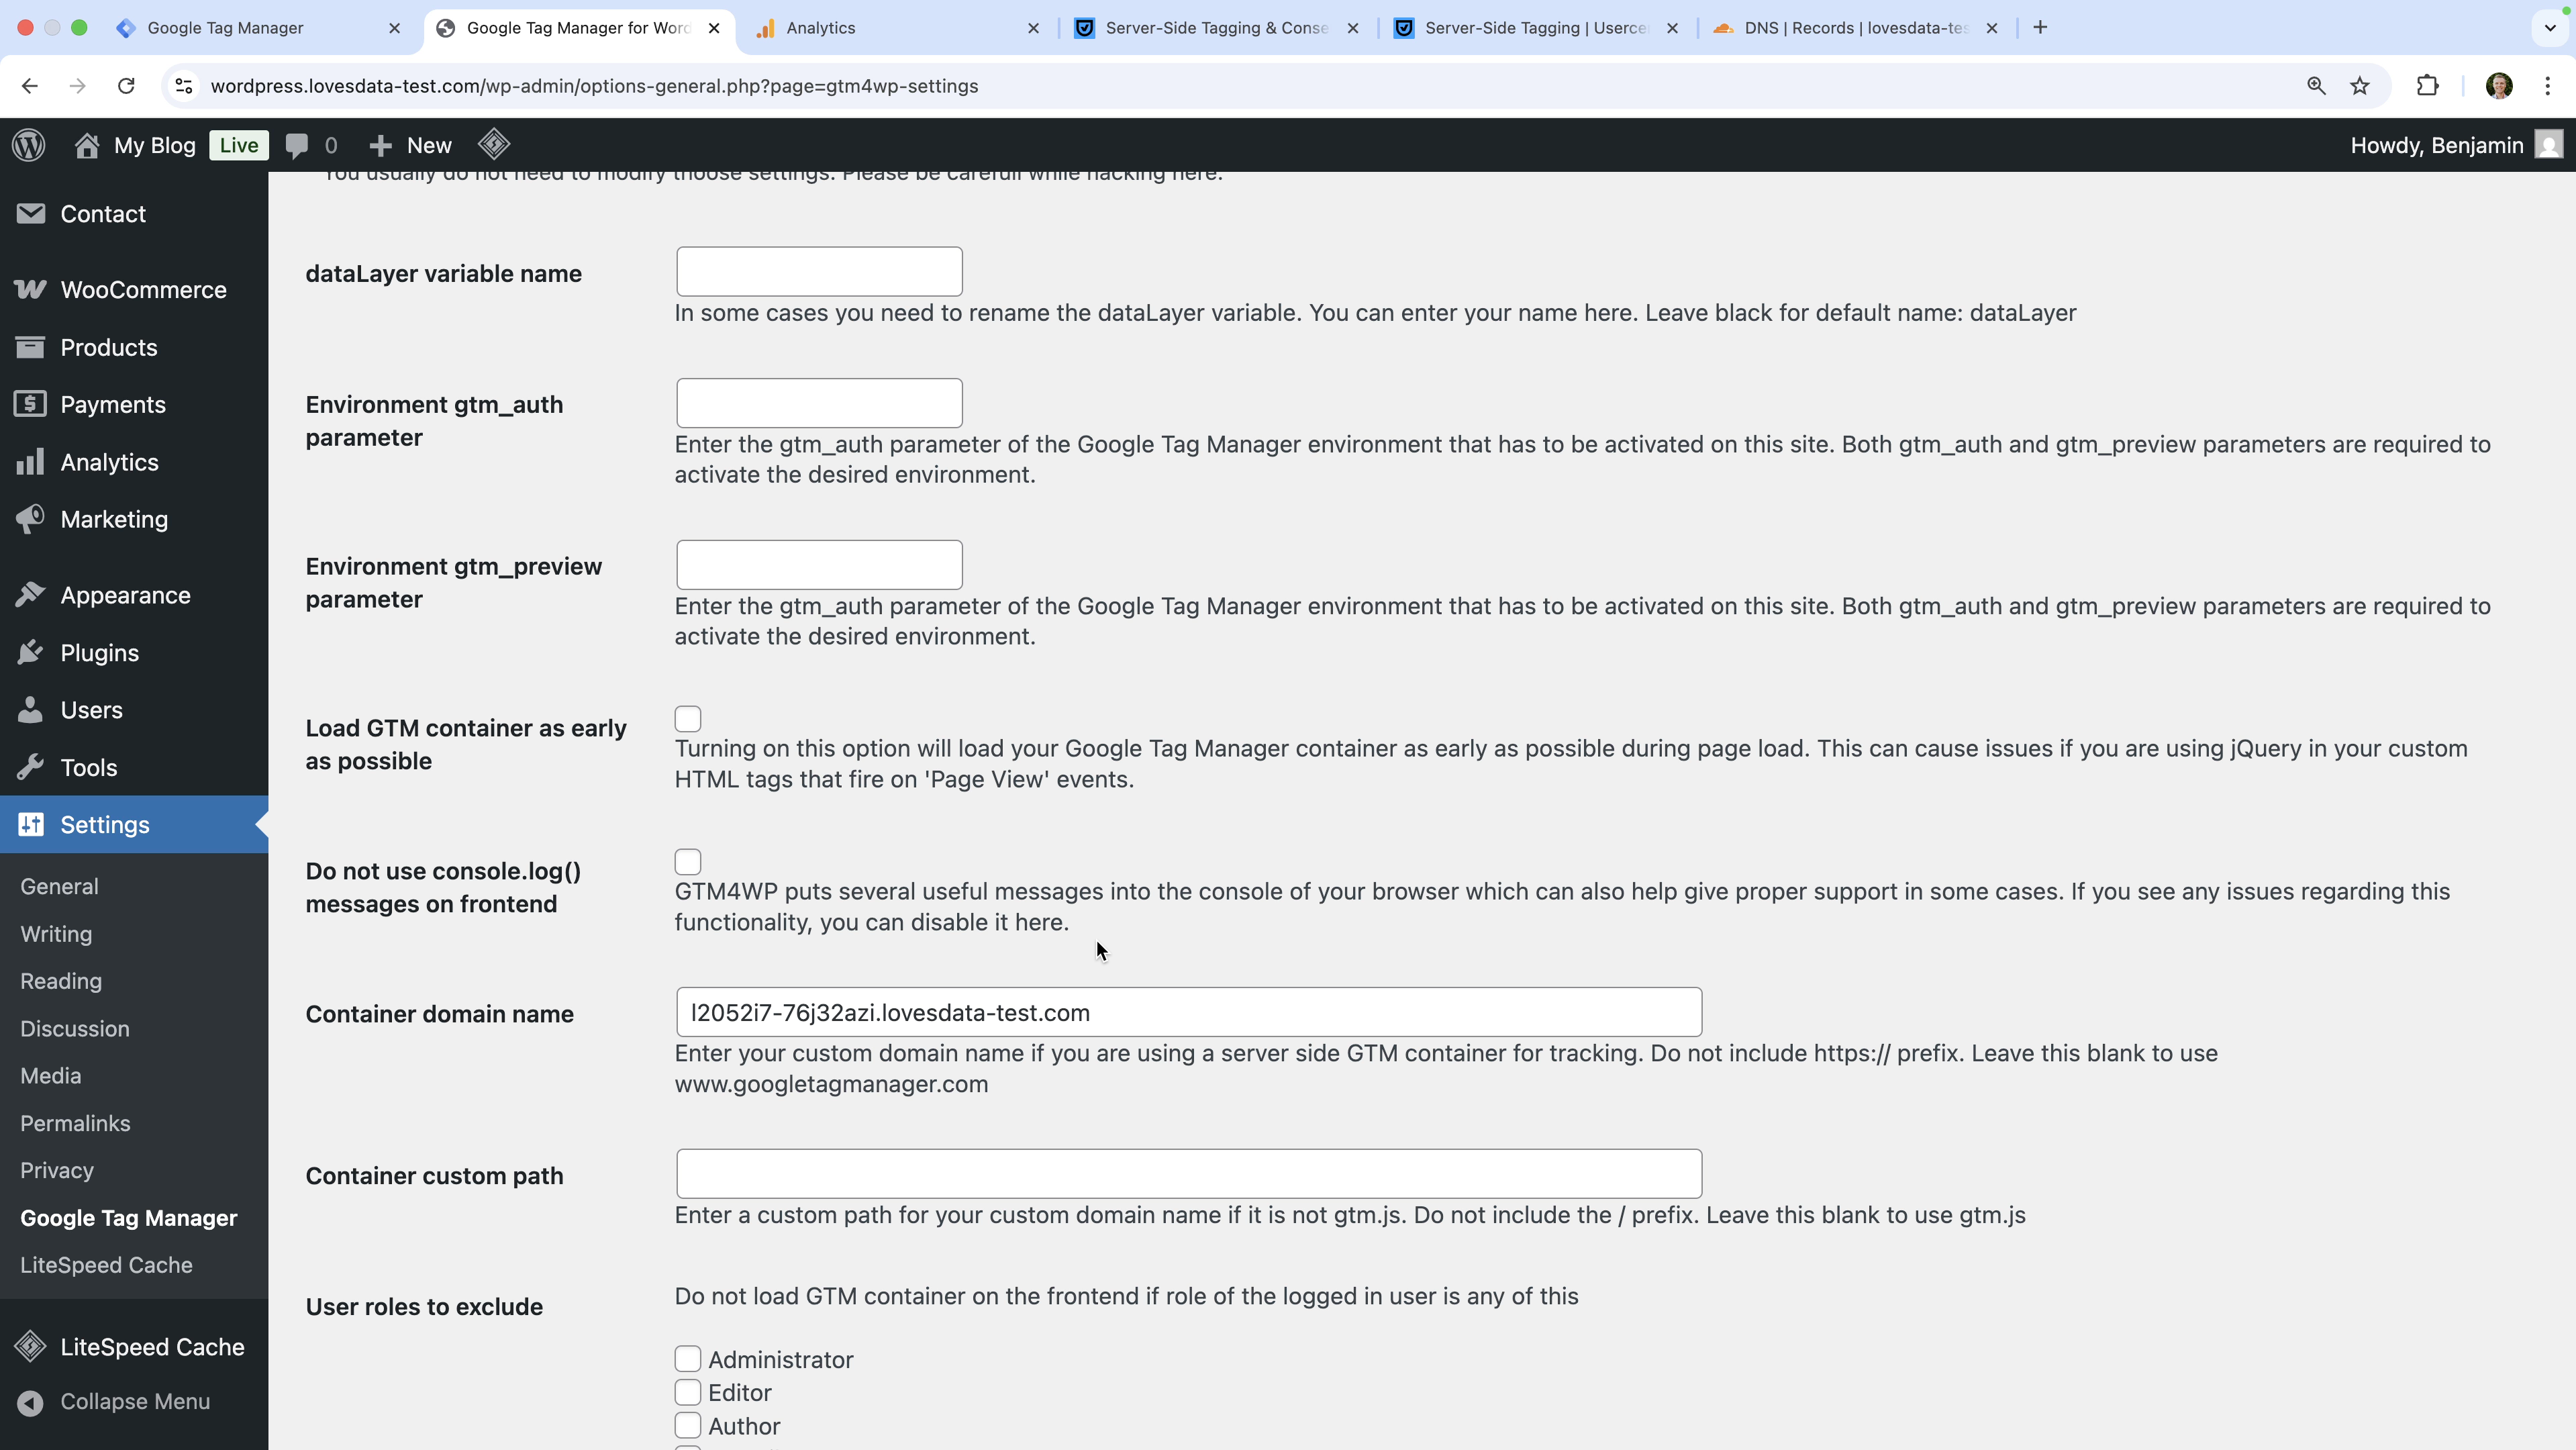
You will need to modify your GTM container code to use your custom domain. If you're using the GTM4WP plugin for WordPress, you can adjust this by selecting the 'Advanced' tab and then entering your custom domain.
Then in your GTM web container, open the Google Tag used to send data to GA4. Once you've opened the tag, select 'Tag Configuration' and then select 'Configuration Settings'. You will then need to add the following parameter that includes the URL of your server-side container:
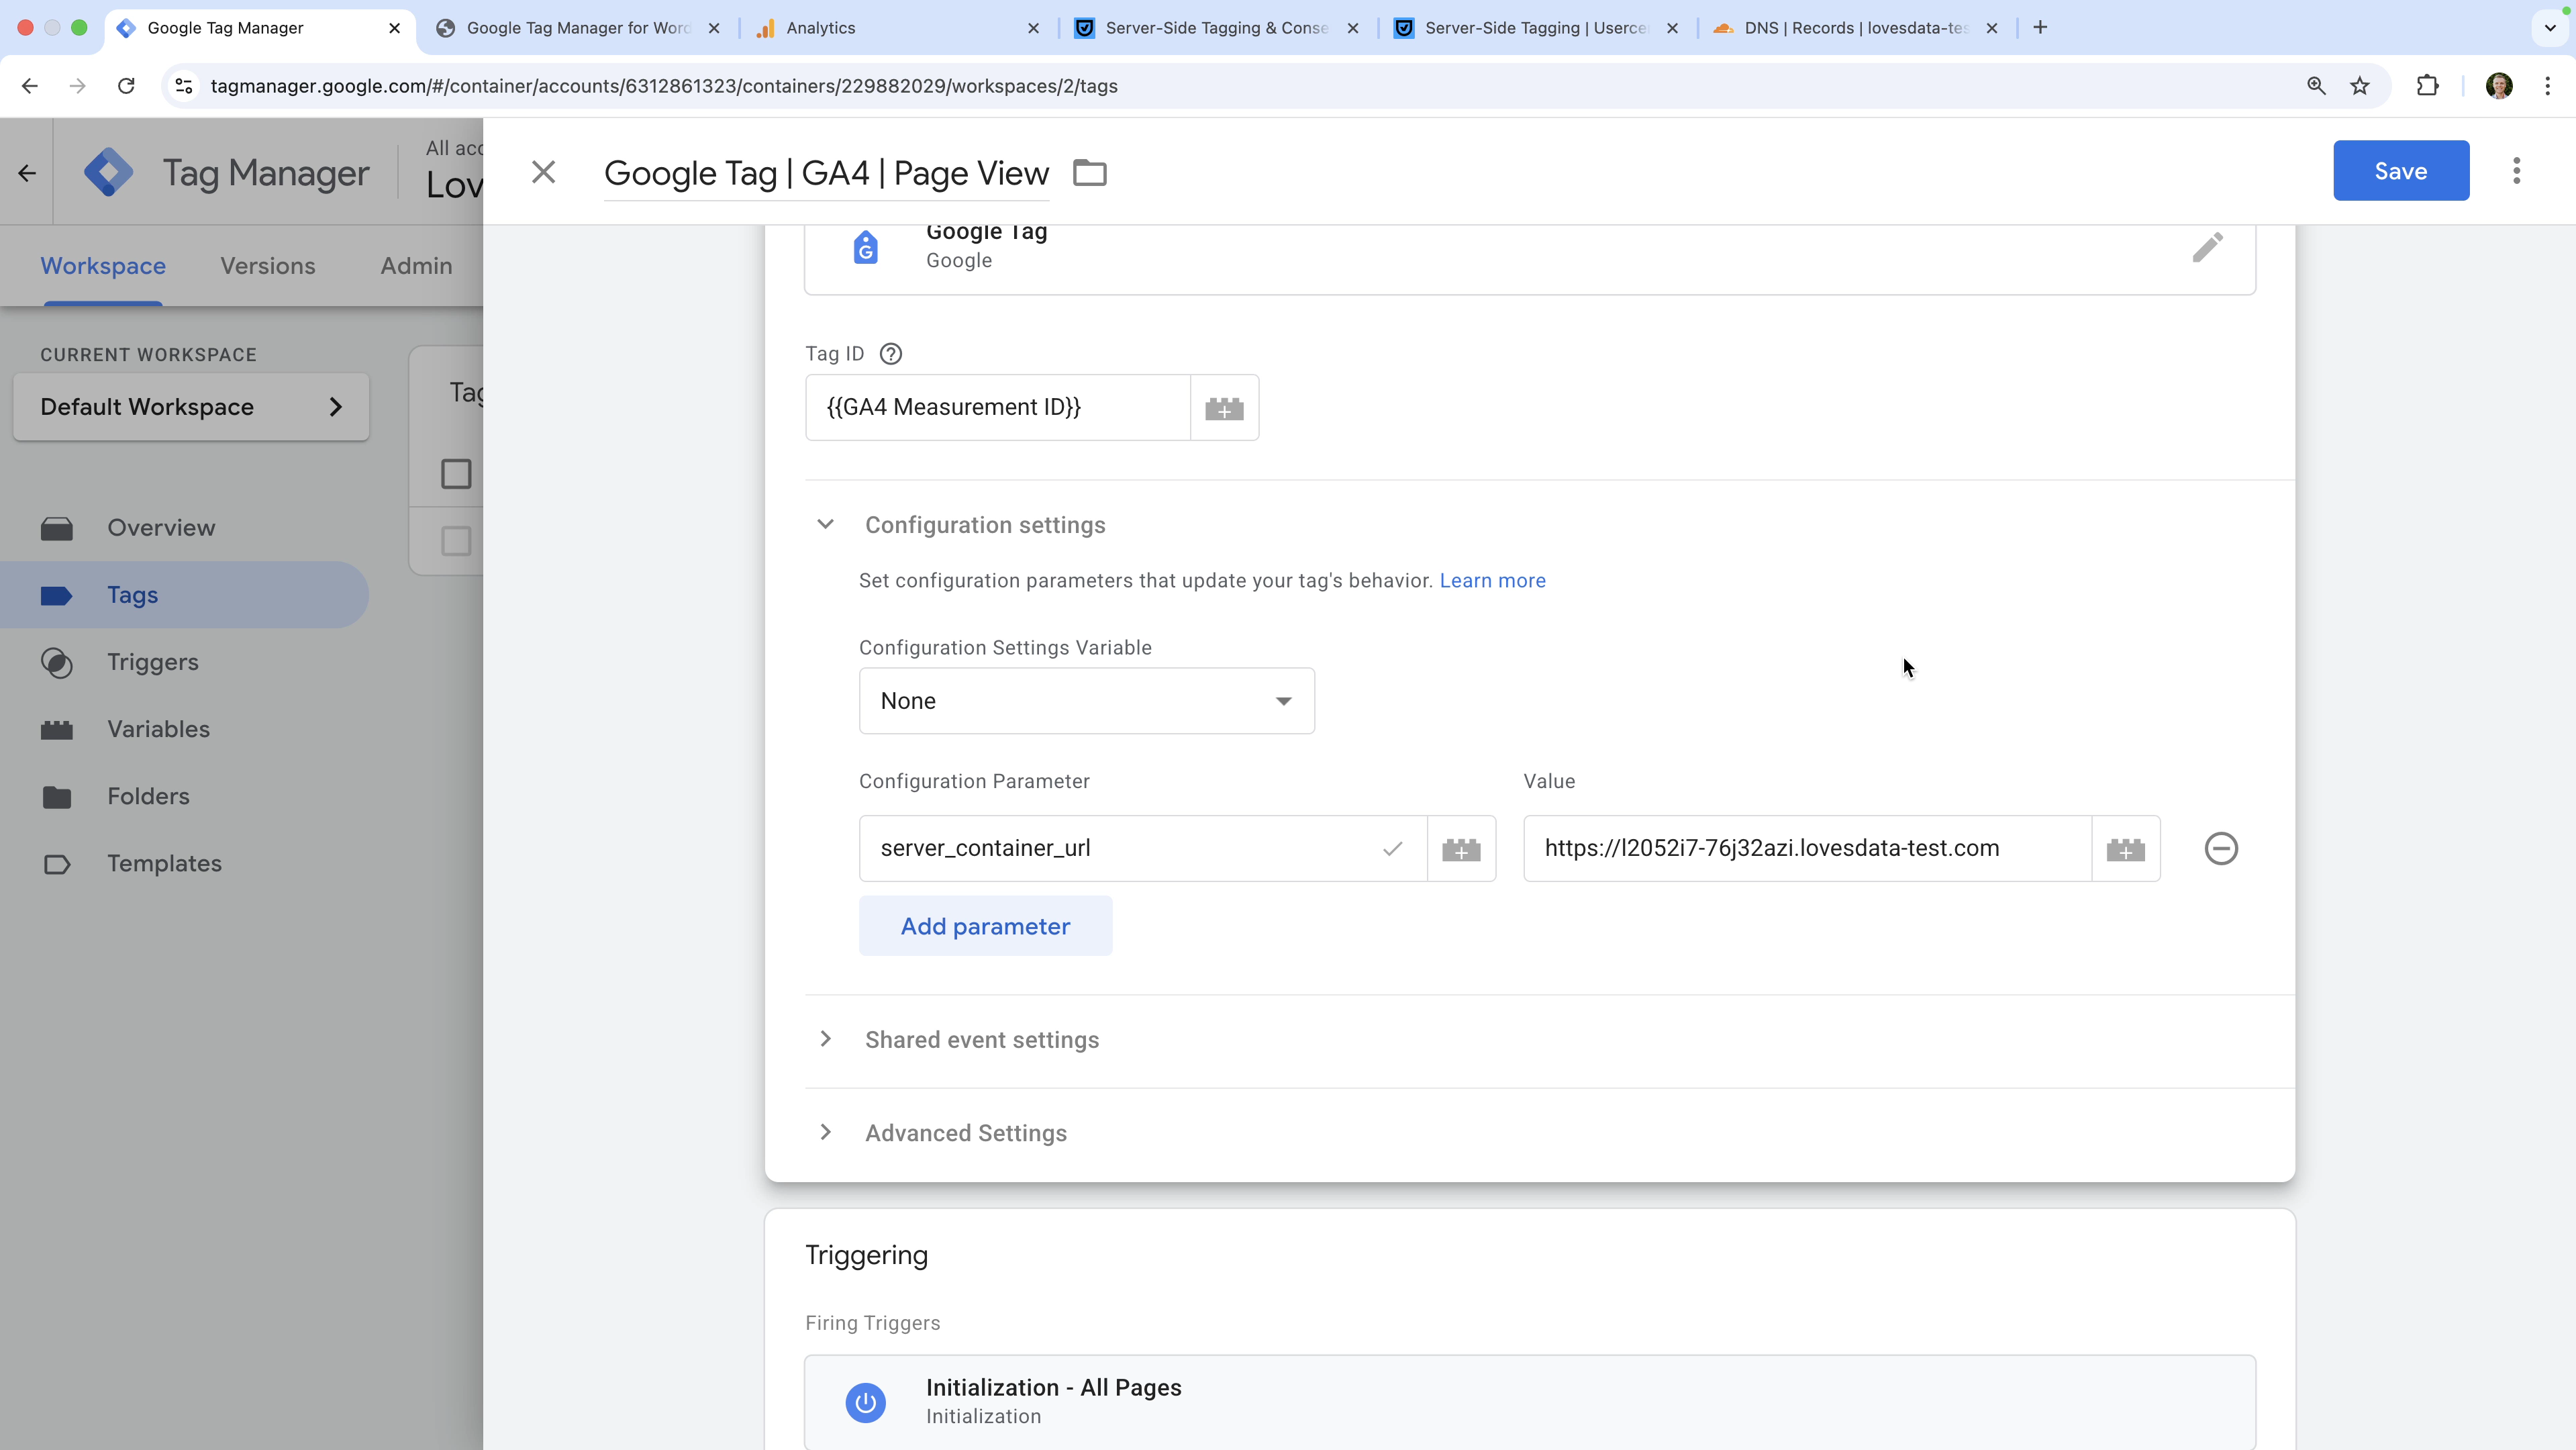
This parameter will send hits from your web container to your server-side container.
Step 9: Connect Cookiebot to Your Server-Side Container
Now that your Usercentrics tagging server is live, you can connect it to your cookie banner. This ensures only consented data is sent to Google Analytics and any other platforms you're using.
Install Cookiebot
You will need to follow the recommended steps to install Cookiebot on your website. If you're using WordPress, you can use the steps below, otherwise you can find details in the Cookiebot support articles.
- Sign into WordPress and select 'Plugins' and choose 'Add New'.
- Next, search for and install the 'Usercentrics Cookiebot' plugin. Once the plugin is installed, click 'Activate'.
- Open the plugin and connect your Cookiebot account using your 'Domain Group ID'.
- Select the 'Google Tag Manager' tab and enable the Google Tag Manager option. Then enter your the ID from your GTM web container.
- Select the 'Google Consent Mode' tab (in 'Configure Settings'), ensure that the Google Consent Mode option is enabled.
- Click 'Save'.
Cookiebot has now been added to your website and is sending consent signals to GTM using Google Consent Mode. Next, we'll capture those signals in your server-side container.
Create a consent signal variable in your server container
- Open your GTM server-side container and navigate to 'Variables'.
- Click 'New' (next to 'User-Defined Variables') to create a new variable.
- Name the variable (for example, 'Google Consent Signal').
- Select 'Event Data' as the variable type.
- Enter
x-ga-gcsas the 'Key Path'. - Click 'Save'.
This variable will capture the consent selections people have made on your website. Now you can create a trigger that checks the value of this variable to control when tags do (and do not) fire in your server-side container.
Create consent-based triggers
We're going to create two triggers that we will use as exception triggers. This means when the trigger conditions are matched we will prevent our tag from firing.
The first trigger will match when analytics consent hasn't been provided. Here are the steps to create the trigger:
- Navigate to 'Triggers' and click 'New' to create a trigger.
- Name the trigger (for example, 'Consent Status | No Analytics').
- Select 'Custom' as the trigger type.
- For the condition, select the
{{Google Consent Signal}}variable you just created. Then select 'Matches Regex' as the match type, and enterG1\d0as the value. - Click 'Save'.
And we're going to create one more trigger. This trigger will match when advertising consent hasn't been provided:
- Click 'New' to create another trigger.
- Name the trigger (for example, 'Consent Status | No Ads').
- Select 'Custom' as the trigger type.
- For the condition, select the
{{Google Consent Signal}}variable you just created. Then select 'Matches Regex' as the match type, and enterG10\das the value. - Click 'Save'.
Add exception triggers to your tags
Now that you've created triggers that will match when consent hasn't been provided, you need to apply these to your tags in the server-side container. We're going to apply the analytics consent-based trigger to our Google Analytics tag. Here are the steps:
- In the server-side container, navigate to 'Tags'.
- Open the Google Analytics tag.
- Scroll down and select 'Triggering'.
- Click 'Add Exception' and select the 'Consent Status | No Analytics' trigger.
- Click 'Save'.
Step 10: Test and Publish
The final step is to test that everything works correctly, including that tags are only fired when consent has been granted. Here are the steps to test and publish your containers:
- In your server-side container, click 'Preview'.
- Then open your web container and click 'Preview'.
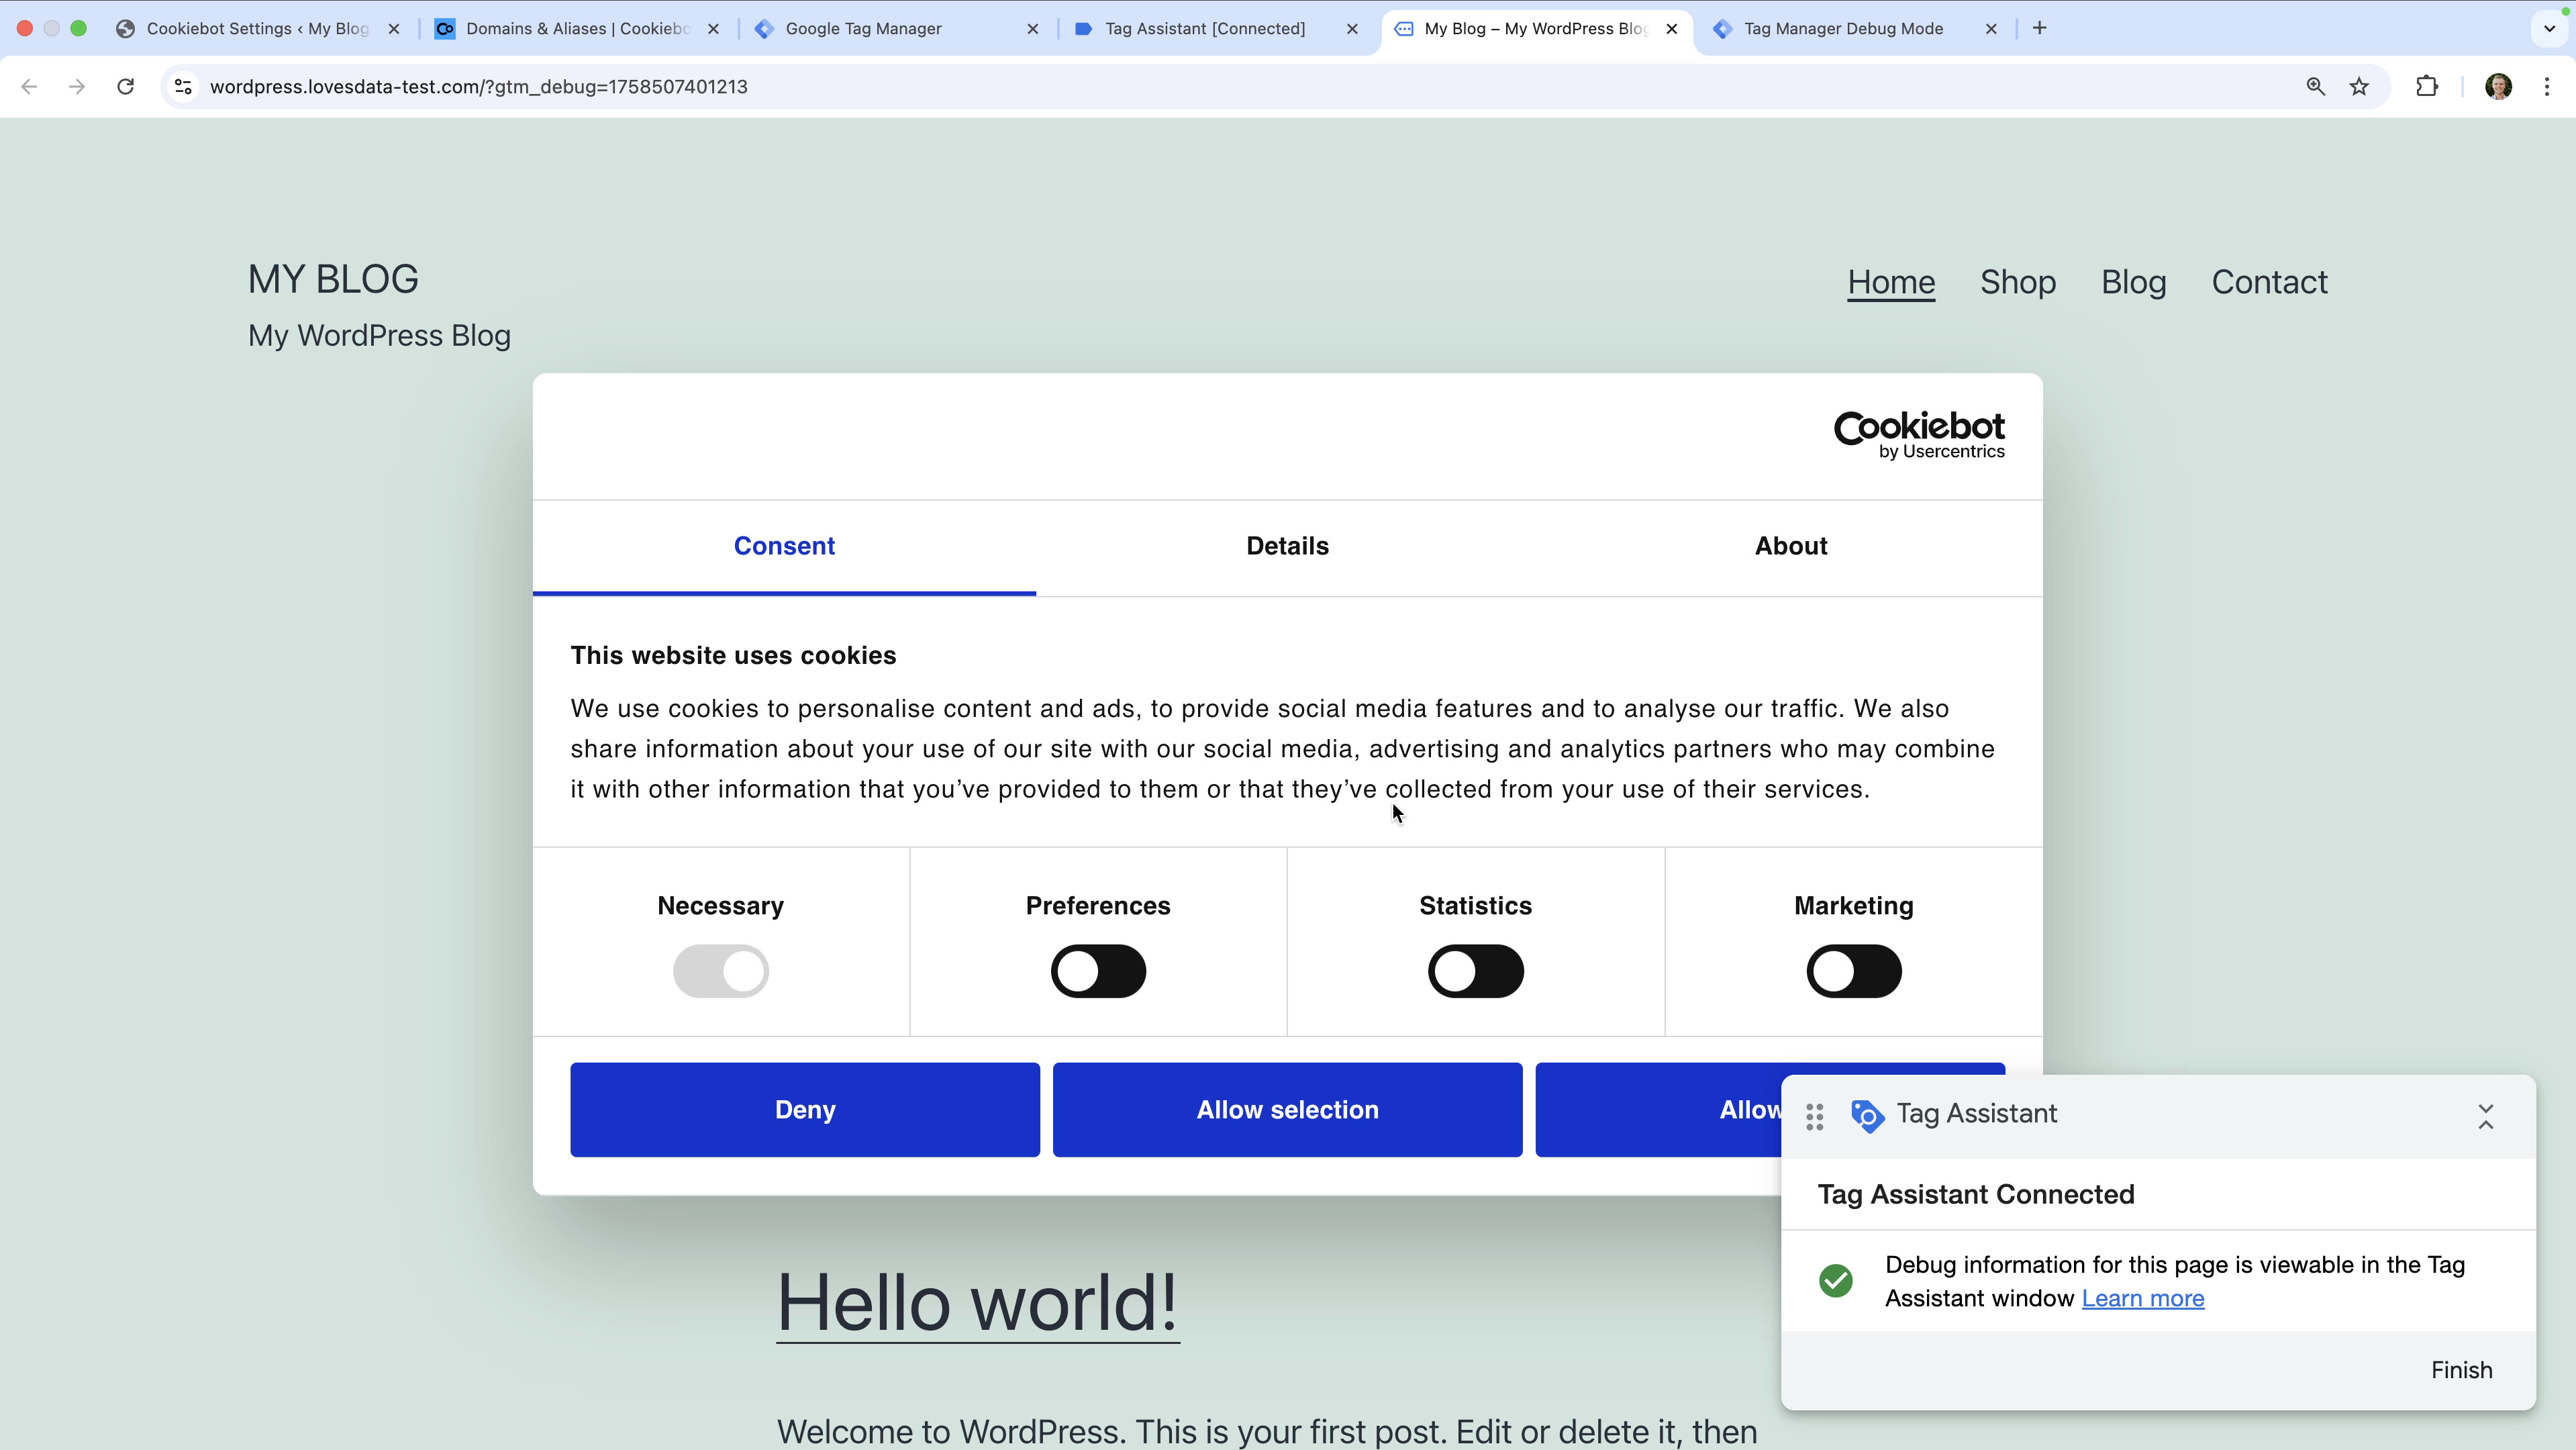
- In Google Tag Assistant, enter the URL of your website and confirm that consent hasn't been granted yet. When you check Tag Assistant for your web container and your server-side container, your Google Analytics tag should not have fired yet.
- Next, use the Cookiebot consent banner to allow cookies. Then check Tag Assistant again. This time, your Google Analytics tag should have fired.
- If everything is working correctly, publish both of your GTM containers.
Troubleshooting Tips
- Verify your DNS setup to make sure the CNAME record points to the Usercentrics endpoint.
- Check that
server_container_urlis correctly configured in the Google Tag located in your GTM web container. - Test consent states with Google Tag Assistant and confirm the event data includes
x-ga-gcs.
If you're getting started with GTM or want to learn tag management best practices, my Google Tag Manager course walks through setting up and testing tags step-by-step. And it also including advanced topics like Consent Mode and server-side tagging.
Conclusion
By setting up GTM server-side tagging with Usercentrics, you'll be streamlining data collection, improving user privacy, and helping to future-proof your implementation. You'll be able to manage data collection centrally and send more reliable data to analytics and advertising platforms.
This article contains affiliate links. If you decide to sign up, then we might make a small commission from your purchase.