How to Import Meta Ads Data into Google Analytics
Benjamin Mangold
Google Analytics 4 (GA4) now lets you connect directly to Meta so you can import cost and click data from your Facebook, Instagram, Messenger, and Audience Network ads. This new integration is free to use and can import up to two years of historical data. Once connected, you’ll be able to view Meta advertising metrics alongside Google Ads and other traffic sources.
In this blog post, I’ll show you how to set up the Meta Ads cost data import, and where to find your imported data in Google Analytics. You can also watch my tutorial to walk through the steps:
Table of Contents
- Step 1: What you need before you start
- Step 2: Create a new Meta data source
- Step 3: Mapping your UTM parameters
- Step 4: Create the data source
- Step 5: Where to find Meta data in Google Analytics
- Additional resources
Step 1: What you need before you start
Before connecting Google Analytics to Meta, there are a few things you’ll need. First, you will need the correct level of permission for Google Analytics. You’ll need Editor or Administrator permission for the property to set things up and import data.
You’ll also need access to the Meta Ad Account that is set up in a Meta Business Portfolio. If you don’t have these permissions, ask an account administrator to adjust your permissions or get them to complete the set up steps.
Finally, you'll need to ensure your Meta Ads are tagged with UTM parameters. Ads will need utm_source and utm_medium parameters in order to import data.
Tip: If you aren't using campaign tags with your Meta Ads yet, you'll need to start using these before you can import data. You can watch my campaign tagging tutorial or read the guide to campaign source and medium to get started.
Step 2: Create a new Meta data source
Once you’ve confirmed you have the correct permissions and tagging in place, you can set up a new data source to import your Meta advertising data.
- Open your Google Analytics property and navigate to 'Admin'.
- Select 'Data Import' under 'Data collection and modification'.
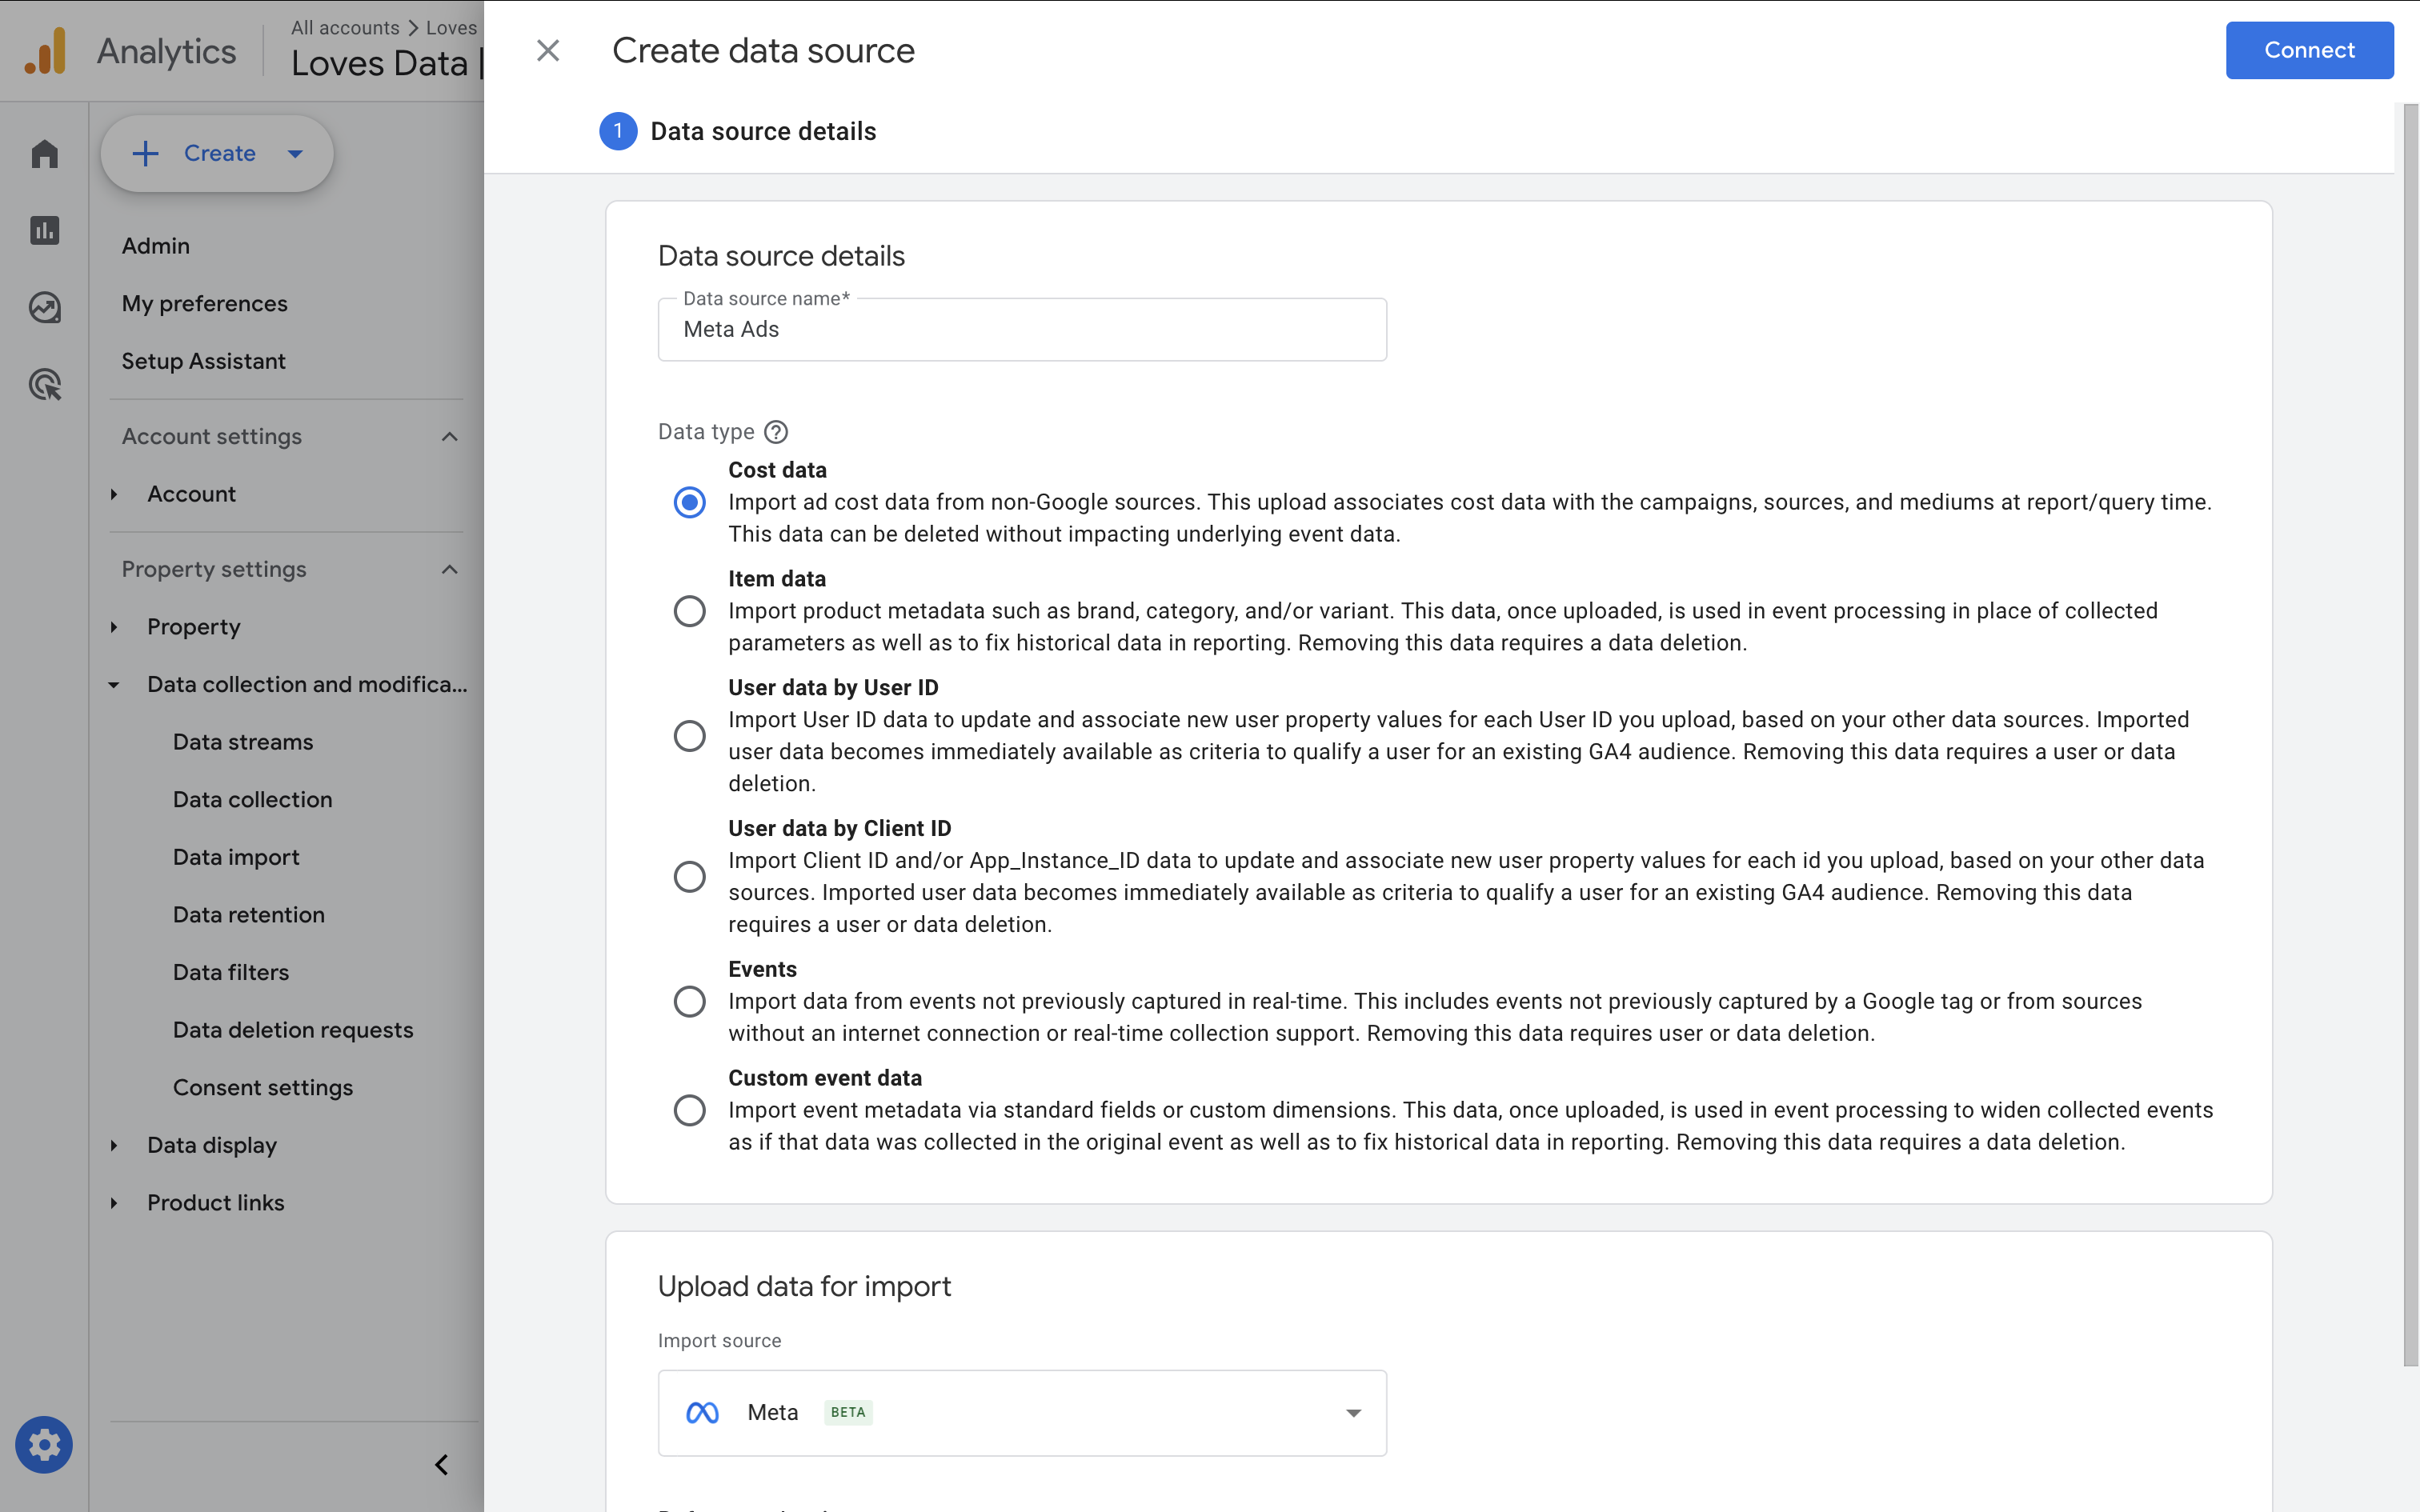
- Click 'Create data source'.
- Name your data source, for example 'Meta Ads', ensure 'Cost data' is selected as the 'Data type', choose 'Meta' as the 'Import source', and click 'Connect'.
- You will then need to authorize access so data is shared with Google Analytics.
- Next, choose the 'Business Center' (which is the Meta Business Portfolio) and 'Ad Account' that contain your campaigns.
Tip: Make sure you sign in using the Meta account that has access to the Business Portfolio and Ad Account to select the correct accounts.
Step 3: Mapping your UTM parameters
This is the most important step. You need to map the correct values for the UTM parameters (campaign tags) that are used for your Meta Ads. You'll need the values used for the utm_source and utm_medium tags to do this.
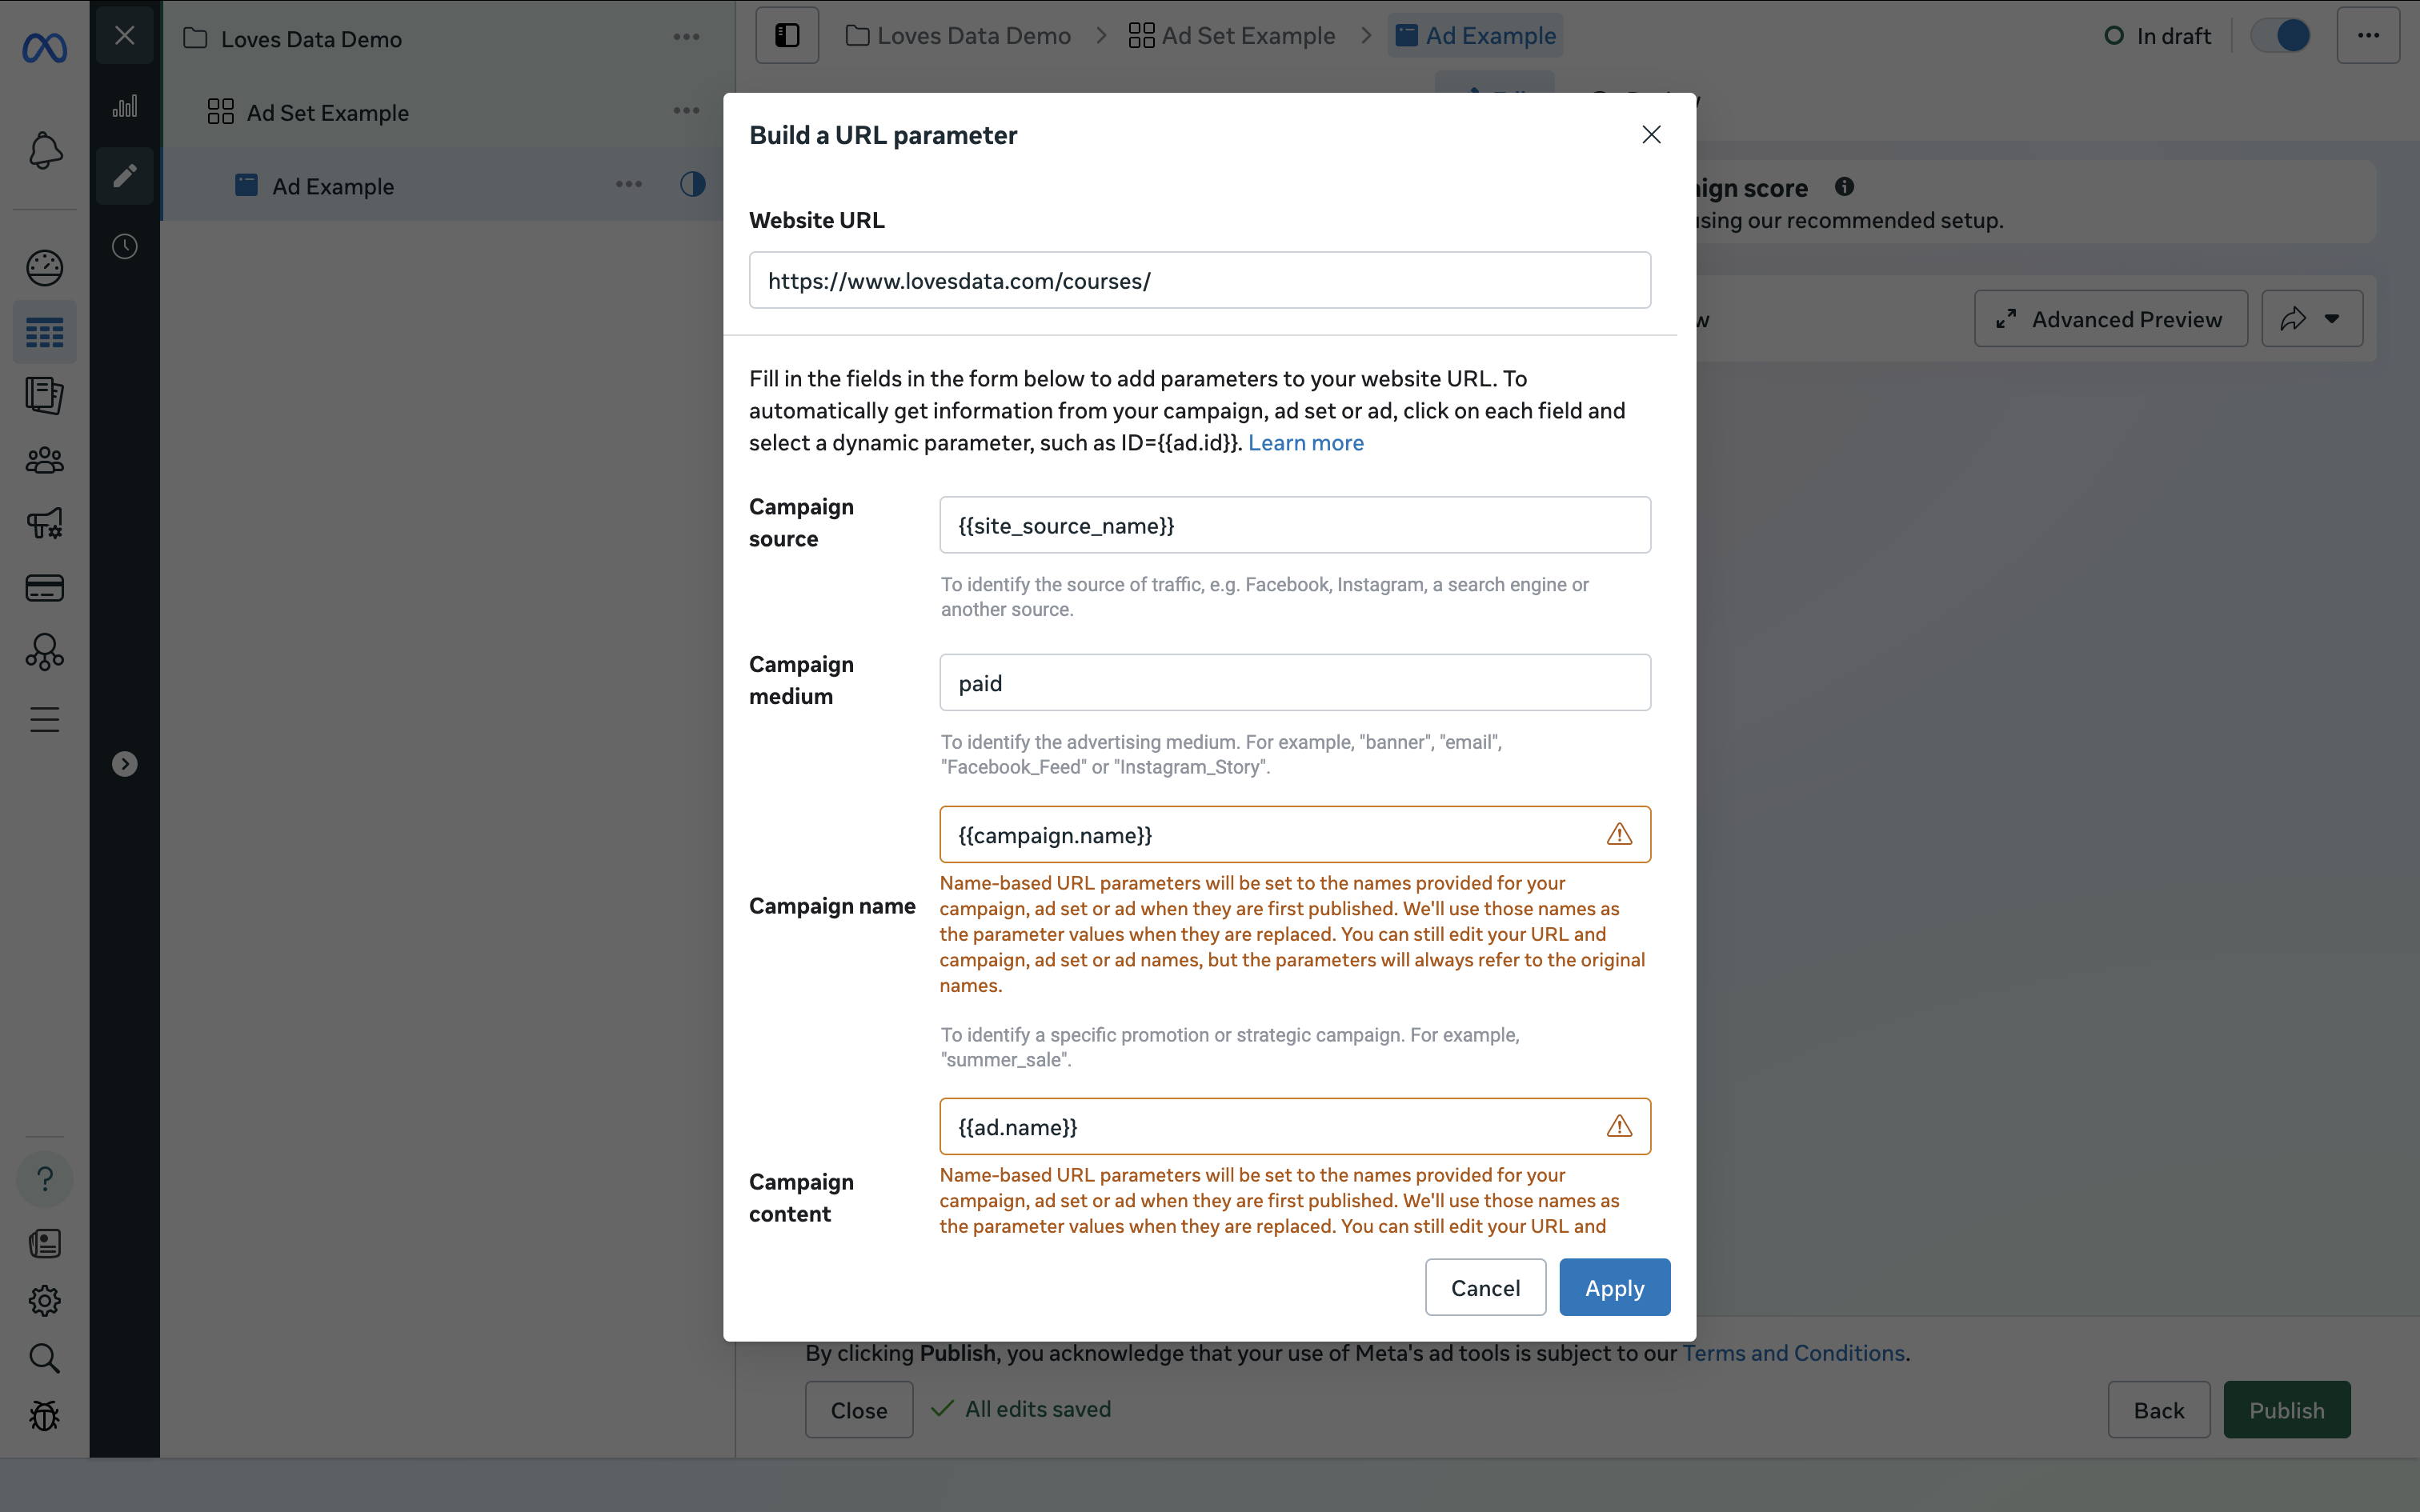
You can check the campaign tags that are currently being used by opening your ads in Meta Ads Manager and selecting 'Build a URL parameter' under the 'Destination' settings. You'll need to make a note of the values used for 'Campaign source' and 'Campaign medium'.
For 'Campaign source', I recommend using the dynamic {{site_source_name}} parameter. This will automatically use the following values depending on where your ad is seen and clicked:
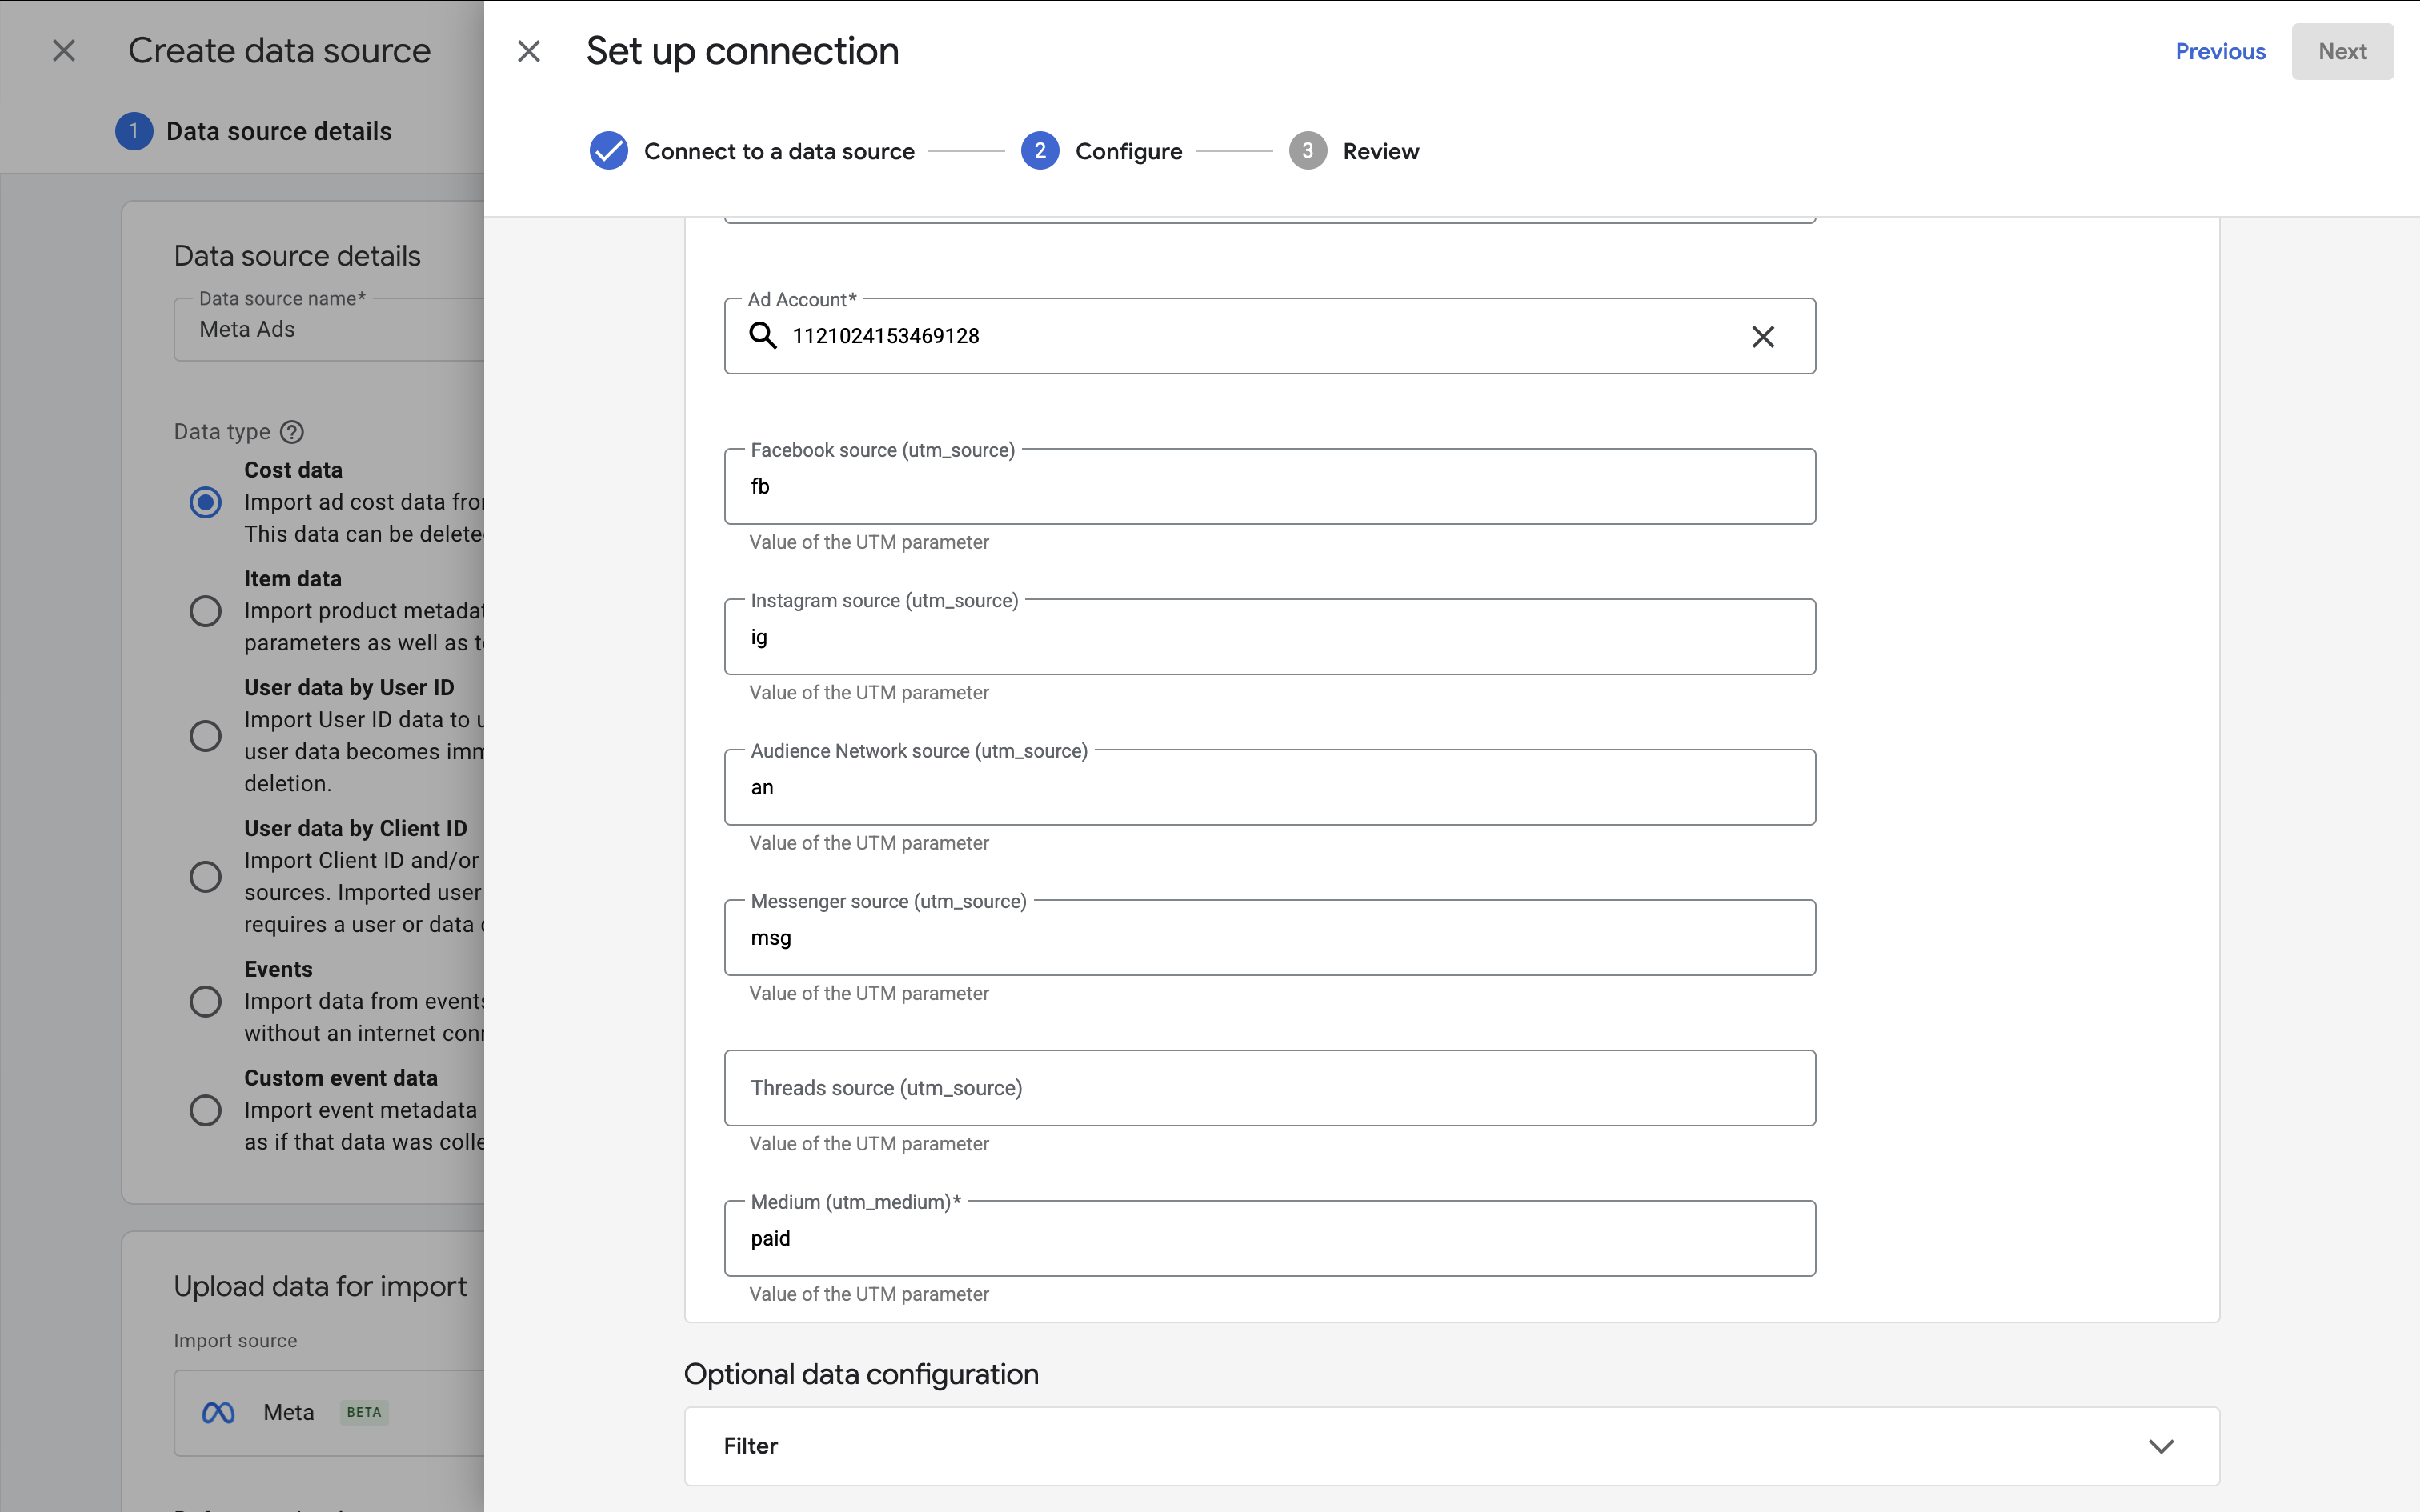
- fb for Facebook
- ig for Instagram
- an for Audience Network
- msg for Messenger
And for the 'Campaign medium', I recommend using paid as the value. However, you will need to check the value used for your campaign tags.
Now it's time to head back to Google Analytics and map these values to the different sources available. If there are differences between the value of the tags in your Meta ads to the configuration in Google Analytics, data won't be imported correctly.
Using my recommended examples, you could configure the data source like this:
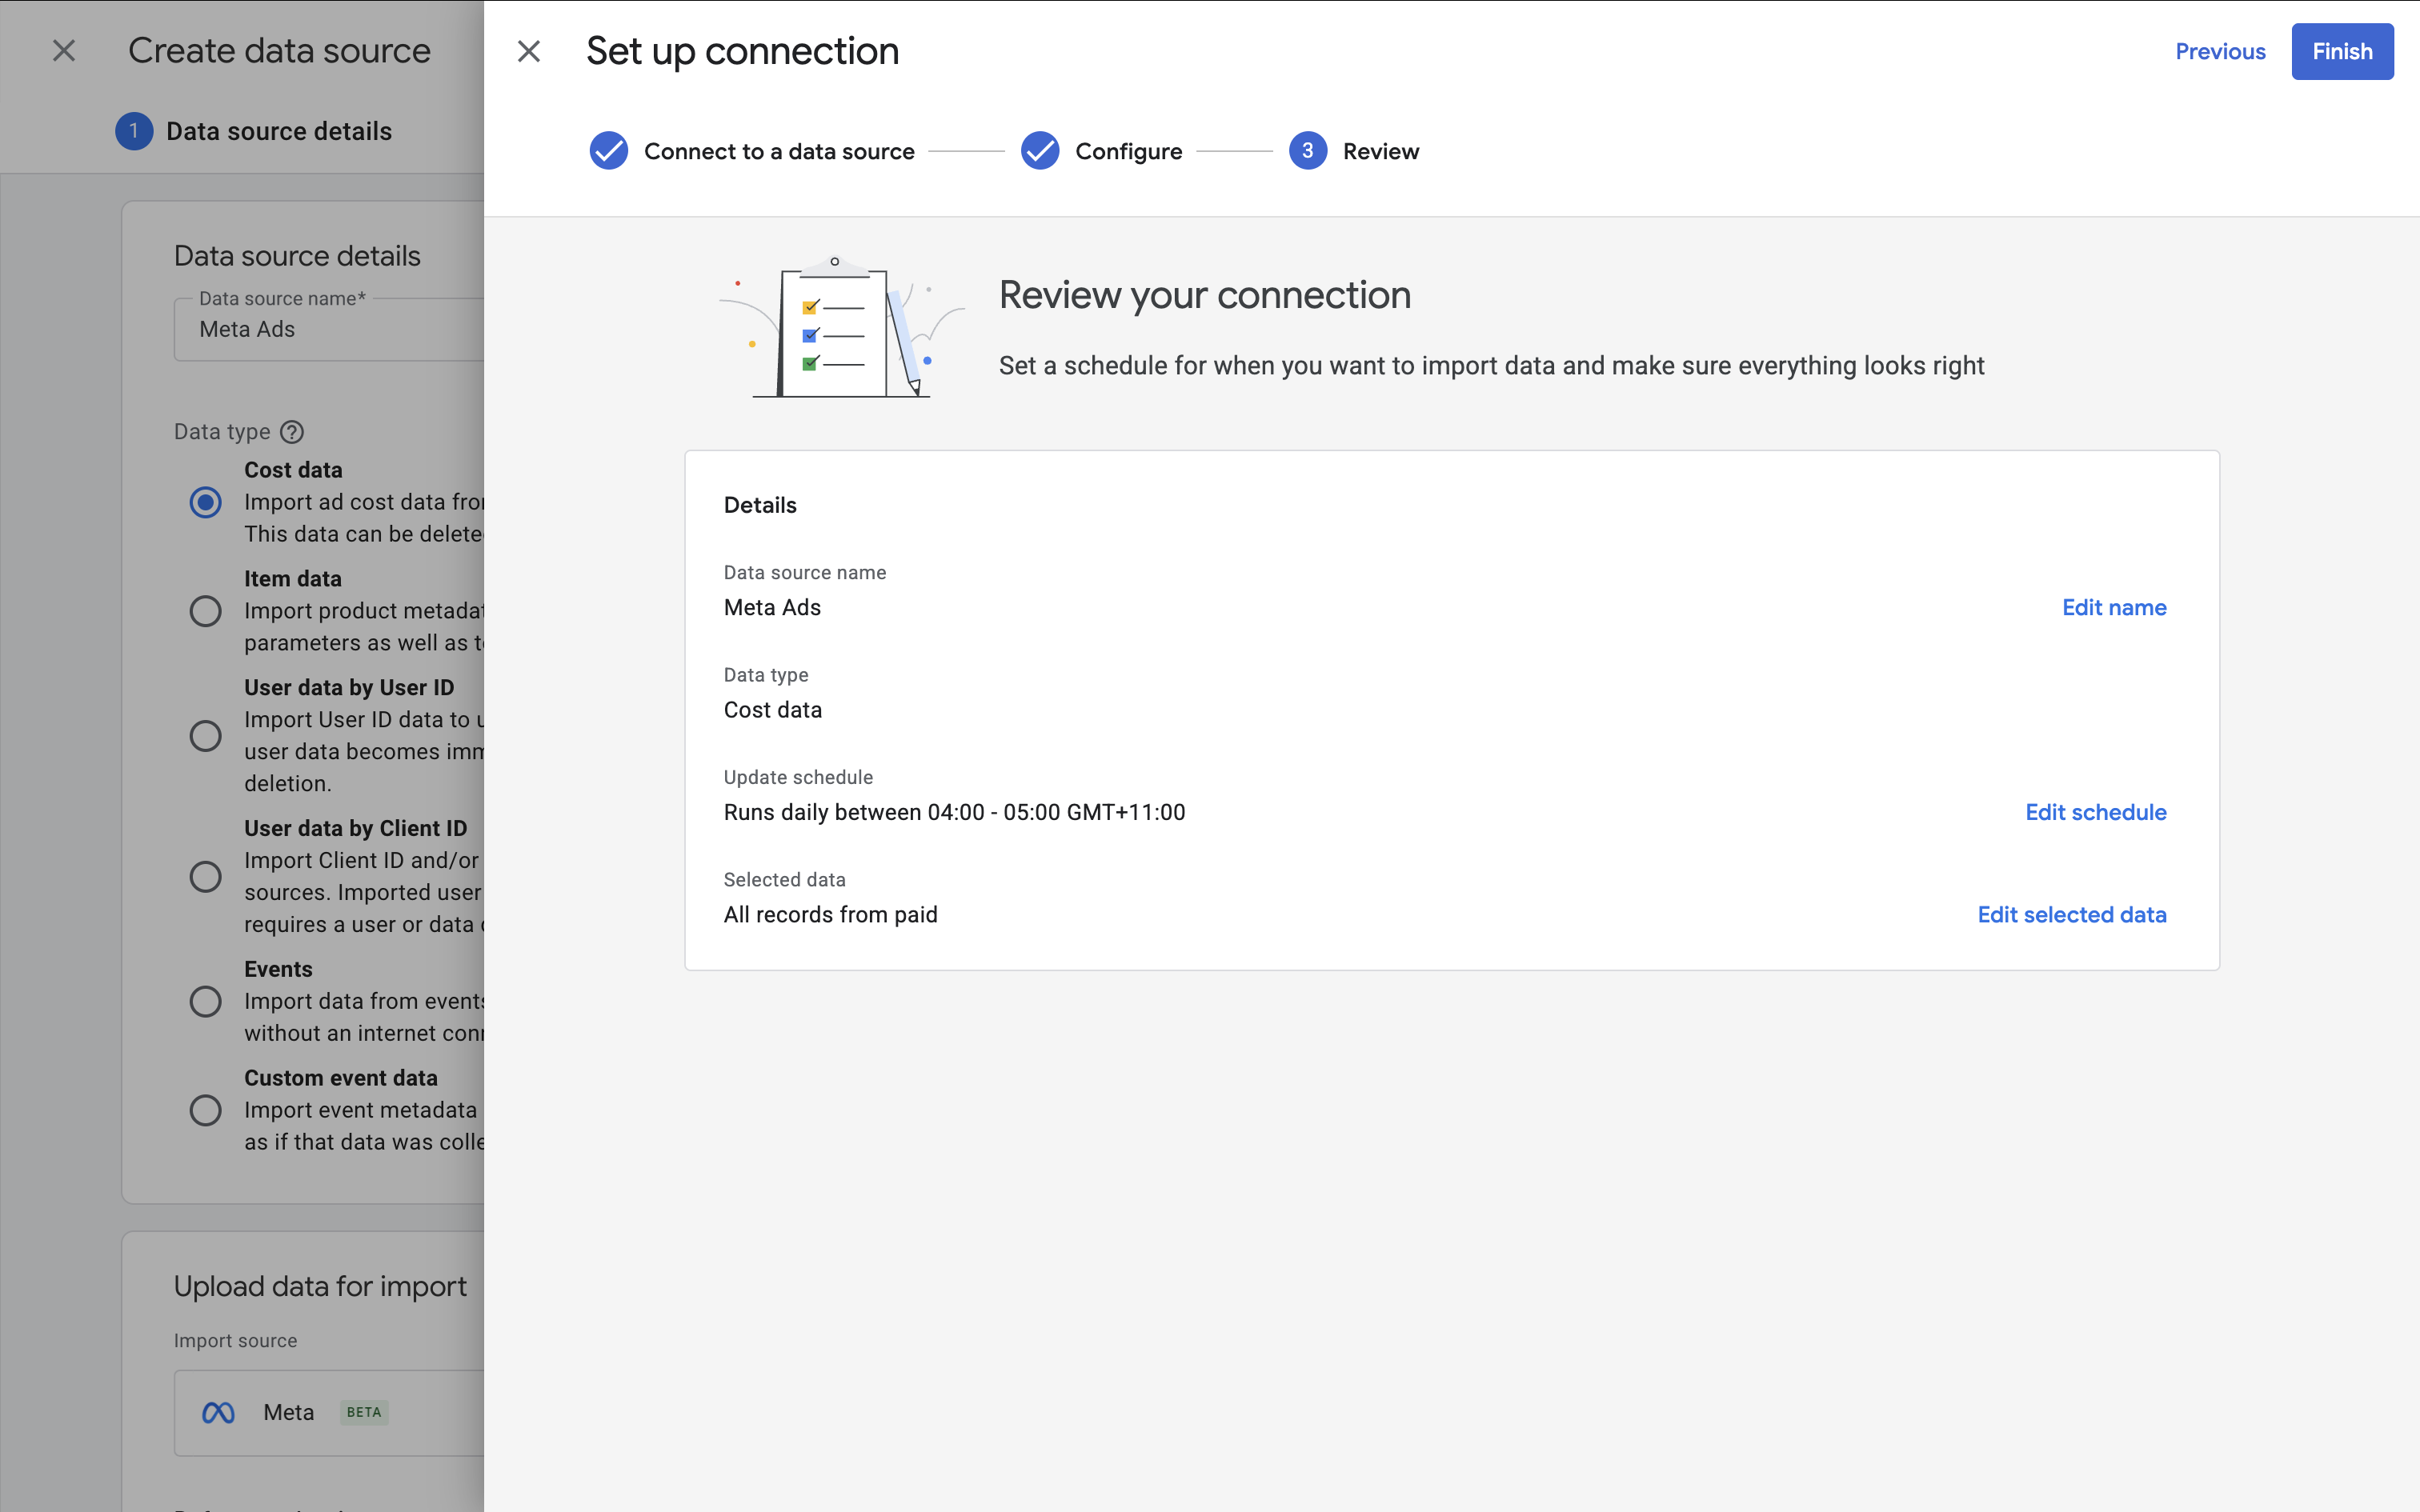
Step 4: Create the data source
Now that you've mapped your UTM parameters, the final step is to check your settings and create your new data source. The default settings will automatically select a time to import new data each day. You also have the option of adding filters to only import certain data from Meta. For example, you could cfreate a filter to only import data from certain campaigns.
When you're ready to import data, click 'Finish'.
Depending on how much historical data you’re importing, it might take some time before data appears in your reports.
Tip: If data isn't imported, I recommend double-checking that your utm_source and utm_medium values match exactly, and that you’ve selected the correct Business Portfolio and Ad Account.
Step 5: Where to find Meta data in Google Analytics
Once the import is complete, you’ll see metrics for your Meta Ads, including clicks and cost, in your reports. To view the imported data, you can use the default 'Non Google cost' report. You can find this by navigating to 'Reports' and selecting 'Acquisition'.
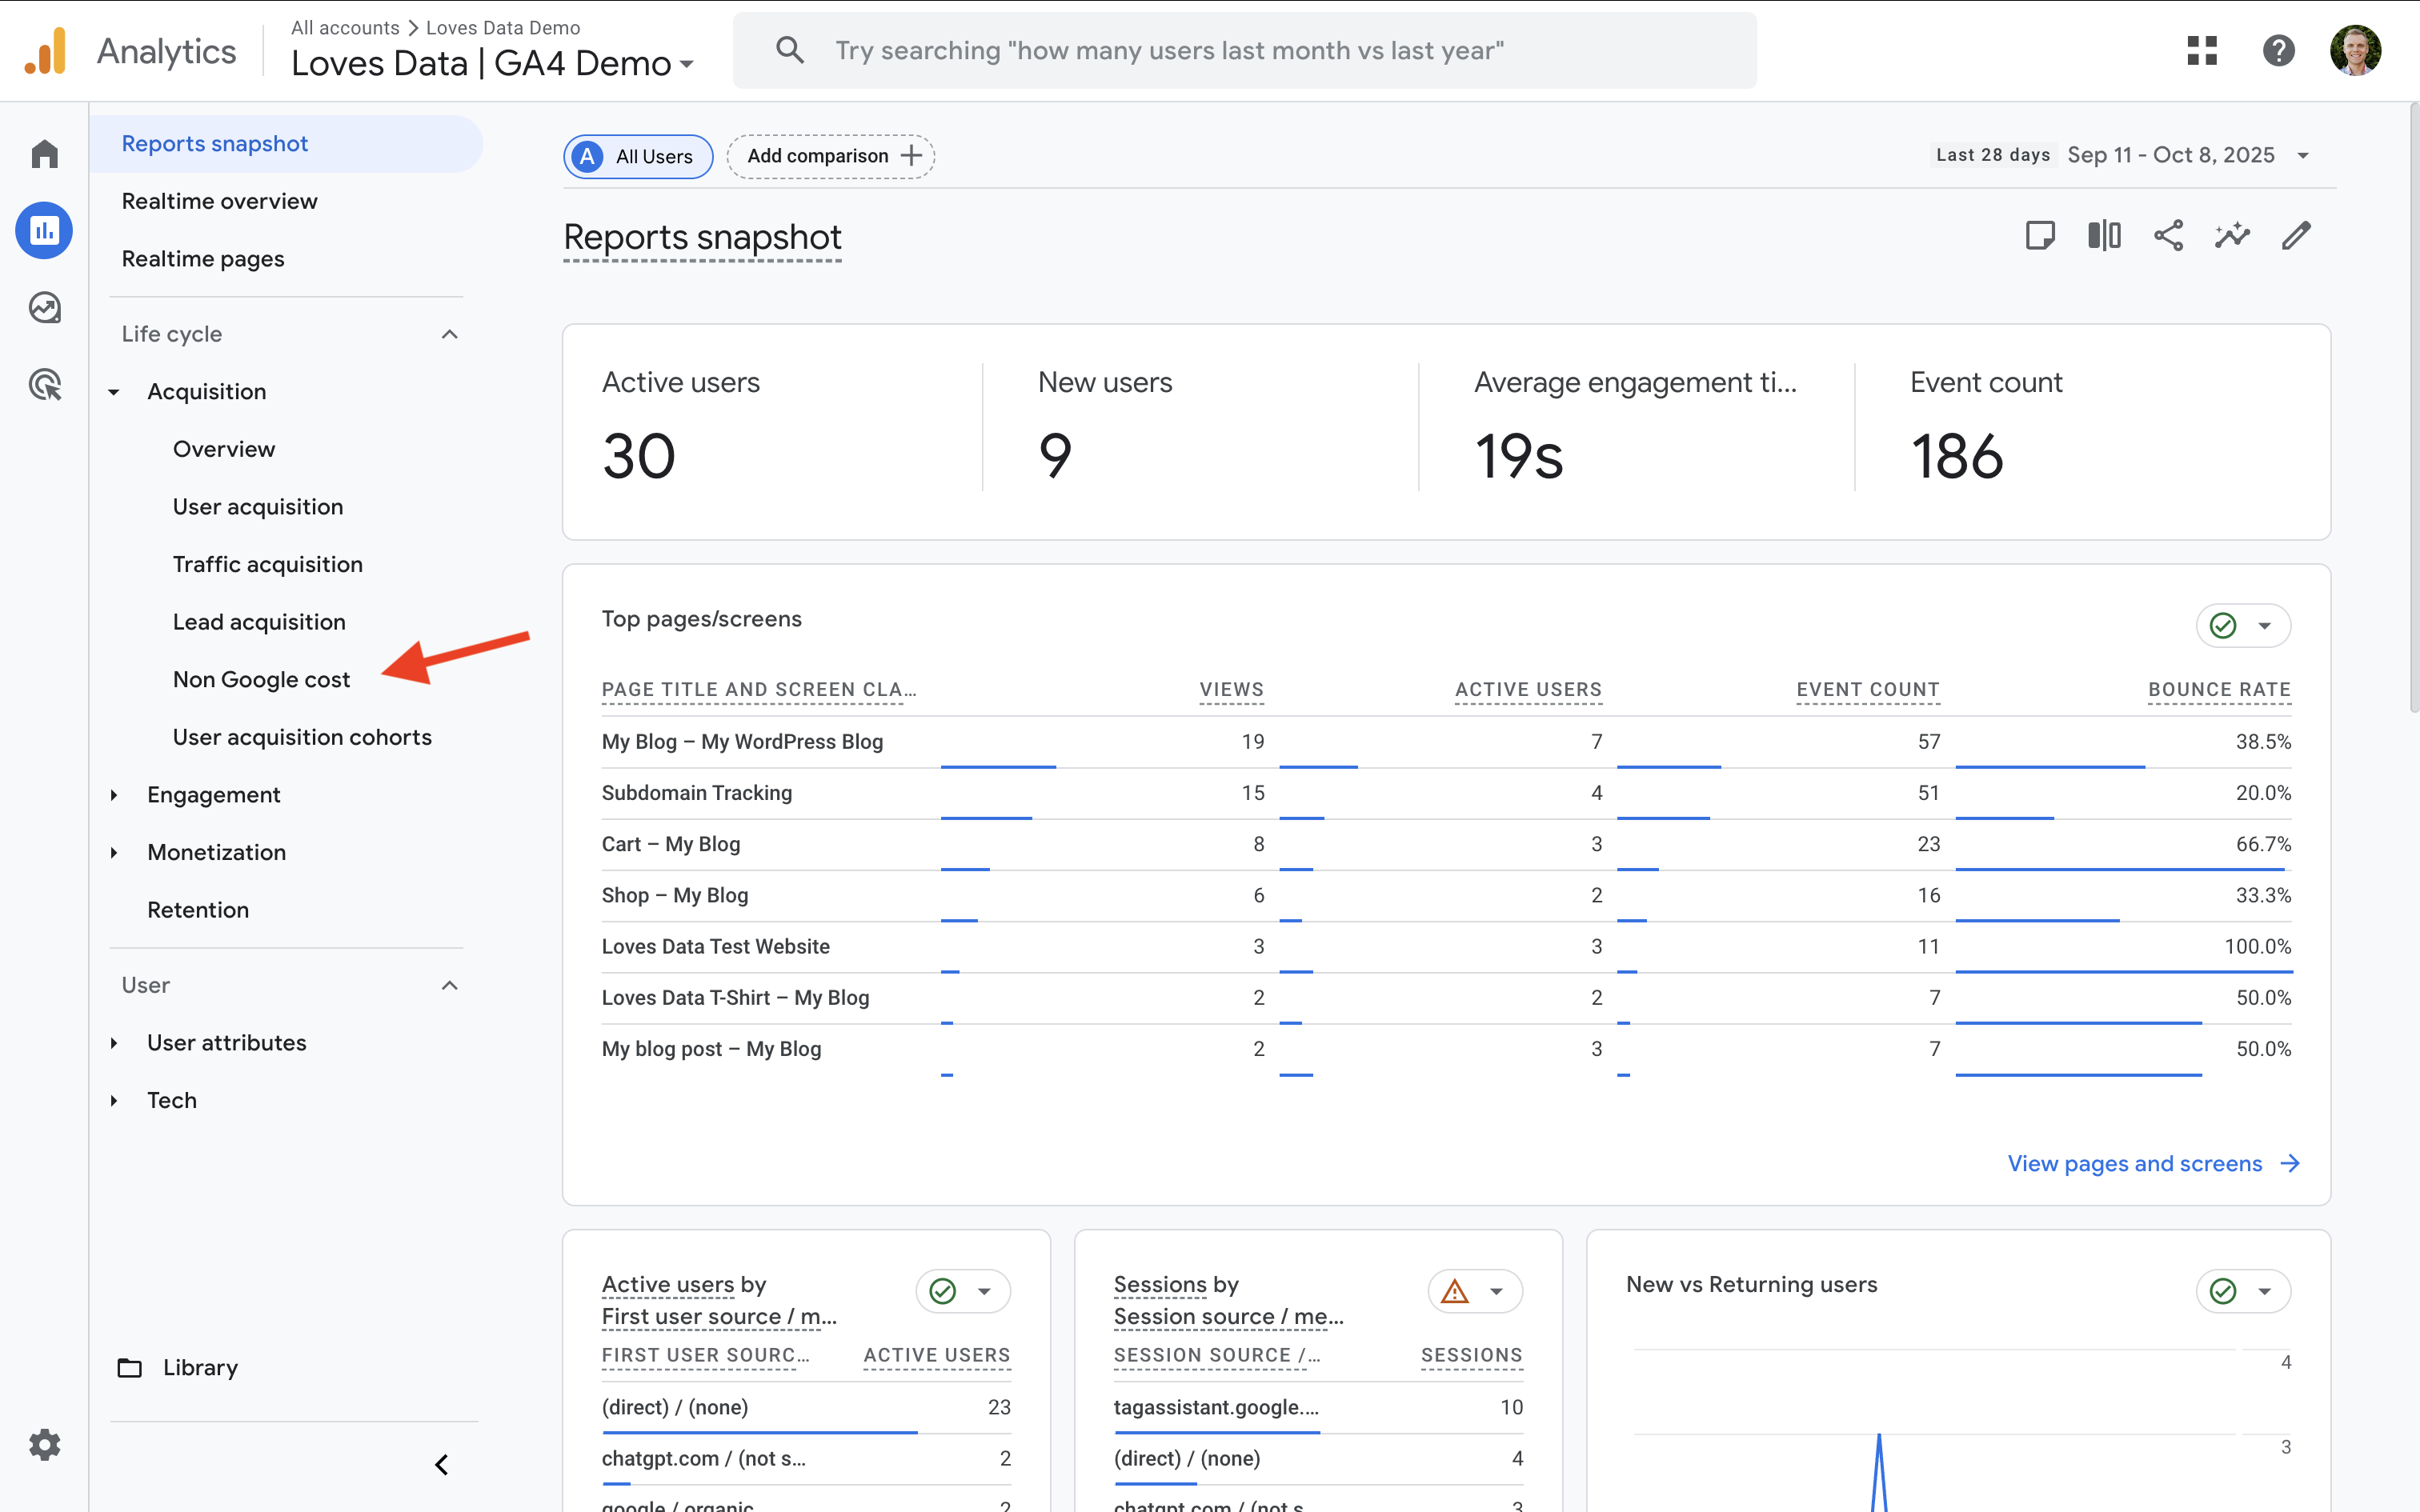
Here you’ll find your Meta campaigns listed alongside Google Ads and any other imported cost sources.
And apart from the standard reports, you can also create Exploration reports to combine Meta cost data with behavioral and key event metrics. This allows you to create custom reports that compare things like key events (conversions), ecommerce, and engagement metrics.
Tip: To visualize your imported cost data, consider building a dashboard in Looker Studio. It’s an easy way to see spend, clicks, and key events (conversions) across all your marketing channels.
Additional resources
- Campaign tagging tutorial (YouTube)
- Google Analytics 4 Complete Course
- Analytics Essentials (free mini-course)
- How to track social media traffic in GA4
- Guide to campaign source and medium
- Creating visual stories with Looker Studio
Once you’ve completed the setup, your Meta Ads cost data will appear in your Google Analytics reports. Uploading your non-Google Ads cost data gives you a better view of performance and ROI across your marketing channels.
Courses by Loves Data
Learn how to use Google Ads, Google Analytics, Google Tag Manager, and Looker Studio. View our courses.