
Google Tag Manager Settings: How to Upgrade Your Container
 Benjamin Mangold
Google Tag Manager (GTM) is introducing the new ‘Settings’ section and destination tags that let your container send data directly to Google Analytics and Google Ads. Google recommends upgrading existing containers to use this configuration, but the upgrade is optional.
In this guide, we’ll look at what Google Tag Manager Settings does, what the upgrade changes, and how to review and test the changes before publishing.
You can also watch my tutorial, where I walk through the container upgrade and the new Settings section:
Contents
- What are Google Tag Manager Settings?
- What Does the GTM Upgrade Change?
- How to Upgrade Your Google Tag Manager Container
- Understand Your Destination Status
- How to Review Your GTM Settings
- Why Can’t I See the Upgrade Option?
What are Google Tag Manager Settings?
‘Settings’ gives you a central place to review your Google destinations and manage settings for the destinations connected directly to your container.
A destination is where your measurement data is sent. For example, a Google Analytics web data stream or a Google Ads account. A destination tag connects your container directly to that destination.
The Settings section is separate from ‘Admin’, where you manage container administration and access. It also doesn’t replace every setting inside Google Analytics or Google Ads.
The options you see in ‘Settings’ depend on the destinations connected to your container. Once you connect a destination directly, you can manage additional settings, such as cross-domain measurement for Google Analytics.
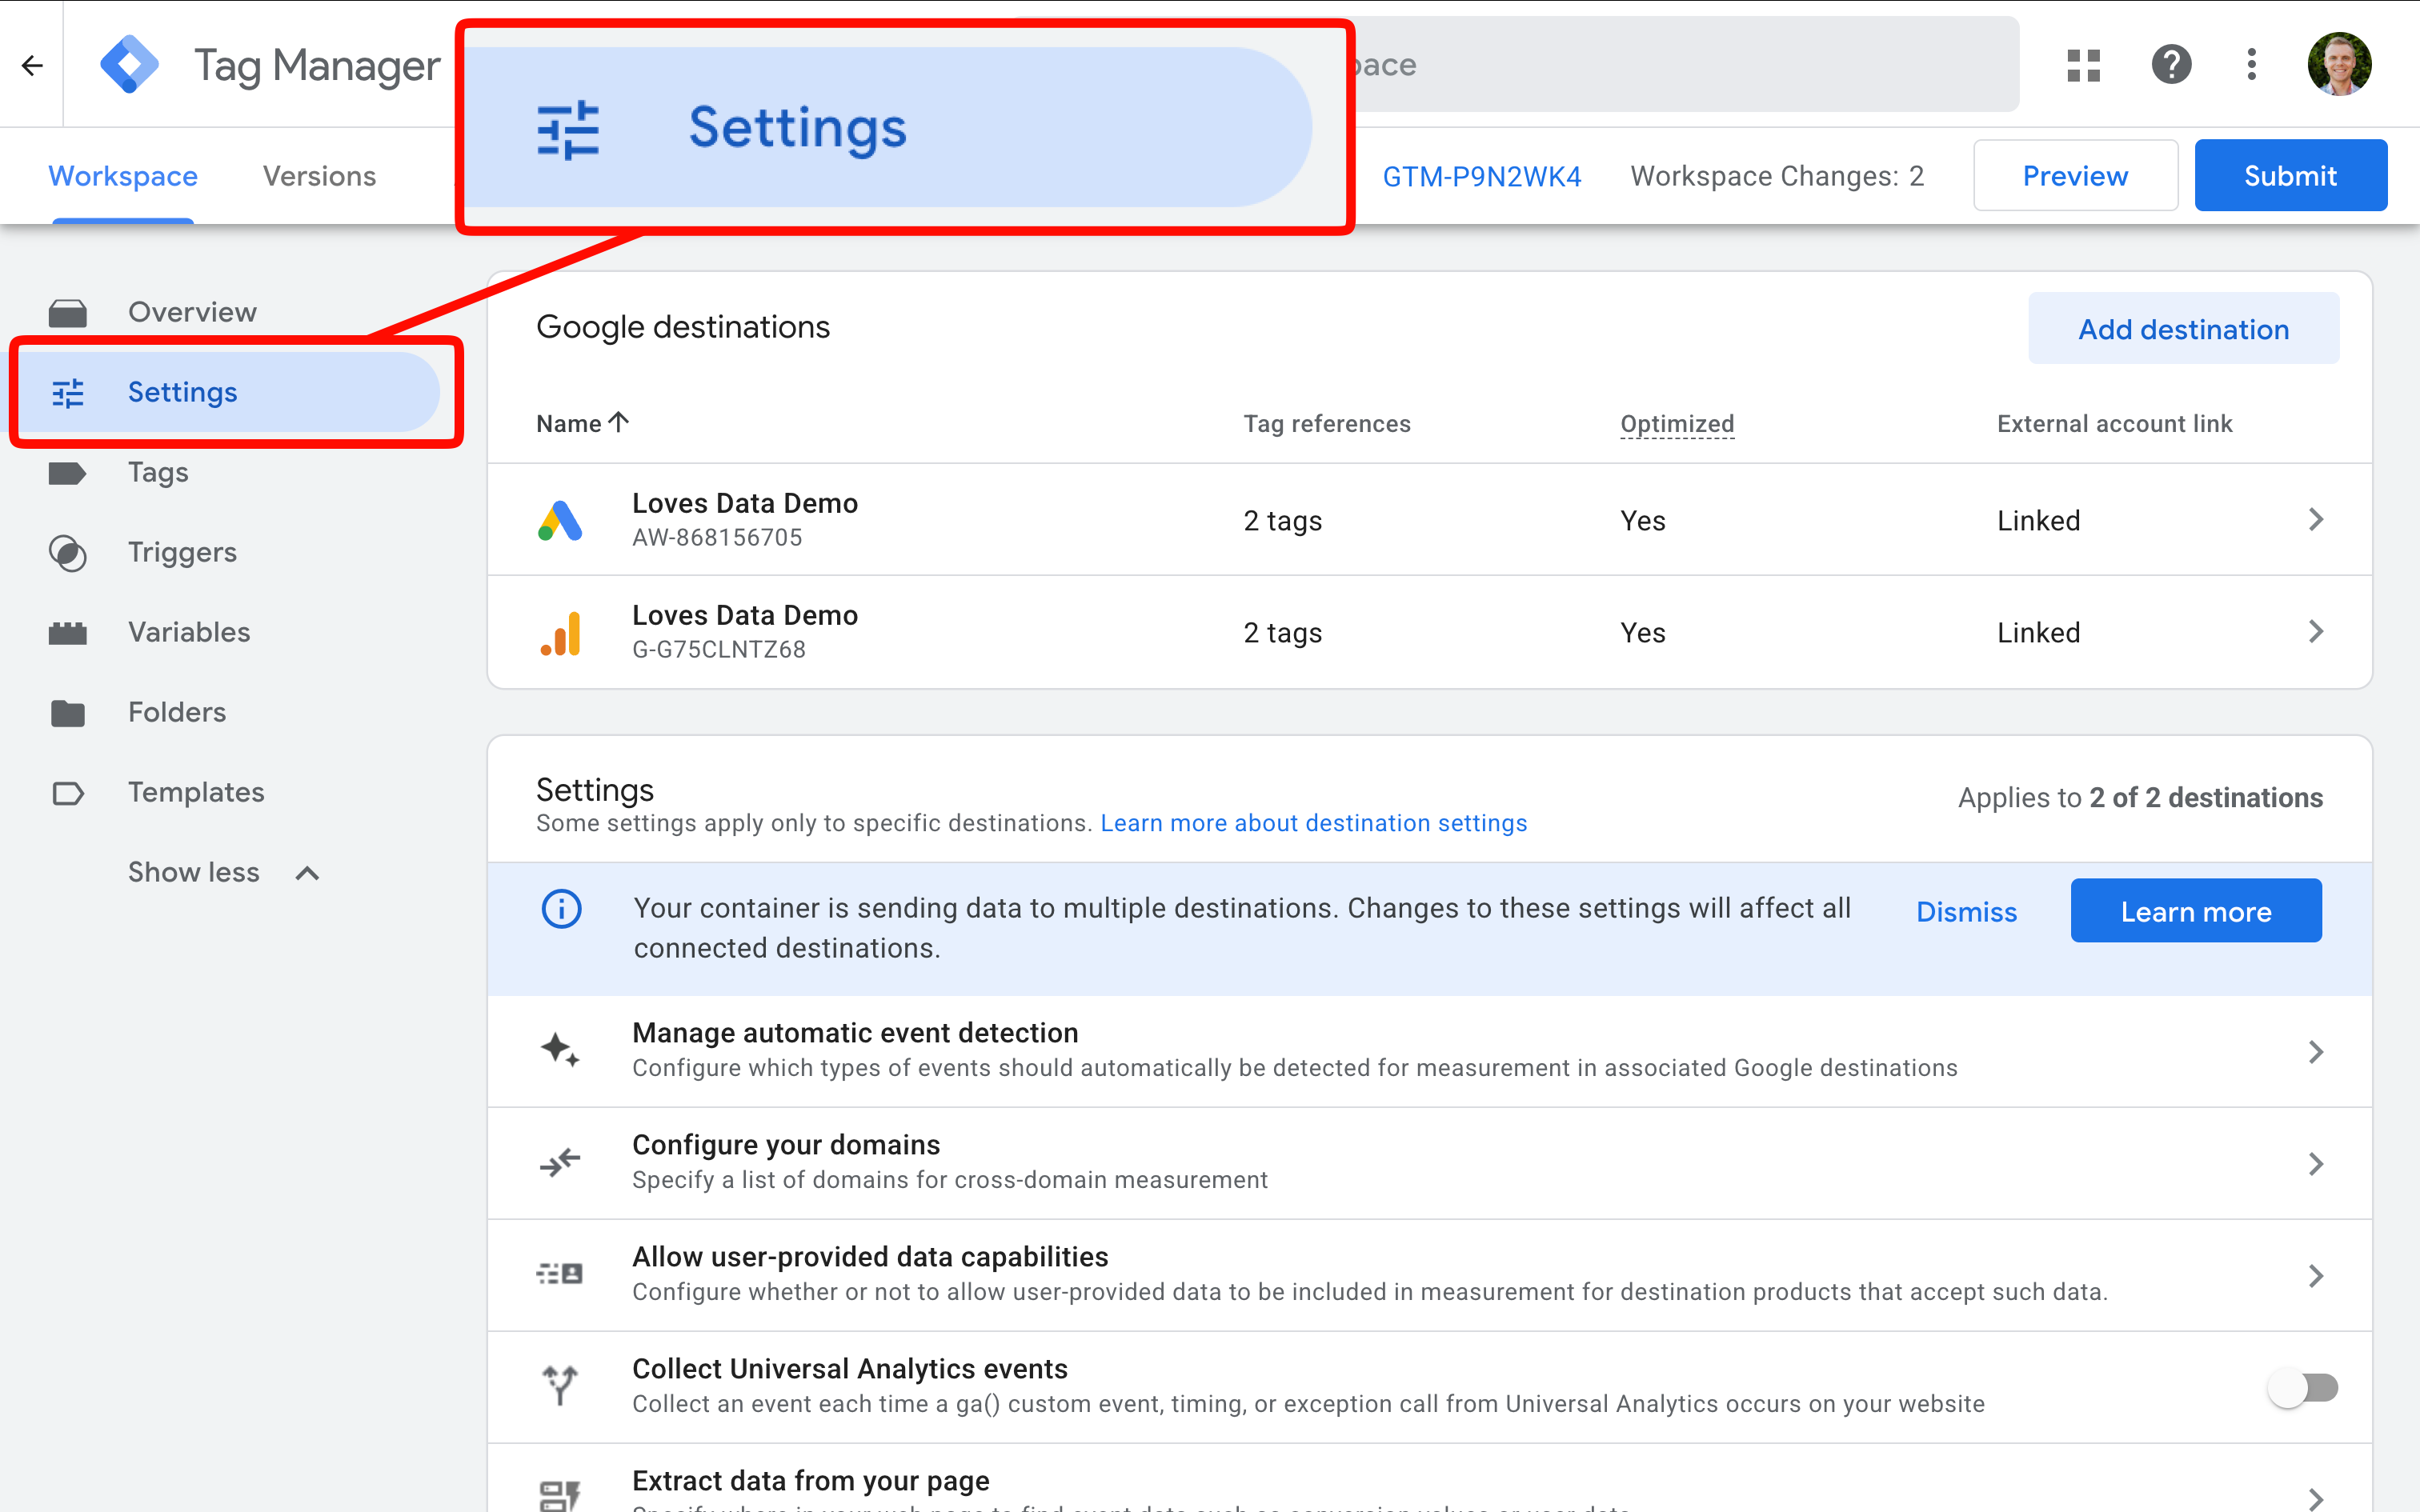
Seeing ‘Settings’ in the navigation doesn’t mean your existing Google tags have been migrated. It’s possible to have the new interface while your container still loads an existing Google tag.
What Does the GTM Upgrade Change?
Previously, Google Tag Manager loaded additional Google tag JavaScript to send data to a Google destination. With destination tags, your container can send data directly, removing that extra loading step for the destinations you upgrade.
The upgrade also brings Google tag settings into your container and creates external account links through the guided optimization process. Your existing event tags remain unchanged.
Google describes these changes in its October 12 release announcement. The aim is to improve tag performance, centralize settings and access, and make diagnostics easier to troubleshoot.
This can help improve performance, but the result will depend on your implementation. It doesn’t automatically remove Google tags installed separately through your website template, a plugin, or another service.
The upgrade is recommended, not automatic. You can continue using your existing setup while you review the new configuration. Google also outlines the changes in its Google tag and Google Tag Manager update documentation.
How to Upgrade Your Google Tag Manager Container
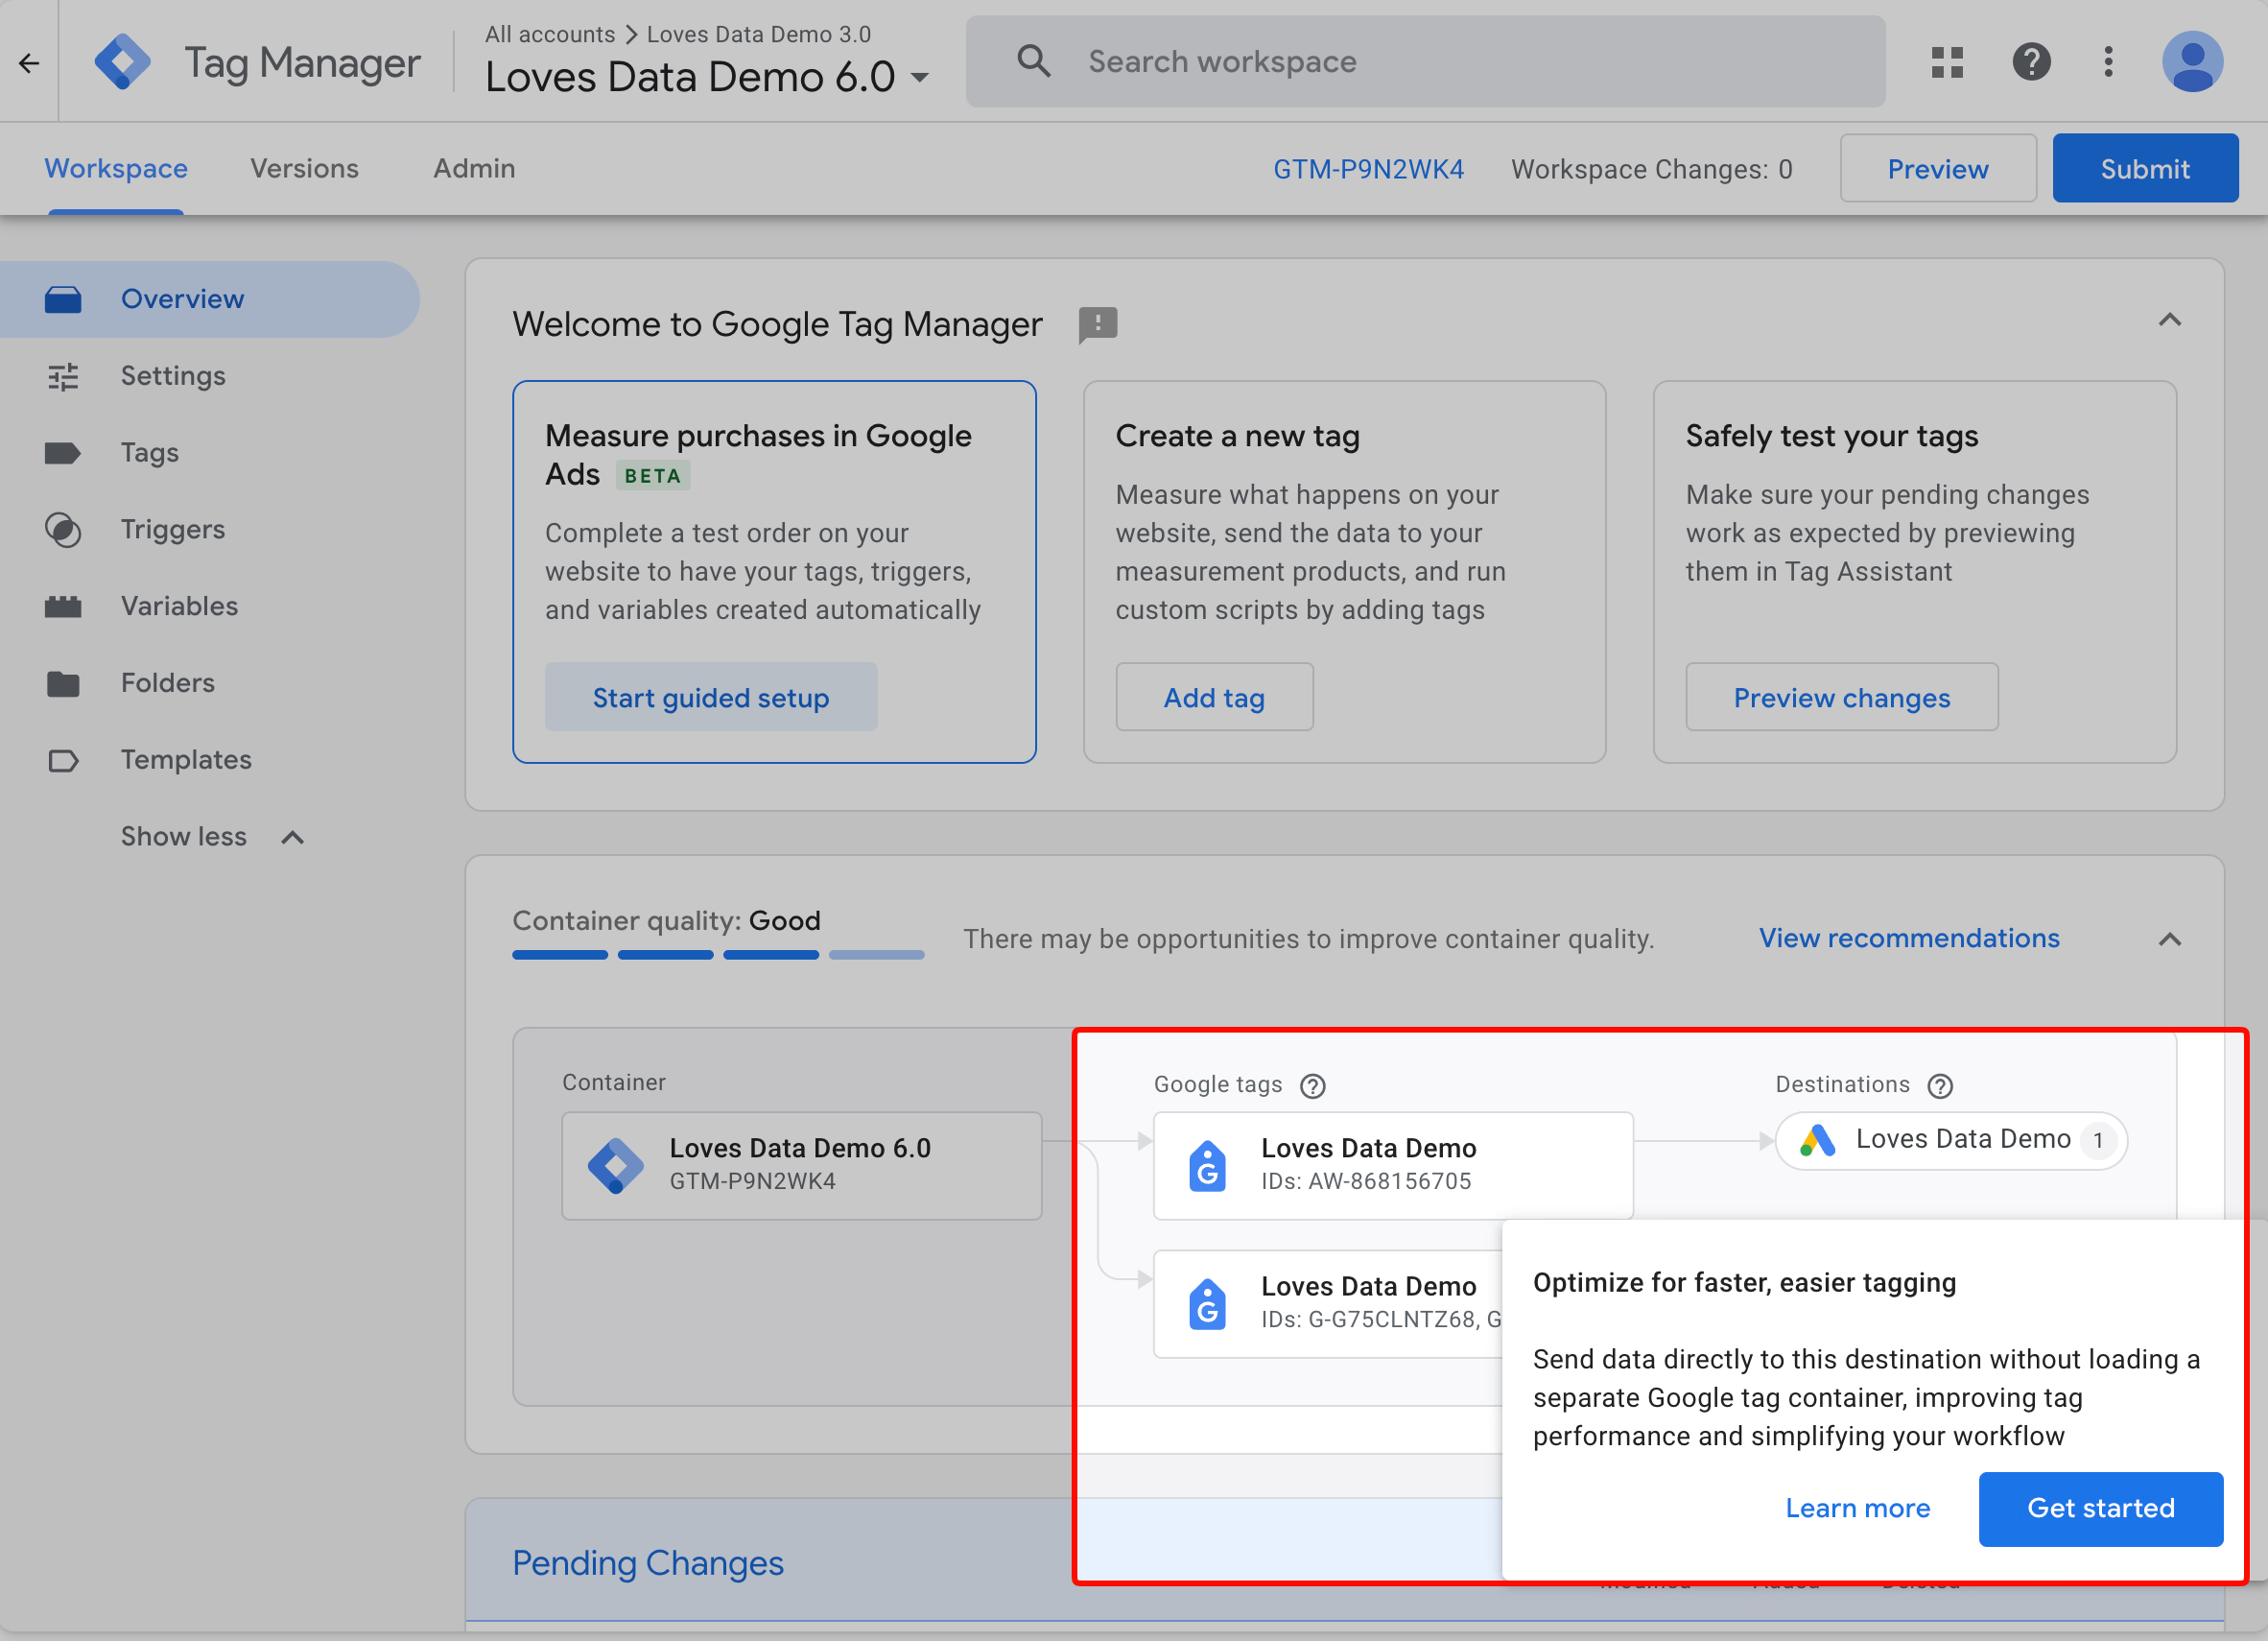
The following process uses the guided optimization available in the containers I checked on October 13, 2026. I didn’t see an upgrade banner, but I could open the wizard by hovering over a Google tag in the ‘Container quality’ section.
You’ll need permission to edit the workspace to apply changes. Publishing also requires the appropriate container permission. Before starting, review any unpublished workspace changes so you don’t accidentally publish unrelated work with the upgrade.
1. Open the Guided Optimization
- Open your web container and select ‘Overview’.
- Scroll down to the ‘Container quality’ section.
- Hover over a Google tag in the connection diagram.
- In the ‘Optimize for faster, easier tagging’ popover, select ‘Get started’.
This opens ‘Optimize your Tag Manager container’. Select ‘Better tag performance’ to see how the container will send data directly to destinations.
2. Review the Tags and Account Access
Under ‘Optimize your container setup’, review the Google tags selected for optimization. Check their destination IDs, especially if you use similar names for test and production accounts.
There’s also an access option next to each tag. In my example, this was set to ‘Read access’. Review this before selecting ‘Next’.
Important: The wizard creates external account links when you add the changes to your workspace. These permission changes take effect immediately, before the tagging changes are published. Review them carefully if you manage client containers or work with different teams.
3. Choose the Container Defaults
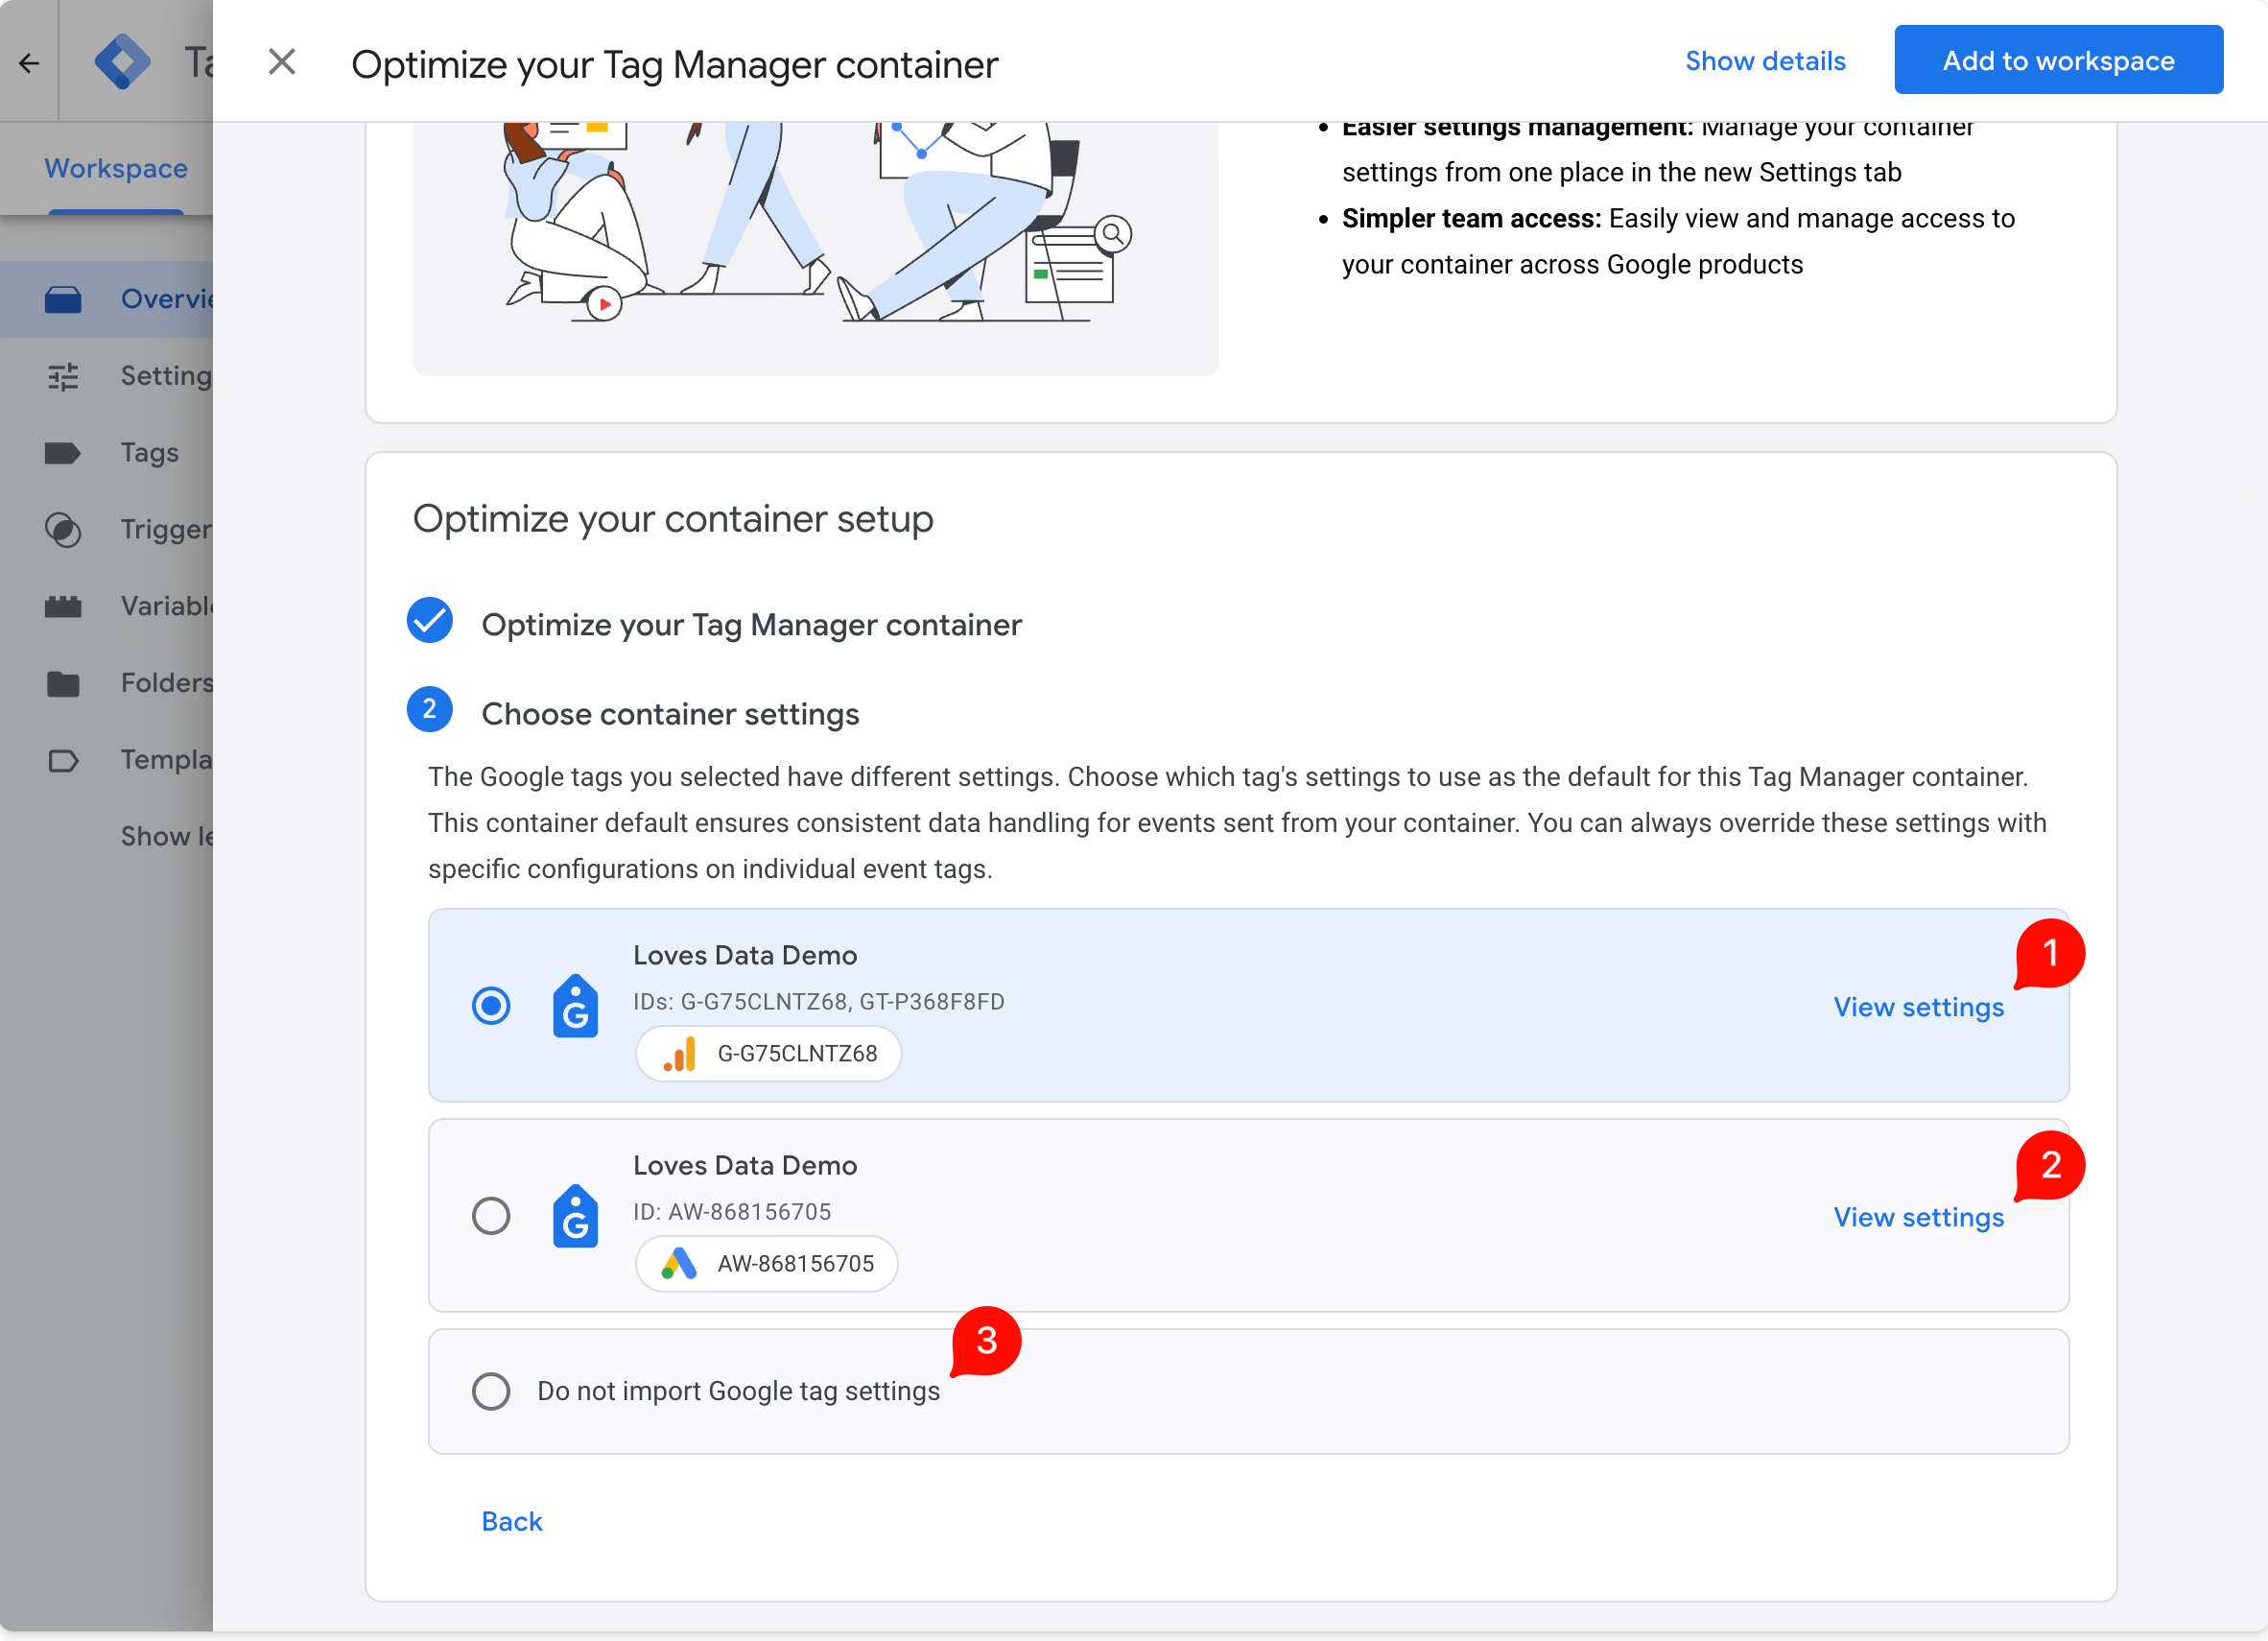
If your selected Google tags have different settings, ‘Choose container settings’ asks you to choose which tag’s settings to use as the container defaults.
Select ‘View settings’ to compare the configurations. For example, two tags might have different domain configurations. Choose the source that matches the setup you intend to use, rather than assuming the wizard will merge every setting.
The wizard also offers ‘Do not import Google tag settings’. If you choose this, review and configure the required settings yourself. For an existing implementation, importing the settings you’ve checked gives you a starting point to validate.
4. Review the Proposed Changes
Select ‘Show details’ to open ‘Preview changes’. Review the selected workspace, the settings being added, and the tags being added or modified.
Scroll down to ‘Permission changes’ and check the destination IDs and access levels. If you need to change these choices, return to the configuration before proceeding.
When you’re happy with the proposed changes, select ‘Add to workspace’.
5. Check Settings and Test Your Tracking
The tagging changes are now in your workspace, but they aren’t live yet. Open ‘Settings’ and review the imported values. Also check the destination tags’ configuration and triggers against your previous setup.
Select ‘Preview’, connect to your website, and complete the interactions you measure. In Tag Assistant, check:
- The destination and event tags fire when expected.
- Events use the intended measurement or destination ID.
- Parameters contain the correct values.
- The same interaction isn’t sending unintended duplicate events.
For purchases, check the transaction ID, value, and currency. If you use a consent banner, test the relevant behavior with consent denied and granted. You can also check Google Analytics DebugView to confirm that your test events arrive.
If you use server-side Google Tag Manager, confirm that your server container URL is still configured and that the expected requests reach the server container. This upgrade applies to the web container and doesn’t replace your server-side tags.
6. Publish the Tested Changes
Once you’ve reviewed and tested the setup, select ‘Submit’, add a useful version name and description, and select ‘Publish’. Check the published implementation on your live website too.
If you later need to review the account links, navigate to ‘Admin’ and select ‘External Account Links’. Treat access changes separately from the version of your tagging configuration.
Understand Your Destination Status
The ‘Google destinations’ table in Settings helps you review how destinations are connected. Two statuses are particularly useful:
| Status | What It Means |
|---|---|
| ‘Optimized’: ‘Yes’ | The destination is configured to receive data directly without loading a separate Google tag container. If changes are still unpublished, this doesn’t confirm that the optimized configuration is live. |
| ‘External account link’: ‘Not linked’ | There isn’t an external account link for managing permissions and accessing the container through the destination product. This status doesn’t, by itself, mean tracking is broken. |
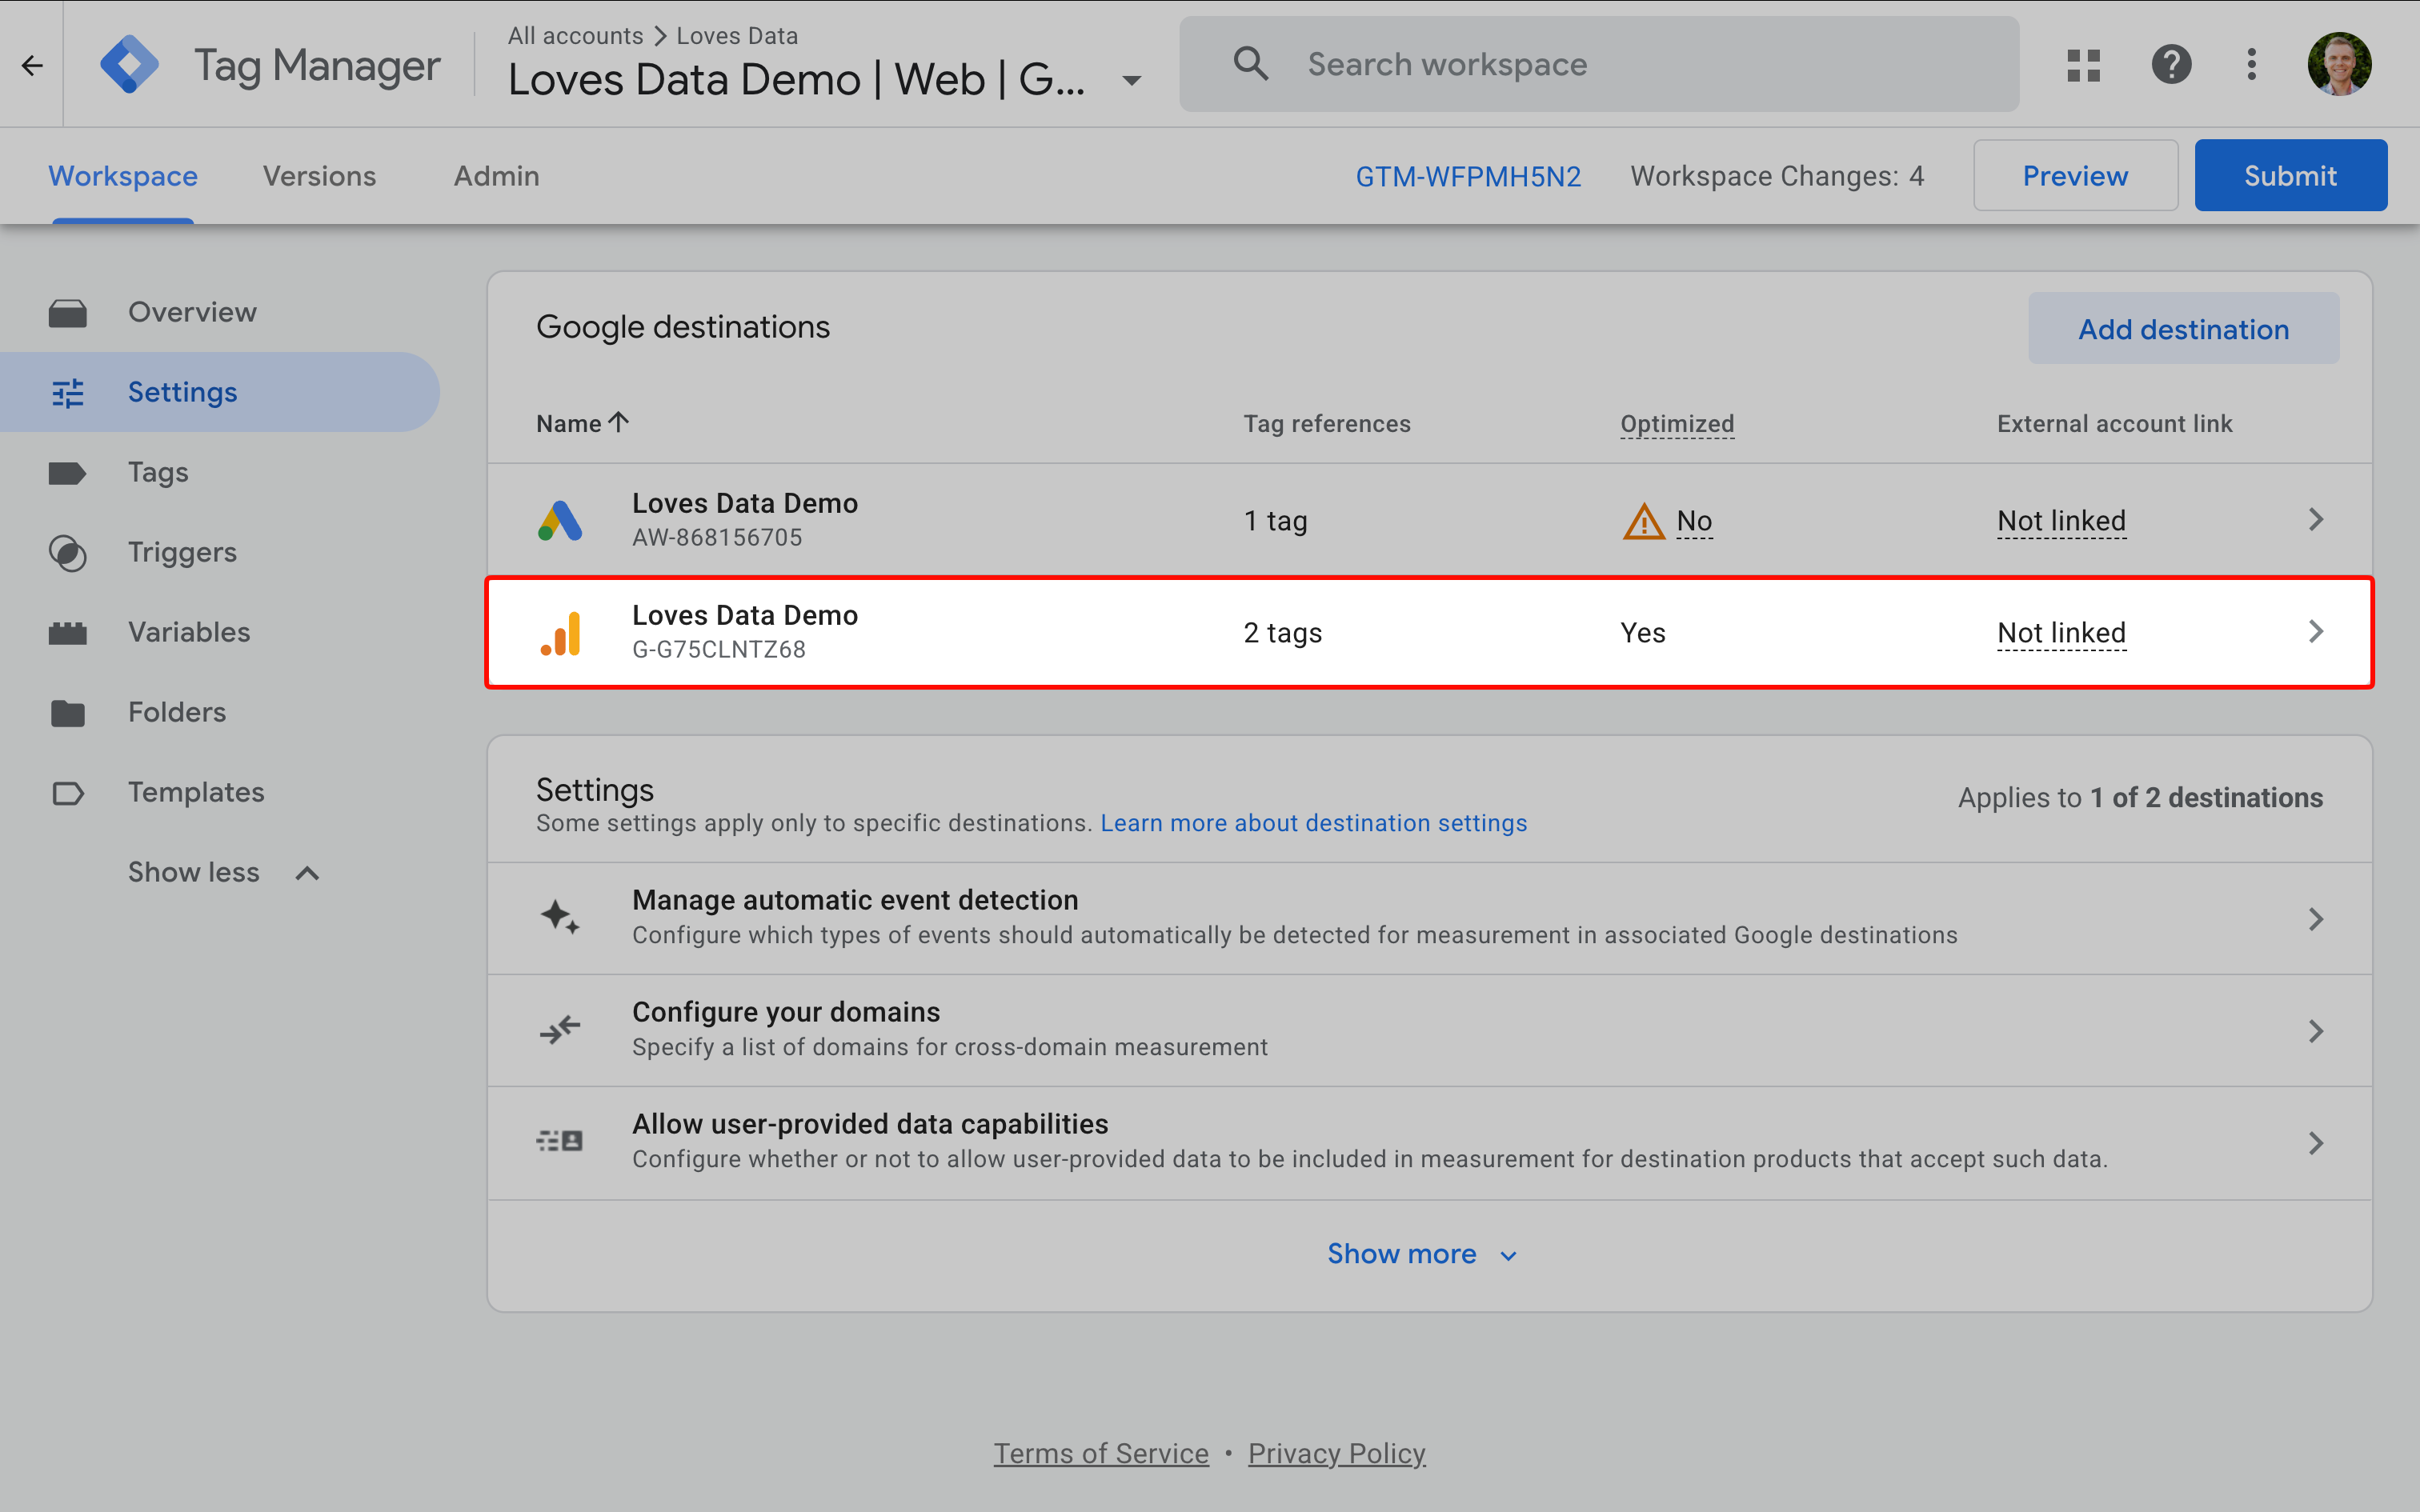
In my manual setup test, adding an Analytics destination produced ‘Optimized’: ‘Yes’ while the account link remained ‘Not linked’. This is different from the guided optimization, which explicitly creates account links.
You can use ‘Add destination’ to configure a destination tag manually. However, adding one doesn’t automatically replace an existing Google tag for the same destination. For an existing setup, review the migration carefully instead of adding another tag and immediately publishing.
How to Review Your GTM Settings
Start with the settings imported from your previous Google tag. You don’t need to change their values simply because they’re now managed through the container.
- ‘Configure your domains’: Review the domains used for cross-domain measurement, such as a website and a separate checkout domain you control.
- ‘Manage automatic event detection’: Review which interactions are detected automatically and whether they overlap with your custom event tracking.
- ‘Allow user-provided data capabilities’: Review this as part of your intended user-provided-data or enhanced-conversions implementation.
- Consent controls: Check that the configuration matches your consent-management setup. The upgrade doesn’t replace your consent banner or consent updates.
Some settings apply only to particular destinations. Also review any custom parameters on the destination and event tags, rather than assuming every value is managed through the Settings page.
For destinations connected directly through destination tags in a web container, Google has confirmed that the Conversion Linker’s capabilities are covered by destination tags and Settings. Review any destinations that haven’t been optimized before removing an existing Conversion Linker tag. This isn’t an instruction to remove a server-side Conversion Linker.
Why Can’t I See the Upgrade Option?
The new capabilities are rolling out, and you might see Settings before an optimization banner or prompt. In my checks, the guided process was available from the Google tag hover popover even though no banner appeared.
Start by checking the Google tags in the ‘Container quality’ diagram. If the new options aren’t available in your container yet, continue using your existing setup and check again as the rollout progresses.
The absence of a banner doesn’t establish that your container has already been upgraded.
Review Your Settings Before Upgrading
The Google Tag Manager upgrade gives you a more direct connection to Google destinations and a central place to manage their settings. The practical next step is to review your existing configuration, choose the intended defaults and access, then test the changes before publishing.
For background on the earlier interface changes, see my Google Tag Manager update overview. If you’d like to develop your tagging skills further, my Google Tag Manager course covers tags, triggers, variables, and testing with practical exercises.